- Best for
- Homeowners seeking character
- Time
- 2-3 weekends
- Difficulty
- Confident DIY
- Cost
- Under $700
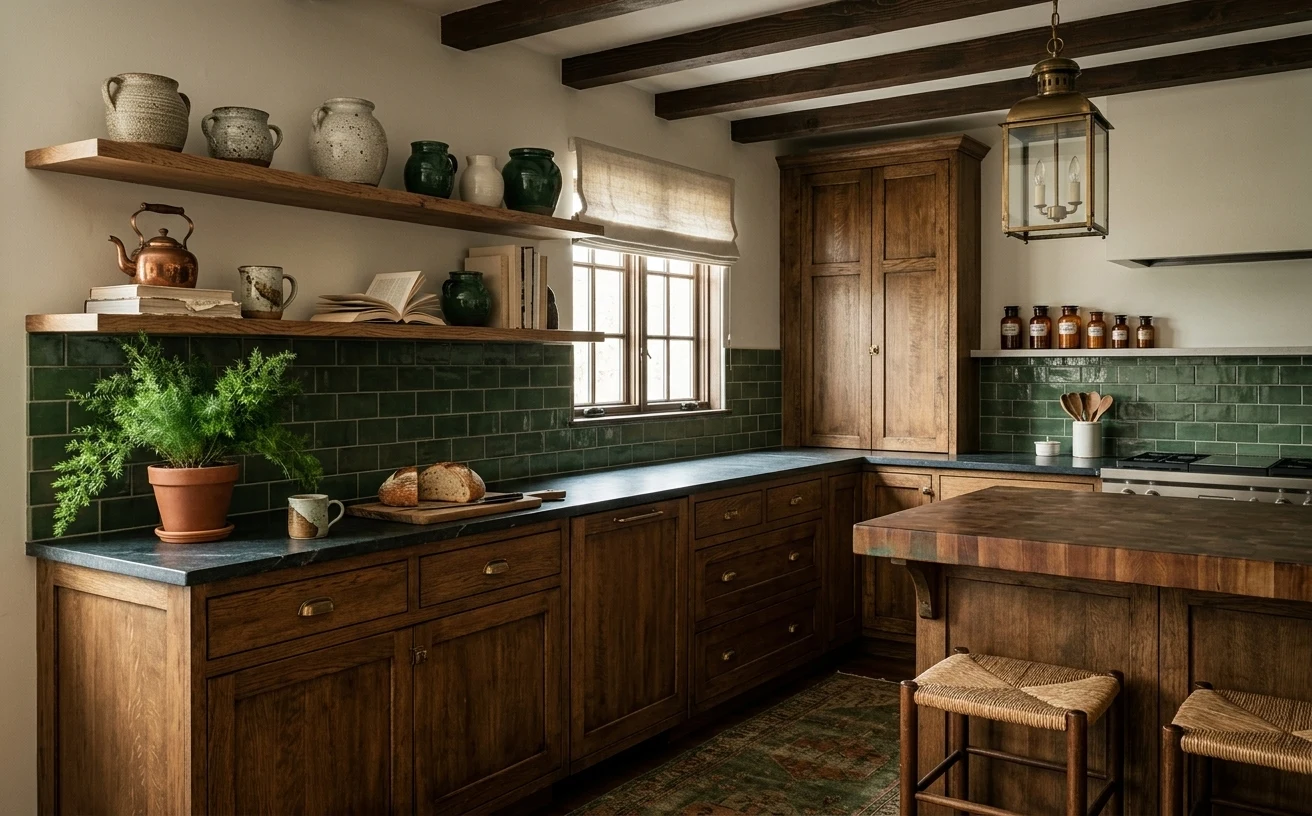
Why the Lived-In Kitchen is the Kitchen of 2026
In a world increasingly driven by sleek, minimalist trends, there's a growing appreciation for spaces that feel inherently warm, collected, and genuinely lived-in. This trend, often dubbed "Grandmillennial" or "Modern Farmhouse Rustic," celebrates rich textures like dark wood and natural fibers, alongside earthy tones such as deep forest greens and creamy whites. We’re seeing a shift away from stark, all-white kitchens towards those that feel deeply personal and inviting, reminiscent of a favorite European countryside home. This look is perfectly achievable for homeowners who have the freedom to paint, tile, and install hardware, allowing for permanent, high-impact changes that fit a realistic budget and a weekend timeline.
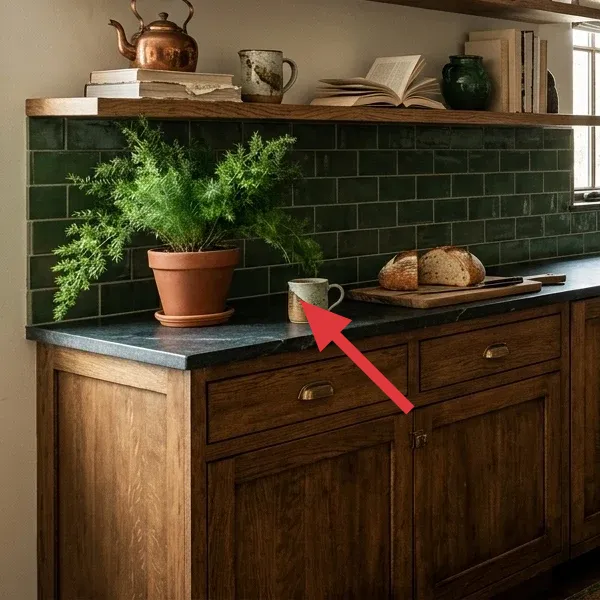
Layer 1 — Backsplash Tile ($300) A splash of personality
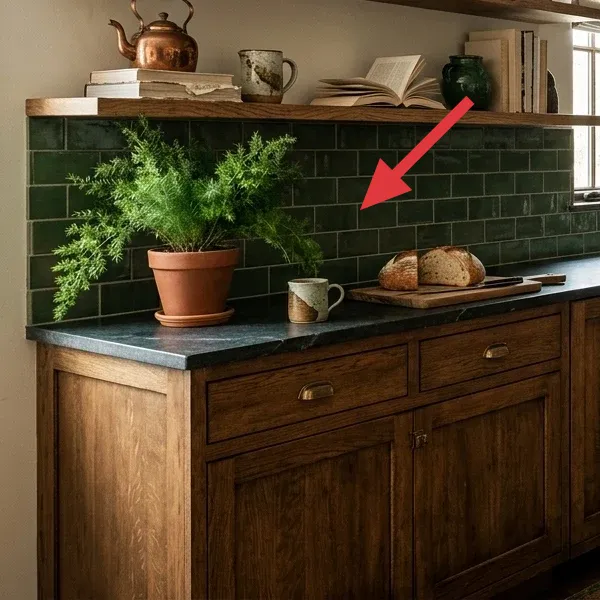
The dark green subway tile backsplash is arguably the most impactful change in this kitchen. It introduces a rich, saturated color that immediately grounds the space and provides a stunning contrast to the warm wood cabinetry. Opting for a handmade-look tile, even if it's machine-made, adds a lovely organic texture and depth that a flat, uniform tile might miss.
Installing a subway tile backsplash is a homeowner-friendly project that can be completed over a long weekend. It requires careful measuring and cutting, but the pattern is forgiving, and the visual payoff is enormous. This color choice also complements a wide range of kitchen styles, from traditional to more contemporary.
Consider your grout color
While white grout can make individual tiles pop, a darker, complementary grout color like charcoal or even a deep green will create a more seamless, expansive feel and can be much easier to keep clean in a busy kitchen.
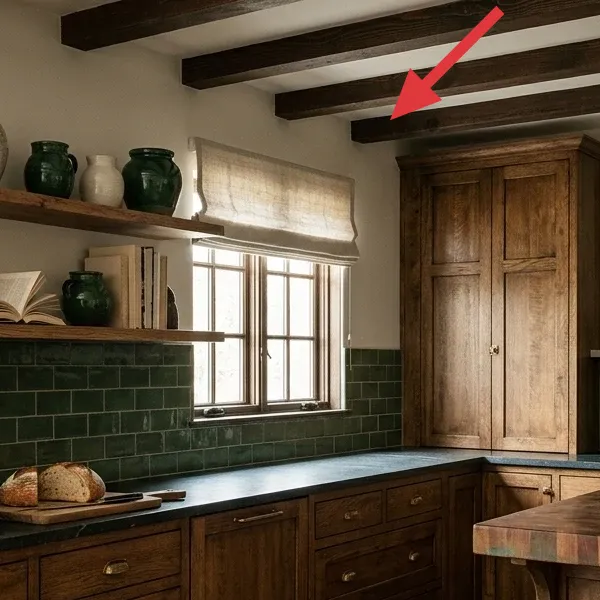
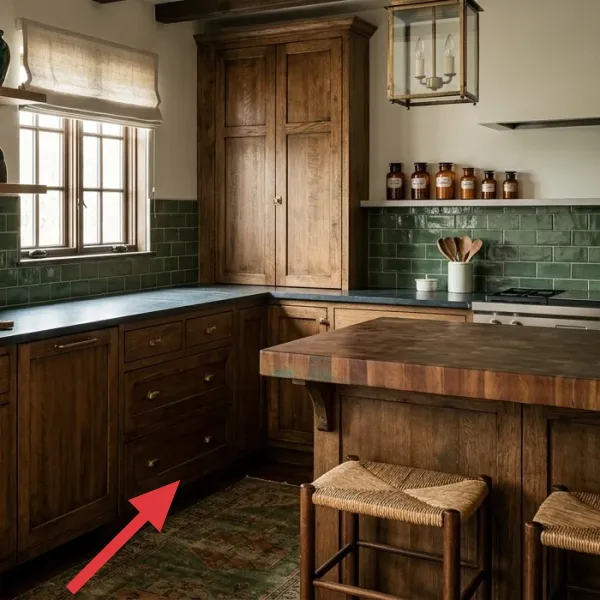
Layer 2 — Wood Cabinetry & Island ($0) The foundation of warmth
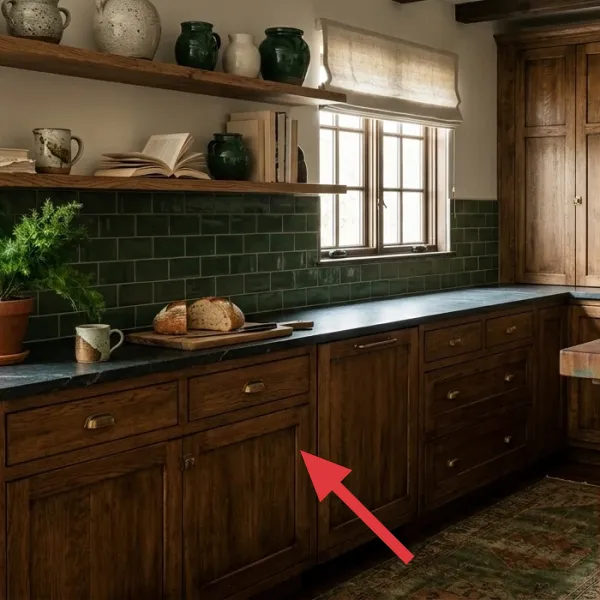
The existing dark wood cabinetry and island form the core of this kitchen's character. Instead of fighting against it, this design embraces the natural warmth and texture of the wood. The deep tone of the cabinets provides a rustic, grounded feel that sets the stage for the more vibrant elements, like the green tile and brass accents. This approach demonstrates that you don't always need to replace major elements to achieve a fresh look.
If your existing cabinetry is in good condition but you want to shift its tone, consider refinishing or re-staining as a weekend project. For a look like this, a rich walnut or even a dark oak stain can work wonders, bringing out the wood grain and adding depth without the cost of new cabinets. Remember, sometimes the best design choice is to work with what you have and enhance its natural beauty.
Update hardware for a quick change
If full refinishing isn't in the cards, simply swapping out cabinet pulls and knobs can dramatically update the look of your existing cabinetry. Brass, matte black, or even ceramic pulls can instantly modernize or soften the aesthetic for minimal cost and effort.
Layer 3 — Floating Shelves (DIY) & Decor ($88) Smart storage that fits your style
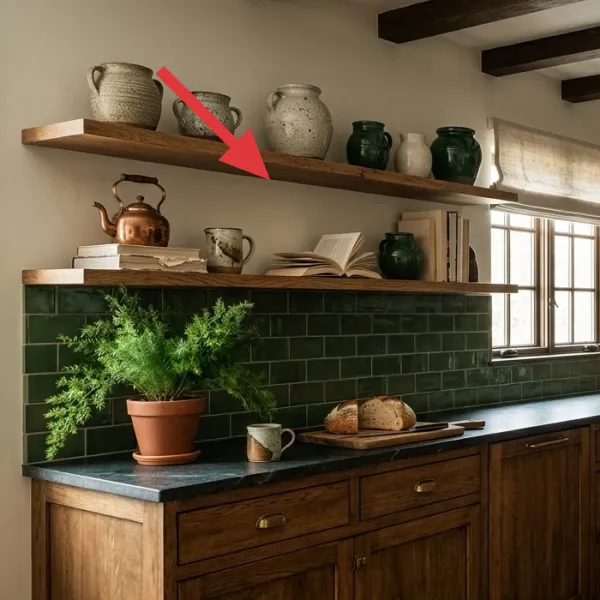
Floating shelves are a fantastic way to add open storage and display opportunities in a kitchen, breaking up the visual weight of upper cabinets. These simple wooden shelves contribute to the rustic charm, offering a place for everyday essentials and decorative pieces. By DIY-ing the shelves themselves, you gain custom sizing and a perfect finish to match your kitchen's aesthetic.
The carefully curated decor on the shelves — a mix of vintage pottery, a copper kettle, and a few well-placed books — adds a layer of personality and makes the kitchen feel truly lived-in. It’s a wonderful opportunity to display items that are both functional and beautiful, reflecting your personal style and creating visual interest at eye level.
Make it instead of buying it
Building your own floating shelves allows for custom dimensions and a seamless look for far less than buying pre-made units.
Materials
- Pine board — 1x8, 4 ft — Home Depot — $10
- Wood stain — Minwax Special Walnut, 8 oz — Home Depot — $5
- Foam brush — 2 in., pack of 4 — Home Depot — $3
- Sandpaper — 220-grit, 5-pack — Home Depot — $4
- Floating shelf brackets (heavy-duty) — pair — Amazon — $25
Steps
- Measure your desired shelf length and cut the pine board to size using a miter saw or hand saw. For stability and visual balance, aim for lengths between 24 and 36 inches.
- Sand all surfaces and edges of the cut board smooth with 220-grit sandpaper, ensuring a splinter-free finish ready for staining.
- Apply two coats of wood stain using a foam brush, following the grain of the wood. Allow adequate drying time between coats as per product instructions, and wipe off any excess.
- Once fully dry, mark the wall studs for secure mounting. Install the floating shelf brackets into the studs, ensuring they are level and spaced appropriately for your shelf length.
- Slide the stained board onto the installed brackets, ensuring a snug and stable fit. For extra security, you may want to add a small screw from the underside of the shelf into the bracket.
- Arrange your decor, ensuring heavier items are placed closer to the wall and directly over the brackets for optimal support.
Total DIY cost: ~$47 — saves about $50 over buying.
Layer 4 — Countertops ($0) A subtle, grounding surface
The dark countertops in this kitchen provide a solid, understated foundation that complements the rich wood cabinetry and vibrant backsplash. Their muted tone ensures they don't compete for attention, allowing the other elements to shine. While replacing countertops is typically a major renovation, working with existing dark surfaces can be a design advantage, providing a sophisticated backdrop for your culinary activities.
If you have laminate countertops that mimic natural stone, or solid surface counters, focus on keeping them clear and styled with minimal, functional pieces. A wooden cutting board, a simple plant, and a few everyday items can make the surface feel intentionally curated rather than cluttered. This approach leverages the existing elements to create a cohesive and inviting kitchen environment.
Avoid harsh cleaners on natural stone
If your dark countertops are natural stone (like granite or soapstone), be very careful with acidic or abrasive cleaners. These can etch the surface or dull its finish, requiring professional restoration. Stick to pH-neutral cleaners specifically designed for your counter material.
Layer 5 — Pendant Light ($150) A touch of vintage brass
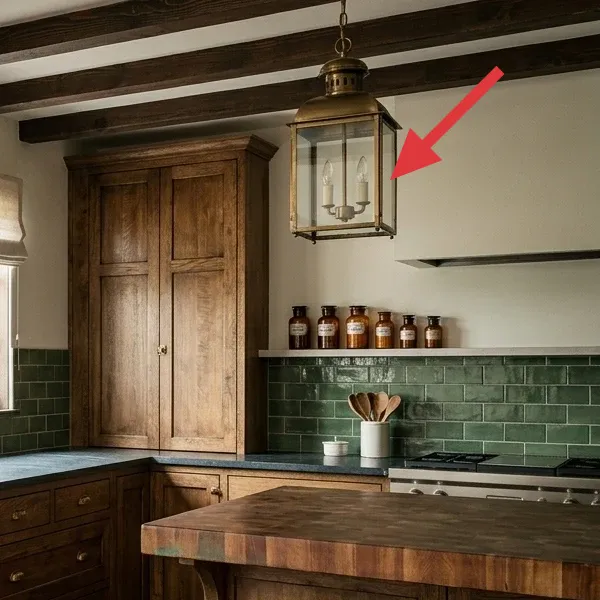
The brass lantern pendant light is a beautiful focal point that adds a vintage touch and a warm glow to the kitchen. Its classic design and metallic finish provide a welcome contrast to the wood and tile, introducing another layer of texture and visual interest. Swapping out an existing light fixture for a new one is a homeowner-friendly task that can dramatically change the feel of a room.
Choosing a pendant that complements the overall style of your kitchen is key. A brass finish, like the one shown, works beautifully with rustic and traditional styles, while a matte black or brushed nickel might suit a more modern aesthetic. Always remember to turn off the power at the breaker before starting any electrical work, and don't hesitate to call an electrician if you're unsure about the installation.
Match finishes for cohesion
When selecting a new light fixture, consider matching its metal finish to other hardware in the room, such as cabinet pulls or faucet, to create a cohesive and polished look. Mixing metals can work, but a consistent finish often feels more intentional.
Layer 6 — Window Treatment ($60) Softening the light
The simple Roman shade over the window adds a crucial layer of texture and softness to the kitchen. Made from a natural, linen-like fabric, it allows diffused light to enter while providing privacy and a finished look to the window. Window treatments are often overlooked in kitchens, but they can significantly impact the room's comfort and aesthetic appeal.
For a lived-in kitchen, a Roman shade is an excellent choice as it offers a clean line that doesn't interfere with the countertop or sink area. The neutral color of this shade ensures it blends seamlessly with the wall color, allowing the other bolder elements to take center stage. Installation is straightforward for homeowners, often requiring just a few screws and a drill.
Consider practicality in the kitchen
When choosing window treatments for a kitchen, prioritize materials that are easy to clean and can withstand splashes and humidity. Natural fibers like linen or cotton blends are good choices, but ensure they can be easily spot-cleaned or laundered if necessary.
Layer 7 — Area Rug ($80) A touch of pattern underfoot
An area rug in the kitchen, particularly under an island or in a high-traffic zone, adds immediate warmth, color, and a sense of grounding. The vintage-style rug shown here introduces a subtle pattern and muted tones that tie together the green backsplash and the wood cabinetry, making the space feel more intentional and complete. It also adds a layer of comfort underfoot, which is always welcome in a kitchen.
Choosing a rug for a kitchen means balancing aesthetics with practicality. Look for low-pile options that are easy to clean and preferably made from durable, stain-resistant materials. A rug with an aged or distressed pattern is also forgiving of everyday spills and wear, contributing to that sought-after lived-in feel.
Anchor your rug with a pad
Always place a non-slip rug pad underneath your kitchen rug. This not only prevents slips and trips but also adds an extra layer of cushioning, protects your flooring, and helps the rug lie flat, extending its life.
The cost, layer by layer
| Layer | Item | Cost |
|---|---|---|
| 1a | Green subway tile (30 sq ft) | $240 |
| 1b | Tile adhesive & grout | $60 |
| 2 | Existing cabinetry & island | $0 |
| 3a | DIY Floating shelf materials | $47 |
| 3b | Thrifted pottery & decor | $41 |
| 4 | Existing countertops | $0 |
| 5 | Brass lantern pendant light | $150 |
| 6 | Linen Roman shade | $60 |
| 7 | Vintage-style area rug | $80 |
| Total | $678 | |
If your budget is even tighter, consider swapping the tile backsplash for a painted accent wall in a deep green hue (around $40 for a gallon of paint) or using peel-and-stick tile ($60-$100 for a similar area). You could also focus solely on styling the open shelves with items you already own, further reducing the cost of Layer 3.
What worked, what didn't (across the whole room)
Overall, this kitchen refresh hit all the right notes for creating a cozy and inviting space. The combination of warm woods and the deep green palette feels very current yet timeless, achieving that elusive lived-in look we were aiming for.
What worked
- The green subway tile backsplash was a game-changer, adding significant depth and character without requiring a full kitchen overhaul.
- Embracing the existing dark wood cabinetry saved a huge amount of budget and time, proving that working with what you have can be incredibly effective.
- The DIY floating shelves provided custom storage and display space that perfectly matched the kitchen's rustic aesthetic.
- Careful styling of the open shelves with thrifted and collected items made the space feel personal and authentic, not staged.
- The brass pendant light added a touch of elegance and warmth, upgrading the lighting without being overly modern.
- The Roman shade softened the window area beautifully, balancing the harder surfaces of tile and wood.
- Adding an area rug provided unexpected comfort and tied the room's color palette together from the floor up.
- The entire project felt like a series of achievable weekend tasks, making it less daunting for a homeowner.
What didn't
- The tile installation, while manageable, took longer than anticipated due to tricky cuts around the window frame.
- Finding truly heavy-duty floating shelf brackets that could handle the weight of pottery was more challenging and slightly pricier than expected.
- Maintaining the grout on the backsplash requires diligent wiping, especially behind the range, to keep it looking fresh.
- The existing countertops, while functional, don't perfectly align with the desired aesthetic but couldn't be replaced within this budget or timeframe.
- The DIY process generated more dust and mess than initially planned, requiring extra cleanup time.
What we'd skip if we did it again
If we were to do this project again, one thing we'd reconsider is the placement of the lower floating shelf directly above a high-splash area. While it looks great, the items on it are prone to getting splattered during cooking, requiring more frequent cleaning. We might opt for a slightly higher placement or choose items that are easier to wipe down.
Another element we might skip or modify is the intensity of the wood stain on the DIY shelves. While we love the deep tone, achieving perfect uniformity with an oil-based stain can be tricky, especially for a novice. For a future project, we might explore a gel stain for easier application or embrace a more rustic, imperfect finish from the start to reduce pressure.
Frequently asked
Can I install a tile backsplash myself if I'm new to tiling?
Yes, a subway tile backsplash is one of the most beginner-friendly tiling projects. It requires patience and attention to detail for measuring and cutting, but the repeating pattern is forgiving. Watch some tutorials, take your time, and rent a wet saw if you don't own one.
How do I choose the right color for my backsplash tile?
Consider the existing elements in your kitchen: cabinet color, countertop, and wall paint. Look for a color that either complements (like green with wood tones) or provides a pleasing contrast. Always get samples and view them in your kitchen's lighting throughout the day before committing.
What's the best way to clean a green subway tile backsplash?
For daily cleaning, a simple mix of warm water and a mild dish soap with a soft cloth works well. For tougher grime, a non-abrasive all-purpose kitchen cleaner designed for tile and grout can be used. Avoid harsh chemicals that could discolor grout or damage tile glaze.
Is it safe to hardwire a new light fixture myself?
Swapping out an existing light fixture for a new one is a common homeowner DIY, but it requires basic electrical knowledge and strict adherence to safety. Always turn off power at the breaker before starting. If you're uncomfortable or unsure, it's always best to call a licensed electrician.
How can I make my kitchen feel more 'lived-in' and less sterile?
Focus on incorporating natural textures like wood, linen, and ceramic. Add plants for a touch of life. Display curated collections of useful and beautiful items (like pottery or cookbooks). Introduce a soft element like a Roman shade or an area rug. These layers add warmth and personality.
What kind of wood should I use for DIY floating shelves?
Pine is a great, affordable option for floating shelves, as it's easy to work with and takes stain well. For a more durable or custom look, you could also consider oak or maple, though these will be more expensive and require more robust tools for cutting.