- Best for
- Plant-forward, no-drill bathroom styling
- Cost
- $350 total
- Difficulty
- Easy (mostly buying + one macramé DIY)
- Time
- About a weekend
Why green-tile inspiration is the bathroom vanity nook of 2026
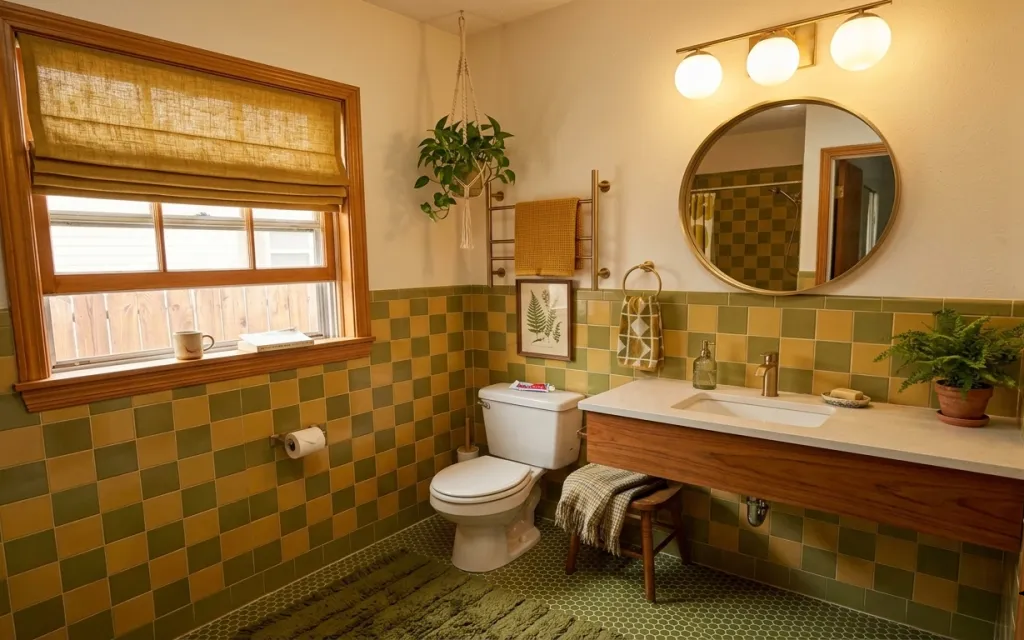
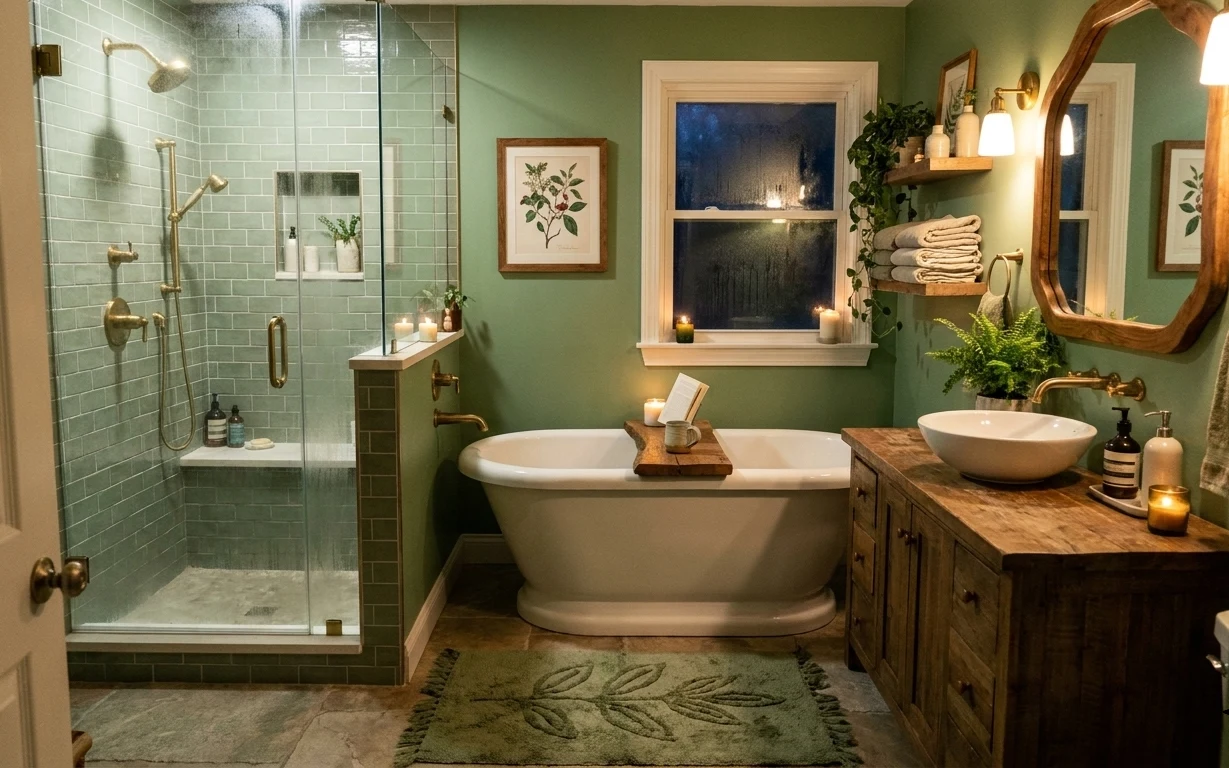
That olive-on-cream palette looks like it belongs in a magazine because the textures do the heavy lifting: a hex-pattern rug anchors the floor, while a framed botanical print and warm-window trim pull your eye upward. On top of the vanity, small glass bottles and a leafy plant make the tile feel intentional instead of accidental. This is achievable on a renter budget because none of it depends on changing the hard finishes—just layering things you can take with you.
I almost suggested swapping the mirror and calling it “the update,” but you can tell the real moment is the styling: plants, framed art, and the patterned rug all reinforce the same earthy mood. Once I noticed the rug’s hex pattern repeating the tile’s grid energy, the whole recipe clicked. Focus on repetition and texture first, then scale the accessories so they look curated, not crowded.
Layer 1 — area rug with hex pattern ($120) Ties the floor’s grid into a softer landing
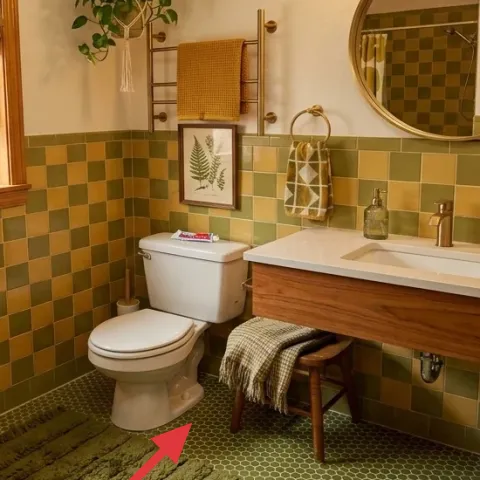
This area rug with a dark, olive-leaning hex pattern sits under the vanity zone and visually links to the bathroom’s tiled floor. It works because the pattern gives you depth where tile can feel flat, and the color keeps the whole setup from going too cool or too bright. The trade-off is that rug fibers are an extra cleaning responsibility, but the payoff is worth it in a rental—no grout, no demo, no mess. Choosing a pattern (instead of a plain solid) is what keeps the look from feeling like an afterthought.
Choose a pattern that echoes the floor
If your bathroom has repeating geometry, match it with a rug pattern instead of fighting it with a totally unrelated motif.
Layer 2 — framed botanical print ($40) Adds a vertical “breathing space” to busy tile
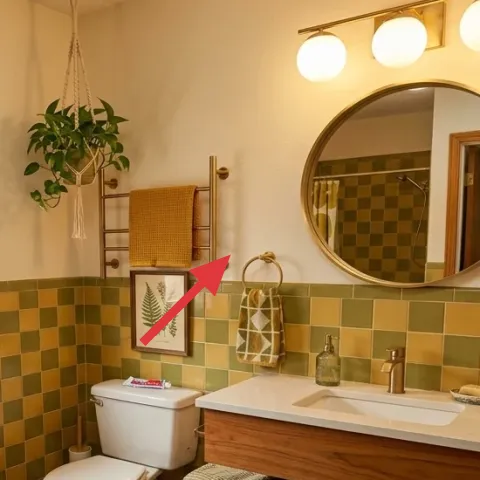
The framed botanical print is centered on the tiled wall area, right where your eyes naturally land between the window and the vanity. Framing matters here: it makes the print feel architectural, not temporary, and it keeps the green tones consistent with the plant styling. The trade-off vs. a floating shelf is that you lose extra storage, but you gain a clear focal point that doesn’t require drilling. If you keep the frame simple (neutral border, botanical linework), it won’t compete with the tile’s colors.
Go for “thin lines,” not bold illustration
Line-drawn botanicals read lighter against tile and won’t visually thicken the wall.
Layer 3 — macramé-style hanging plant holder ($55) Brings the same softness as the rug, but overhead
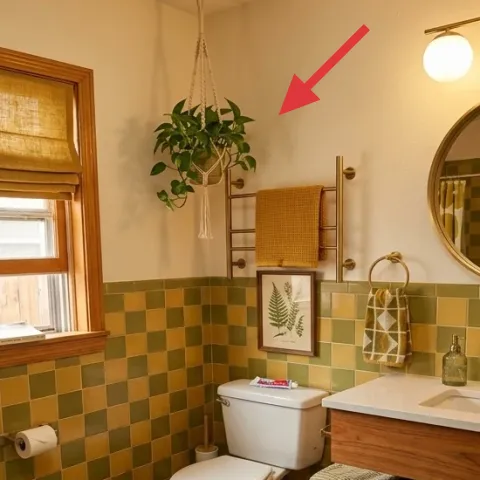
That macramé-style hanging plant holder adds movement above the vanity area, which is exactly where bathrooms often feel too “square.” It works because the cords introduce a tactile, boho texture that balances the hard surfaces, and the plant’s shape gives you gentle curve instead of straight lines. The trade-off is that hanging plants take a little maintenance, especially around humidity, but the whole setup is easy to pack away when the lease ends. Keeping the holder airy (not bulky) keeps the room from feeling visually heavy.
Make it instead of buying it
A macramé-style hanging plant holder uses cord, a simple dowel, and a removable Command hook so you can bring the look with you at move-out.
Materials
- Macramé cord — ~80 ft — craft store — $18
- Wood dowel — 12–14 in — hardware store — $9
- Command hook (for plant weight) — 1 set — home goods store — $6
- Small zip ties or twine — handful — craft store — $4
- Hanging plant pot (optional to match the look) — 1 — plant shop — $8
Steps
- Cut cord lengths (choose a holder height that keeps leaves off the mirror and backsplash).
- Measure cord evenly across the dowel and mark spacing with a pencil.
- Tie the starting knots across the dowel so loops hang symmetrically.
- Make your main knot pattern rows, keeping tension consistent so strands don’t twist.
- Test-fit the plant pot height by temporarily holding the cord bundle.
- Finish with a bottom knot bundle, then trim ends neatly.
- Attach the holder to a removable Command hook and check the hang is level.
- Place the plant pot into the cradle and adjust any cord loops for stability.
- Do a quick weight test before bathroom daily use, then reposition if needed.
Total DIY cost: $45 — saves about $10 over buying.
Layer 4 — large potted plant on vanity ($35) Adds “fresh green” without competing with tile color
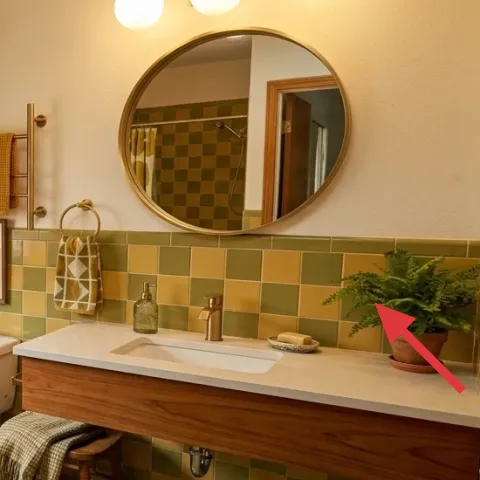
The large potted plant sits on the right side of the vanity, near the mirror, so it reads like part of the “center” of the room rather than a random afterthought. It works because the leaf texture softens the straight countertop and echoes the botanical print. The trade-off is that you’ll want a planter that’s sturdy enough for daily splashes and quick wiping, especially near the sink. I’d rather style one meaningful plant than scatter multiple small ones—this single plant keeps the visual rhythm clean.
Wipe the leaves and keep soil covered
A quick wipe-down and a liner in the pot prevent little water marks on the countertop.
Layer 5 — glass soap dispenser on vanity ($20) Keeps the countertop looking styled, not “stored”
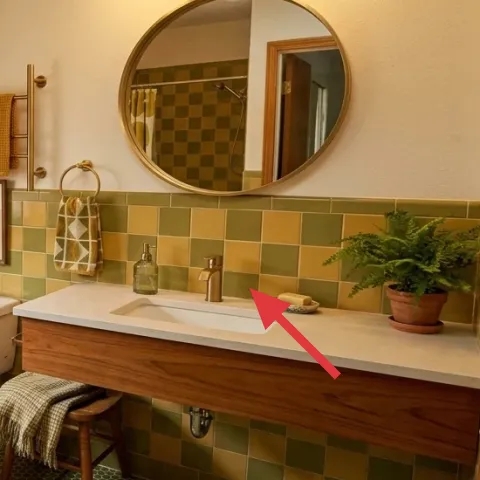
The glass soap dispenser is small but high-impact because it adds shine and clarity right next to matte tile. It works as a visual “stop” between the plant and the mirror, and the transparent body keeps the green palette from getting too dark. The trade-off vs. using a plain plastic bottle is that glass can look smudgier if it’s ignored, but it photographs beautifully and looks intentional. The key choice is to match the vibe with one consistent shape—glass next to green works better than mixing random colors.
Choose containers you can refill easily
If you’ll be refilling often, pick bottles with openings that make switching scents/soap simple.
Layer 6 — checkered cloth folded on stool ($25) Introduces pattern at the counter height

The checkered cloth folded on the wood stool adds a soft textile note at a human height, which is why the space feels lived-in instead of staged. It works because the pattern echoes the rug’s interest in texture while the warm tones keep the bathroom from feeling cold. The trade-off is that folding towels neatly takes a minute, but that small effort reads as “curated” every day. An obvious alternative would be hanging everything on hooks—this folded setup adds warmth without creating clutter behind your mirror line.
Avoid oversizing soft goods
If the cloth bunches too much, it can block light and make the countertop feel cramped.
Layer 7 — pump soap bottle on vanity ($30) Completes the “three objects” countertop grouping
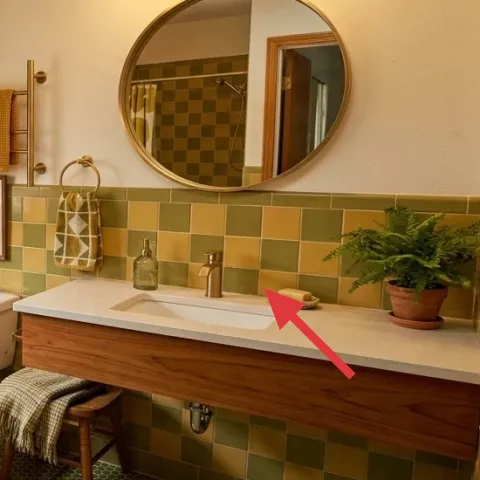
The pump soap bottle rounds out the styling cluster on the vanity so the surface doesn’t look like a one-off. It works because adding one more countertop object creates a balanced triangle around the plant and the mirror, and matching the visual height keeps it orderly. The trade-off vs. leaving the counter bare is the extra wipe-down, but the payoff is a finish that looks designed rather than functional. Keep the bottle label style simple or muted so it doesn’t fight the botanical print or the tile’s color movement.
Group by height, not by exact item count
Stagger bottle heights so the cluster reads layered, even when the room is busy visually.
The cost, layer by layer
| Layer | Item | Cost |
|---|---|---|
| 1 | Area rug with hex pattern | $120 |
| 2 | Framed botanical print | $40 |
| 3 | Macramé-style hanging plant holder (DIY) | $55 |
| 4 | Large potted plant | $35 |
| 5 | Glass soap dispenser | $20 |
| 6 | Checkered cloth | $25 |
| 7 | Pump soap bottle | $30 |
| Total | $325 | |
A cheaper variant is to swap the framed print for an affordable print under plexiglass and choose a smaller potted plant. You can also find an olive-toned patterned rug at a discount, then spend the saved amount on a second glass container for a tidy countertop cluster.
What worked, what didn't (across the whole room)
The overall look works because the textures repeat: hex pattern on the floor, botanical linework on the wall, and soft cord + leafy shapes overhead. The palette stays cohesive when you keep countertop items in a similar tone family (greens and warm neutrals) instead of introducing too many new colors. What didn’t work at first was trying to add “more stuff” to hide tile—when the hard finishes are bold, restraint plus texture wins every time.
What worked
- The hex-pattern rug makes the tiled floor feel intentional instead of visually flat.
- The botanical print brings a lighter, vertical focus between the window and vanity.
- The macramé-style hanger adds boho softness overhead and balances the hard backsplash lines.
- The large potted plant repeats the green story and softens the countertop’s edges.
- Glass and pump bottles create a styled countertop cluster without needing storage changes.
- The folded checkered cloth adds textile warmth at counter height, not just on the floor.
What didn't
- Leaving the vanity completely bare made the mirror area look unfinished, even with the plant.
- Using mixed, bright-colored bottles pulled attention away from the botanical print and rug.
- Hanging too many small textiles created visual clutter against the tile’s busy pattern.
- Choosing a solid rug in a flat color made the floor feel less connected to the tile.
- Too-heavy macramé cords would have made the upper zone feel crowded near the mirror.
What we'd skip if we did it again
Skip swapping major fixed elements like the mirror or sink hardware. Even when you can’t change the hard finishes, the tile can look finished with renter-safe layers—rug, framed print, plants, and countertop styling do the real work.
Skip plain, solid textiles when your tile already has pattern. In this kind of bathroom, pattern-lightening (like the rug and checkered cloth) keeps things from feeling too rigid, and it ties the room together more than an extra “neutral” item would.
Skip over-styling the vanity. A three-object grouping (plant + two glass/ceramic bottles) reads cleaner than five small items, and it makes refilling and wiping down much easier—especially in a rental where maintenance still matters.
Frequently asked
How long does this renter bathroom refresh take?
Most of it is shopping and styling: rug placement, hanging the framed botanical print, and setting the plant on the vanity. The only time sink is making the macramé-style holder—plan a couple of focused hours plus a careful hang-level check. If you buy a ready-made macramé holder instead, you’re realistically looking at 2–4 hours total.
What’s the safest way to hang the framed botanical print in a rental bathroom?
Use a removable hanging method designed for weight, like picture-rail hooks if your rail exists, or Command-style picture hangers rated for the frame’s weight. Avoid anything that requires drilling. Also place the art slightly above splash zones so you can keep it clean without stressing adhesives.
Can I do this if my bathroom is smaller?
Yes—scale down the rug to a size that still reaches under the vanity front, and keep the countertop cluster to three items. For the wall art, choose a narrower frame or hang it a touch higher so the wall stays visually breathable. The macramé holder also helps because it draws the eye upward without taking floor space.
What if my bathroom tile color isn’t olive?
The recipe still works: pick one rug pattern that echoes your tile’s geometry, then repeat color through accessories (botanical print, plant greens, and one warm neutral like cream or tan). Keep bottles and ceramics in the same “family” so the room looks coordinated instead of random.
Where should I shop for these kinds of renter-safe pieces?
For the rug and textiles, look for patterned rugs in olive, moss, or deep green. For the framed botanical print and smaller decor, any home goods store or online marketplace with removable frames works. Plants are easiest from local nurseries where you can choose a leafy plant that holds its shape indoors.
What’s the biggest mistake people make with bathroom styling like this?
Trying to hide the tile with too many small items. Tile is already doing a lot visually—so the better approach is one strong floor anchor (rug), one clean wall focal point (framed print), and then two or three intentional countertop pieces plus a plant. Texture repetition beats clutter every time.
More in Bathroom

Make a green-tile bathroom feel finished, $350
A renter-friendly bathroom vanity nook refresh with 7 no-drill upgrades for a $350 total. Learn how to add texture with a hex-pattern rug, …
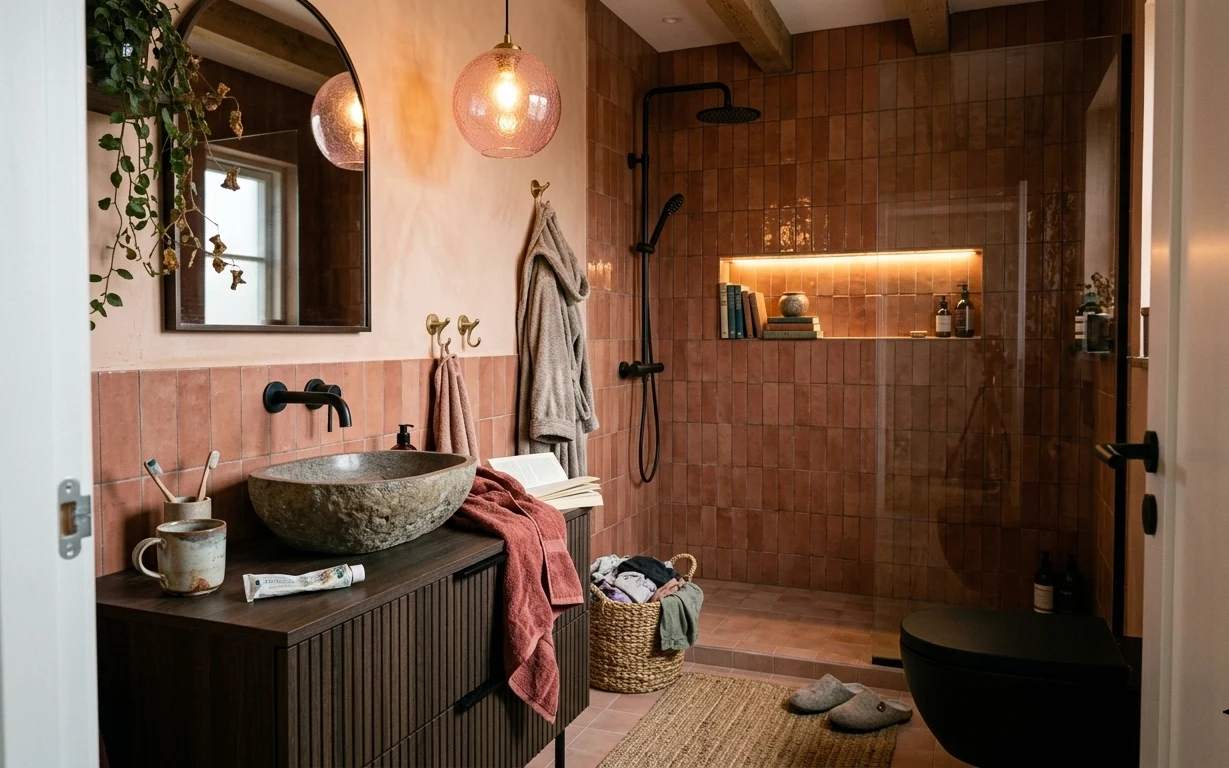
6 renter-friendly ways to refresh a vanity-and-shower corner for $400
A warm terracotta bathroom refresh that works for shared housing: cozy textiles, a practical rug, and shelf styling you can pack up. Built …
7 no-drill bathroom refresh ways for $400 tub-and-counter style
A tub-and-counter bathroom refresh under $400 that leans on rug grounding, stacked towels, botanical framing, and candlelight. The look is …