
- Best for
- Move-friendly texture upgrades
- Time
- 1 weekend (most of it textiles + setup)
- Total cost
- $483 total for the full plan
- Renter-safe
- Yes—no drilling, no permanent installs
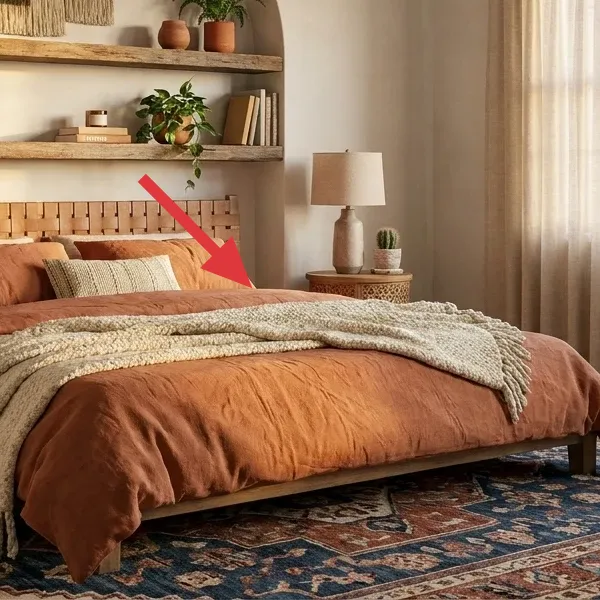
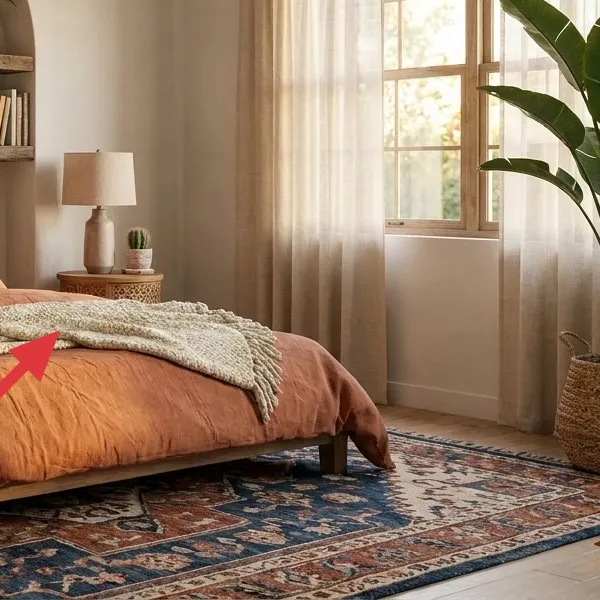
Why this rust-and-cream bed setup is the bed nook of 2026
Look at how this bed nook earns its warmth with three textures: a matte rust duvet, a cream throw that reads cozy in daylight, and that big blue-and-rust rug that anchors everything. The macramé wall hanging gives the wall movement without needing nail-and-mud labor, and the lamps keep the vibe soft at night. Even if your landlord won’t let you touch the walls, this combo is still achievable with washable linens, plug-in lamps, and freestanding or take-down decor—exactly the kind of “take it with you” decorating that works for shared leases. If you’ve ever saved a Pinterest room for later, this is the version you can actually move.
I used to overthink wall decor in apartments—like, “Do I need the biggest frame?” Then I stopped and remembered I’d be packing in a year. The moment I switched to lightweight pieces (cord, cloth, plug-ins) the room started looking intentional instead of temporary. This is that same shift: keep the texture changes you can box, and let the wall be a backdrop, not a project.
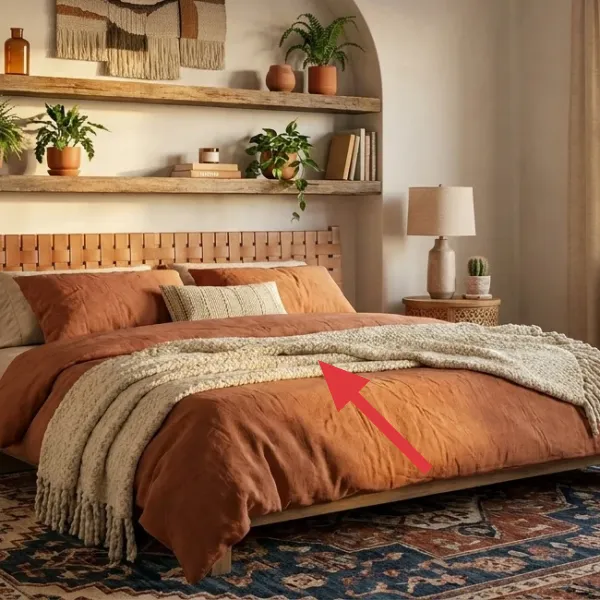
Layer 1 — Throw pillow cover (cream patterned) ($18) brings the “linen-and-lace” contrast
The cream patterned pillow cover sits right where your eye lands when you’re lounging on the bed, so it has to read clearly in both warm lamp light and daylight. Choose a cover with visible texture—like woven cotton or a stitched pattern—rather than a flat, shiny fabric. The trade-off is that patterned covers don’t hide stains as well as solid ones, but they’re easy to swap out before move-out. Compared with buying a whole new pillow set, this is the quickest, cheapest way to get that neutral “layering” look without committing to bulky bedding that won’t pack well.
Layer it close to the center
If you want the pattern to look intentional (not random), place the cream cover near the middle of the bed stack, then let the rust tone pillow peek beside it.
Layer 2 — Throw blanket (cream) ($30) adds weight without adding bulk
A cream throw draped over the front edge of the bed instantly makes the whole setup feel styled, not just “made.” Pick one with a visible weave or fringe so it looks dimensional next to the smoother duvet fabric. I like keeping the throw color close to the pillows so the bed doesn’t turn into a block of one shade. The trade-off: cream shows dust faster than darker tones, but it’s also simple to shake out and re-fold for packing. This is also easier than swapping the duvet cover alone because throws can travel in a small tote.
Use it as a move-friendly staging piece
When you’re between leases, throws are the fastest way to make a new room feel “yours” before you find a rug or art.
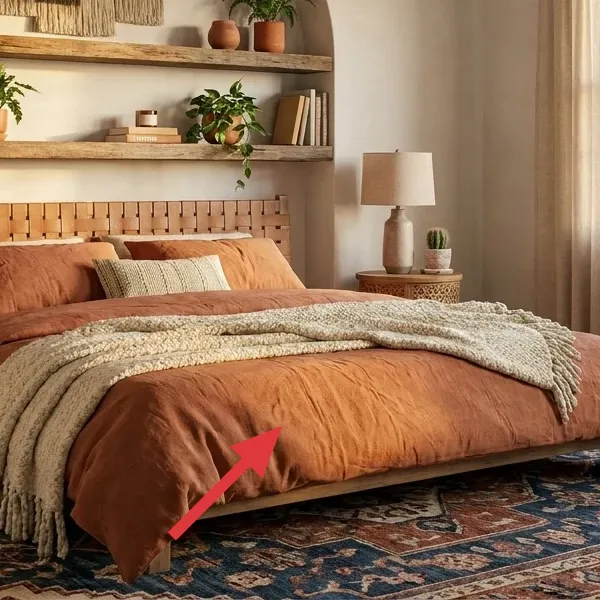
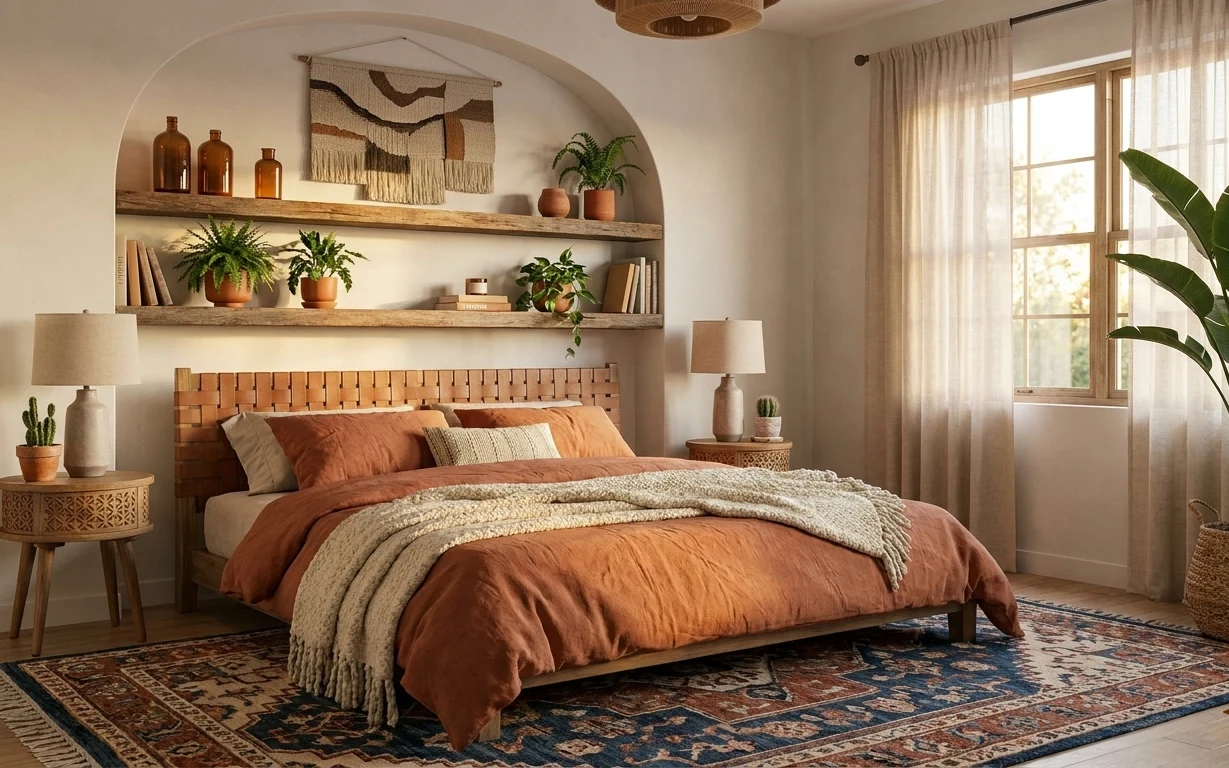
Layer 3 — Rust brown duvet ($80) ties the bed to the rug’s medallion colors
The rust-brown duvet is the main color anchor here—close enough to warm wood and tan walls, but saturated enough to make the rug look richer. Go for a duvet cover (not a comforter system) so it folds flatter and stays easy to swap. The texture matters: a duvet with a matte finish (cotton-linen blend or textured weave) keeps the look earthy instead of shiny. The trade-off is warmth—you may want lighter layers for summer—but for fall-through-winter, this color is the one that keeps the room feeling grounded. If you’re choosing between budget upgrades, bedding is the highest-impact item per dollar.
Match undertones, not just the “color name”
Rust can lean red or brown—try to buy a duvet that looks similar to your rug’s warm terracotta notes.
Layer 4 — Large area rug (blue and rust medallion) ($200) gives the floor a focal point
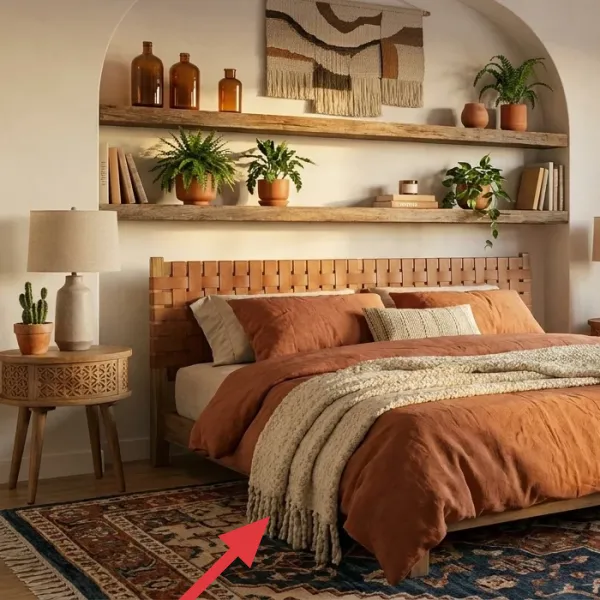
This is the piece that makes everything else look intentional. A blue-and-rust medallion rug pulls together the cool shade in the floor pattern and the warm shade in the bed linens, creating a “designed” anchor zone. Choose a rug large enough that the bed and both bedside tables sit fully on it (or at least their front legs do) so the room doesn’t feel cut off. The trade-off is cost and weight, but rugs are still moveable—you can roll them and wrap them for a short trip between leases. If you’ve ever moved and felt like your decor “vanished,” this is the item that keeps the room cohesive.
Don’t size it like a hallway runner
If your rug only reaches the bed base, you’ll get a floating-furniture look; measure for at least the full bed width plus a little breathing room.
Layer 5 — Macramé wall hanging ($45) adds height without any wall damage

A macramé wall hanging above the shelves gives you that boho texture layer while staying lightweight enough to take down quickly. Hang it where it visually balances the bed’s head-to-shelf height—here, centered above the top shelf line. The trade-off is that cord can twist in storage, so you’ll want to roll or loosely coil it, not cram it. Still, it beats permanent wall decor because you can box it like a scarf and re-center it in your next place. If you’re working within shared housing limits, it’s one of the best “it looks custom” choices that doesn’t require hardware work.
Make it instead of buying it
DIY a macramé wall hanging using cotton cord, a simple wooden dowel, and a removable Command hook so it packs flat and stays renter-safe.
Materials
- Macramé cord (1 roll, ~100 ft) — 1 roll — craft store — $20
- Wooden dowel (for wrapping) — 24 in — hardware aisle — $10
- Command hooks (picture hanging) — 2 hooks — grocery/Target/Amazon — $8
- Cotton rope or trim (for top finishing) — 1 small bundle — craft store — $6
Steps
- Wrap cord ends around the dowel evenly so the spacing looks consistent.
- Use a basic square knot pattern for the body, keeping the rows tight and symmetrical.
- Stop at the height you want, then finish the bottom with an even fringe trim.
- Neaten the top loop so the hanging line sits centered when mounted.
- Press the cords flat so they store without tangling.
- Hang with a Command hook, using a small level and light pressure so it sits centered.
Total DIY cost: $44 — saves about $1 over buying.
Layer 6 — Plug-in table lamp (cream shade) ($60) softens the edges after dark
Those cream-shade plug-in lamps matter because they set the room’s “time of day” mood. Choose a lamp with a fabric shade so the light spreads warm instead of highlighting wall texture or laundry-mess shadows. In a shared bedroom, I like using lamps (not ceiling light) because you control the feel instantly—no system changes, no electrician. The trade-off is glare if the shade is too thin, so test the shade coverage before committing. Compared with replacing overhead lighting, a plug-in lamp is the easiest upgrade you can pack, move, and re-use in the next room.
Keep bulb warmth consistent
Use a warm bulb (around 2700K) so the lamp glow matches the rug’s warm tones.
Layer 7 — Tall potted indoor plant ($50) brings vertical life beside the window

The tall potted plant in the right corner adds height and softness, especially next to curtains where you want a “full” visual edge. Pick a plant with broad leaves so it looks lush from across the room, not delicate and sparse. Because it’s in a pot, it’s easy to lift and pack—just bag the leaves lightly and protect the pot rim so it doesn’t crack in transit. The trade-off is that plants need some light and occasional watering, but this is still simpler than any wall project. It also makes the bed nook feel less like a display and more like a lived-in corner.
Start the plant near bright light
If your window is your brightest spot, place the pot there first; you’ll avoid leggy growth later.
The cost, layer by layer
| Layer | Item | Cost |
|---|---|---|
| 1 | Throw pillow cover (cream patterned) | $18 |
| 2 | Throw blanket (cream) | $30 |
| 3 | Rust brown duvet | $80 |
| 4 | Large area rug (blue and rust medallion) | $200 |
| 5 | Macramé wall hanging | $45 |
| 6 | Plug-in table lamp (cream shade) | $60 |
| 7 | Tall potted indoor plant | $50 |
| Total | $483 | |
If you want a cheaper version, swap the large medallion rug for a smaller 5×7 in the same blue-and-rust family and keep the duvet + throw as your color anchors. You can also choose a simpler macramé (shorter length) to lower Layer 5 without changing the overall vibe.
What worked, what didn't (across the whole room)
This look works because every “big visual job” is handled by a removable textile or plug-in object: rug for grounding, duvet for color, and lamp light for softness. The macramé adds wall texture without turning the wall into a project. The only place I’d be careful is scale—especially with rug size and plant height—so the room doesn’t feel top-heavy.
What worked
- The blue-and-rust medallion rug anchors the bed nook and makes the rest of the palette look planned.
- Rust-brown bedding ties into warm wood tones so the room doesn’t read flat or gray.
- Cream pillow and throw create contrast that looks layered from across the room, not just close up.
- Plug-in lamps let you control warmth after dark without changing any fixed fixtures.
- Macramé cord texture on the wall adds movement while staying lightweight for moves.
- The tall potted plant fills vertical space near the window so the bed area feels less boxed-in.
What didn't
- Cream throws show dust faster, so you’ll need a quick shake and occasional gentle refresh.
- If a rug is too small, the bed area can look like it’s floating above the floor.
- Macramé can tangle if you overstuff storage—coiling with care matters during moves.
- Light-colored shades can reveal uneven bulb placement, so centering the bulb helps.
- Tall plants need consistent light; otherwise the leaves can look uneven over time.
What we'd skip if we did it again
Skip a matchy, coordinated set where every piece comes from the same retailer. In a shared bedroom, that can read “catalog room” instead of lived-in, and it also reduces your ability to mix budget finds.
Skip a wall-hardware plan that involves drilling or heavy anchors. Even if it looks tempting, you’re packing a year from now—cord, textiles, and removable hanging options keep the project aligned with move-out reality.
Skip choosing a lamp for aesthetics only. If the shade is too small or the light spreads harshly, you’ll feel it every night—start with a fabric shade and warm bulb so the room stays soft.
Frequently asked
How long does this kind of bed nook refresh take?
For most shared-housing rooms, you can get the look in one weekend. Plan for about 1–2 hours to get the rug positioned and straight, 1–2 hours for bedding swaps and pillow styling, and another hour for lamp placement and the plant’s “final spot.” The macramé takes the longest if you DIY it—budget an extra afternoon.
What if I’m not sure I’ll keep the same furniture after I move?
That’s the point of this plan: everything in the layers is either a textile or a freestanding object you can pack. Rugs roll, duvet covers fold, and wall hangings come down. If your next room has a different layout, you can re-center the rug and reuse the same color family (rust, cream, blue) without changing fixed items.
Is the rug size flexible if my room is smaller?
Yes, but aim for at least the front legs of the bed to sit on the rug. If you can’t fit a full 8×10 style size, choose a 5×7 or a slightly narrower option and rely more on the duvet + throw for the color anchor. The goal is to avoid a “rug under just one corner” look.
Where should I shop if I want this boho-but-not-chaotic vibe?
Look for rugs in blue-and-rust medallion or vintage-inspired patterns, and choose bedding textures in matte cotton or textured weaves. For the macramé, craft stores and big-box online listings usually have ready-made lengths—or you can DIY. For lighting, stick to plug-in table lamps with fabric shades in cream or oatmeal so the warm mood matches the textiles.
What’s the biggest mistake people make with a bed nook like this?
They buy one “statement” item (usually the rug) but forget the texture balance. If your pillows and throw are smooth and shiny, the room starts looking mismatched instead of earthy. Try to keep at least two of the three—pillow cover, throw blanket, duvet—reading as matte or woven for that consistent, lived-in look.
Can I do this if my power outlets are limited?
You can still make it work. Plug-in lamps only need a nearby outlet, so you might move the lamp base to a different bedside table or use an extension cord temporarily while you decide on the final layout. Keep the lamp on a stable table surface so you’re not relying on cords running across the walkway.
More in Bedroom
Under $500 boho bed nook refresh: rug, rust duvet, macramé
A boho bed nook refresh built for shared housing: warm rust bedding, a blue-and-rust medallion rug, and a move-friendly macramé wall hangin…
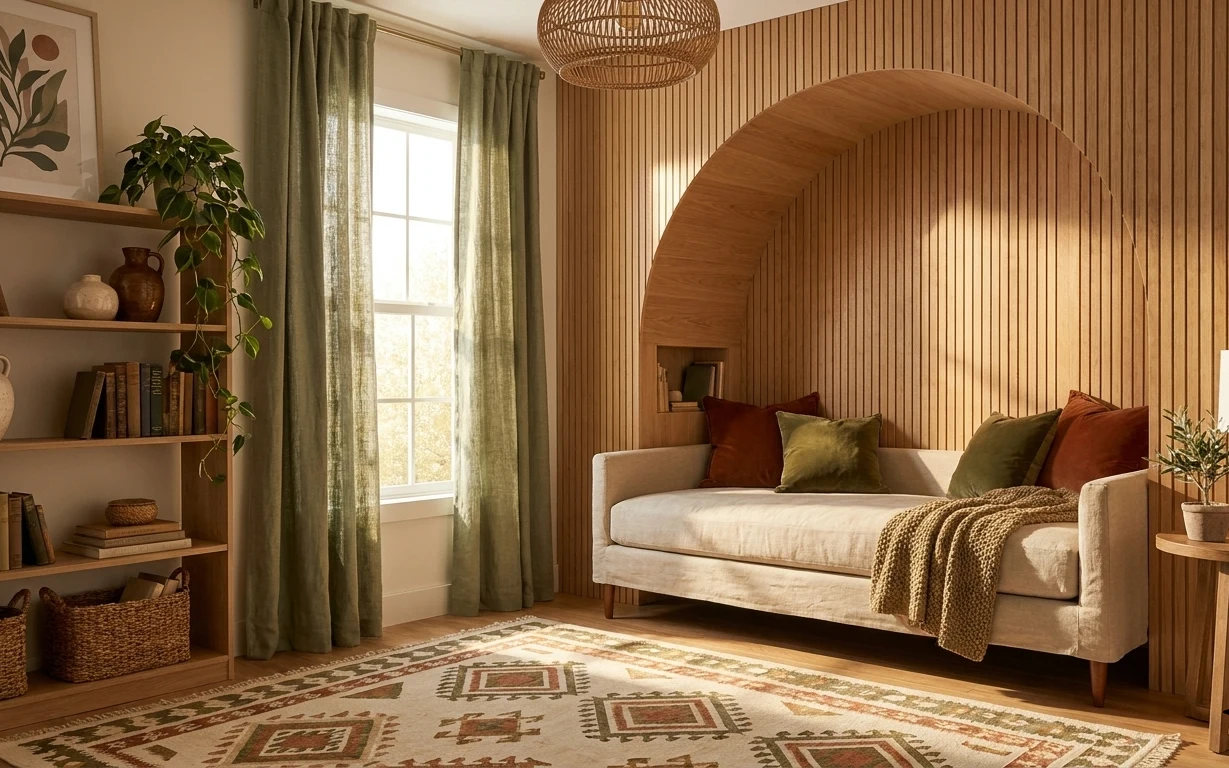
Under $400 for an arch daybed nook: 7 move-friendly upgrades
Arch daybed nook refresh with warm neutrals for shared housing, built around a $400 budget. You’ll swap in move-friendly wall art, rug, cur…