
- Best for
- Small bathroom upgrades with big visual impact
- Cost
- About $600 ceiling
- Difficulty
- Easy to moderate
- Time
- One to two weekends
Why green-herringbone brass fixtures are the spa bathroom of 2026
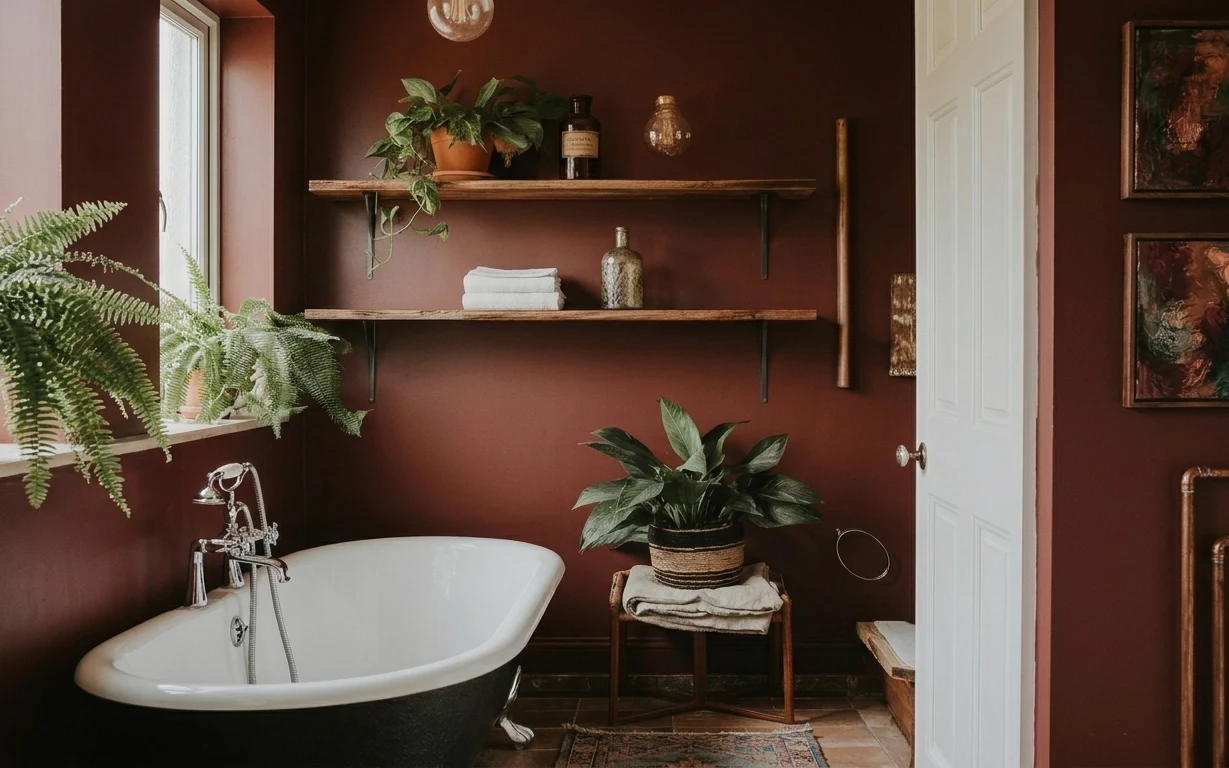
That deep green herringbone against warm wood has a built-in “stay a while” effect, but the look only feels finished when the small objects are curated. On the vanity, the gray stone top gives you a calm base for a decorative tray, a small potted plant, and a candle jar. Above, the rectangular mirror and the framed abstract prints keep the eye moving at the right height. For this audience, the best part is you can chase this exact vibe with a few buy-now changes and one peel-and-stick wall move—no structural work required.
I used to think bathrooms were all about the big-ticket swap: a new vanity or a full lighting refresh. Then I caught myself over-shopping and under-styling—like buying another “pretty” jar while leaving the counter cluttered. What actually changed the feel was treating the vanity like a small shelf system: one tray, one plant, one candle, and negative space around the faucet. The green tile and brass do the mood work; the styling just keeps it intentional.
Layer 1 — decorative tray on countertop ($35) Built for grouping small items
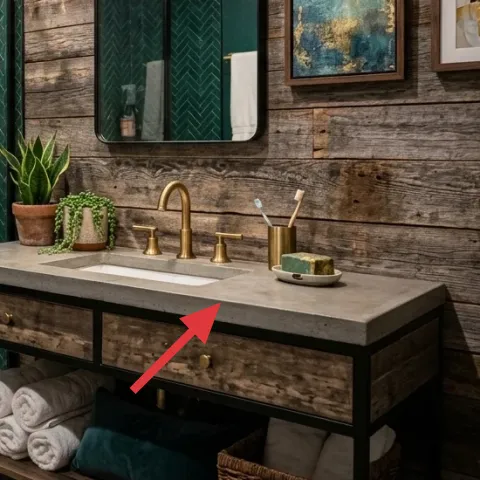
A decorative tray on that gray stone vanity instantly organizes the “mini” objects: it turns scattered countertop pieces into one deliberate arrangement. Choose a tray with a flat base so it sits cleanly around the faucet area without wobbling; the visual trade-off is that you’ll need to edit what fits (usually one plant + one candle + a slim accessory). I like trays here because they also make cleaning faster—everything moves together. The spa look comes from rhythm: tray, candle jar, and plant repeat the room’s earth-and-brass palette without fighting the herringbone tile.
Layer by keeping the faucet zone clear
Leave a small gap around the faucet so the brass reads as a focal point, not as cluttered hardware.
Layer 2 — small potted plant on countertop ($25) Adds the living “green” note
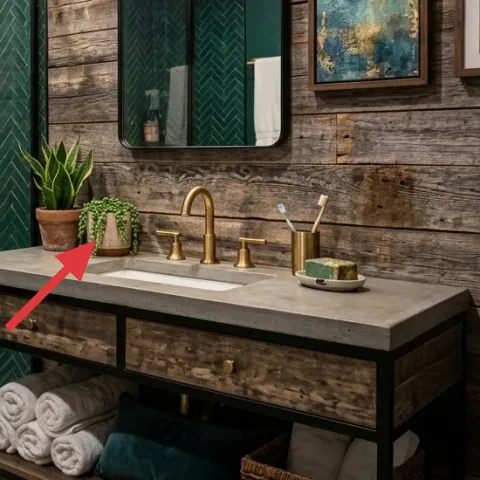
That small potted plant is doing more than decoration—it’s the soft, organic texture that keeps the green tile from feeling too crisp. On a bathroom counter, scale matters: a compact plant reads intentional next to a faucet and mirror, while a tall plant can look top-heavy in tight spaces. The trade-off with real plants is maintenance, but it’s the easiest win for freshness. Place it so it frames the mirror line rather than crowding the towel stack area, and stick to one plant so the scene stays calm.
Match the plant’s color temperature
Deep green tile plus warm wood likes plants with darker leaves—not neon chartreuse.
Layer 3 — small candle jar on tray ($35) Brings warm light when you’re off the clock

A candle jar is one of the fastest ways to make a bathroom feel “hotel-adjacent,” especially because the brass fixtures already steer the palette warm. When you style with a candle, treat it like tabletop lighting: position it on the tray at a consistent angle so it catches the vanity light fixture rather than blocking it. The obvious alternative is swapping in a larger decor object, but that can crowd the counter and compete with the mirror. With a smaller candle, you get ambience without losing the clean, spa-lined layout.
Choose a jar that matches your brass tone
Warm metals and glassy finishes read cohesive against brass faucet hardware.
Layer 4 — rectangular framed mirror ($120) Centers the whole vanity wall

The rectangular mirror is the pivot point: it reflects the vanity light fixture and makes the wood-paneled wall feel taller and calmer. If you’re refreshing, focus on frame finish and proportion—not novelty—because brass-toned fixtures already set the style direction. A larger mirror also makes the room feel more open, but the trade-off is you’ll see more of the wall behind it, so keep the surrounding art placement intentional. When in doubt, measure the vanity width, then aim for a mirror that visually “belongs” to the faucet centerline.
Don’t outsize the mirror in a narrow layout
An overly wide mirror can overpower the shower glass and make the vanity wall feel squeezed.
Layer 5 — framed abstract wall print (right) ($80) Gives texture without extra clutter
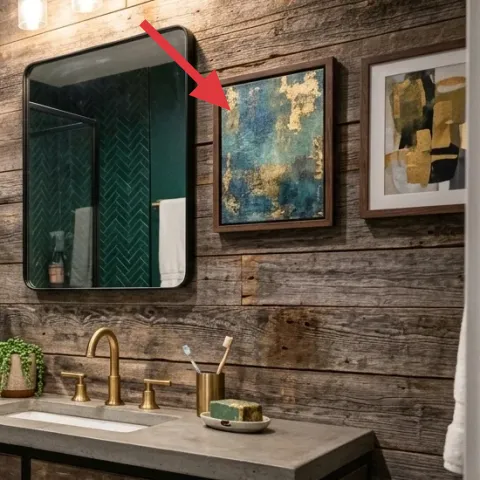
The framed abstract prints add color and movement in a way that flat tile can’t. This is the layer that turns “mostly functional bathroom” into a room with taste, because the art introduces brushy neutrals and muted blues that complement the deep green tile. The trade-off is that art needs breathing room: if you cram too much wall decor, the wood paneling and herringbone pattern start to compete. Keep one to two frames per wall zone and center them around mirror height. The rest stays open for the brass faucet and clean counter lines to read.
Match the frame style to the hardware
Warm metallic or warm wood-toned frames pull focus without clashing with brass.
Layer 6 — peel-and-stick wallpaper (herringbone green panel) ($150) Recreates the spa wall texture fast
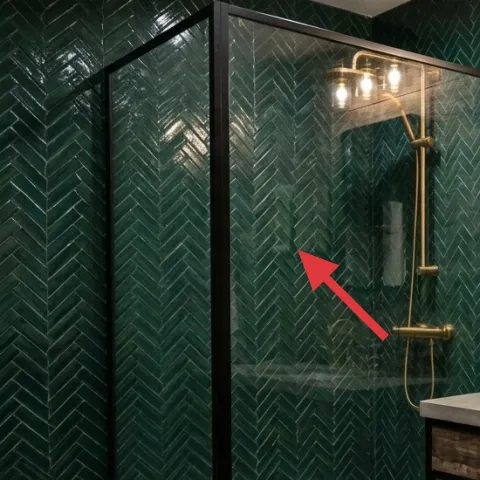
The herringbone green panel is the room’s signature pattern, and peel-and-stick wallpaper is the fastest way to chase that look without re-tiling. The key trade-off: peel-and-stick gives you pattern impact, but you still have to prep the wall surface for clean seams and corners. Work slowly around the edges so the pattern lines look straight—especially since the shower glass will “frame” that section. This layer is especially satisfying for homeowners because you can pick the exact green tone look you want and stop once the room reads balanced with the wood paneling.
Plan for seams before you cut
Dry-fit a full panel against the shower edge so the first seam doesn’t land in the most visible spot.
Layer 7 — paint, 1 gallon (to match the wood plank tone) ($70) Makes everything look intentional

If you’re chasing this exact warm wood-and-green contrast, paint is what unifies it. A fresh coat can correct undertones—making the wood paneling feel more golden and less gray—so brass fixtures, the mirror reflection, and green tile all look like they belong together. The trade-off is time: paint is messier than buying a decor item, but it’s worth it because the whole wall changes. Use a satin finish for bathrooms so light bounces without looking too shiny. When the wood reads warm, the counter styling looks “designed” instead of accidental.
Test one plank first
Wood undertones vary; a small test spot prevents the “why is it cooler than the photo?” moment.
The cost, layer by layer
| Layer | Item | Cost |
|---|---|---|
| 1 | Decorative tray for countertop | $35 |
| 2 | Small potted plant for bathroom counter | $25 |
| 3 | Small candle jar for countertop styling | $35 |
| 4 | Rectangular framed mirror | $120 |
| 5 | Framed abstract art print (one piece) | $80 |
| 6 | Peel-and-stick wallpaper panel (herringbone green) | $150 |
| 7 | Paint, 1 gallon (for wood-plank wall tone) | $70 |
| Total | $515 | |
If you want a cheaper variant, start with the high-visibility changes: mirror styling, the framed print, and the counter tray/plant. Wallpaper and paint are where the big wall tone happens, but you can delay one of those until the next weekend refresh.
What worked, what didn't (across the whole room)
This spa bathroom works because pattern (green herringbone), warmth (wood plank wall), and metal glow (brass faucet and mirror reflection) all point in the same direction. The small objects matter, too: when the counter items are grouped on one tray, the vanity reads intentional from across the room. Where it can miss is when the vanity feels cluttered or when the wall pattern has visible seam misalignment.
What worked
- The tray-and-candle-and-plant grouping makes the vanity look designed, not randomly stocked.
- The rectangular mirror keeps the eye level consistent with the faucet centerline.
- The framed abstract print adds color movement that doesn’t fight the tile pattern.
- The warm wood plank wall softens the crisp geometry of the herringbone tile.
- Warm vanity lighting makes brass reads golden instead of brassy-cold.
What didn't
- Too many small countertop items can break the spa calm quickly.
- Wallpaper seams that land in the most visible edge can make the wall look unfinished.
- Using cool-toned paint can fight the wood’s warmth and flatten the brass hardware.
- Oversized mirror frames can crowd the shower-glass area.
What we'd skip if we did it again
Skip swapping multiple countertop accessories at once. A fresh tray plus one plant plus one candle jar is usually enough, and it keeps the mirror-and-tile pattern from competing with your decor.
Skip wallpaper installation without dry-fitting around the shower edge. The most visible seam is the one you’ll notice every day, so planning alignment beats rushing the cut.
Skip repainting the wood-plank wall if you can’t test a small area first. Undertones vary by lighting, and the wrong sheen or temperature can make the whole palette feel off.
Frequently asked
How long does this kind of bathroom refresh take?
Most of the changes are quick: styling the counter, hanging one framed print, and swapping a mirror look can be done in a few hours total. Wallpaper and painting take the longest because of prep and drying time, so plan one day for surface prep and application, then another for finishing and touch-ups. If you’re working around shower glass, build in extra time for careful trimming and seam alignment.
If I rent, what can I do instead?
For renters, keep it to peel-and-stick wallpaper (on a single wall) and decor-based upgrades: a tray, plant, candle, and a framed print hung with removable methods. A mirror swap is sometimes possible if you can re-mount safely, but avoid anything that damages surfaces. The “spa feel” comes from grouping and spacing more than from demolition.
What if my bathroom is smaller than the one in the photo?
In a smaller bathroom, the goal is to keep fewer items visible at once. Stick to one framed print or two smaller pieces instead of multiple, and choose a compact tray so the counter doesn’t look crowded. If the mirror is too large, scale down to preserve breathing room around the faucet and shower area. The styling should feel curated, not full.
What if my bathroom has different colors or fixtures?
The core formula still works: one strong wall texture, warm metals, and a calm counter grouping. If your tile isn’t deep green, match the “hero color” with art and a single accent accessory so the room doesn’t feel scattered. If your hardware isn’t brass, pick mirror and frame finishes that match it closely, then choose greenery and neutrals to bridge everything.
Where should I shop for these upgrades?
Start with affordable basics for decor: home goods stores and online marketplaces for trays, candles, and plants. For the mirror and framed print, look for reputable home decor retailers with clear measurements so the scale is right. For wallpaper, choose brands that specify application method and have plenty of reviews for clean seams on flat walls.
Biggest mistake people make in bathrooms like this?
Over-styling the counter. It’s tempting to add more jars, towels, and small items, but that tends to blur the spa effect. Another common mistake is wallpaper seams placed without dry-fitting—bathrooms show everything at eye level. A simple tray and a tight edit of objects usually looks better than a larger collection.
More in Bathroom

7 counter upgrades for a $600 spa bathroom
A spa bathroom already has great bones: deep green herringbone tile, warm wood panels, and brass fixtures. This weekend refresh adds 7 coun…
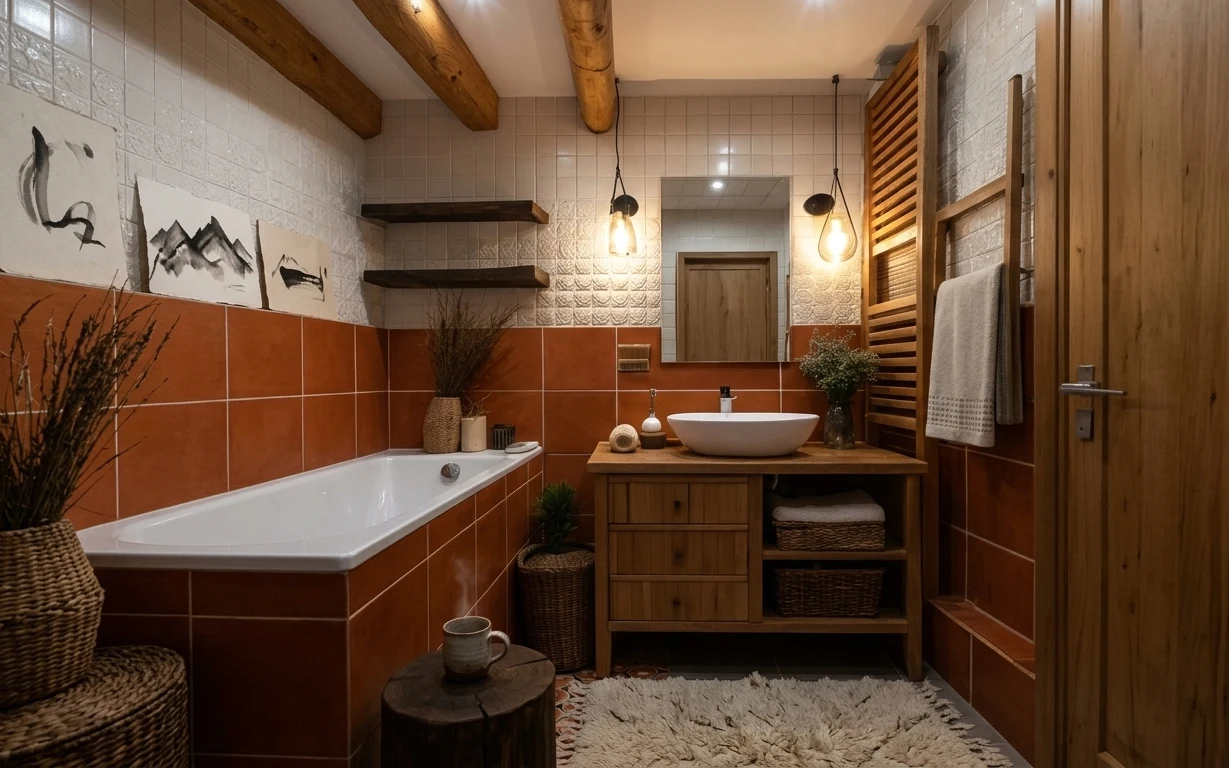
6 no-drill bathroom swaps for a $400 bathroom nook refresh
A warm terracotta bathroom nook look for shared housing, built from movable textiles, freestanding styling, and one no-drill DIY. This plan…
6 no-drill ways to personalize a $400 bathroom vanity nook
A warm terracotta bathroom vanity nook refresh you can pull off without drilling, for about $400. This move-friendly plan leans on swaps yo…