
- Best for
- Evening ambiance and renter-friendly patio styling
- Cost
- About $665 (or budget $700)
- Difficulty
- Easy to moderate
- Time
- 1–2 weekends (plus quick touch-ups)
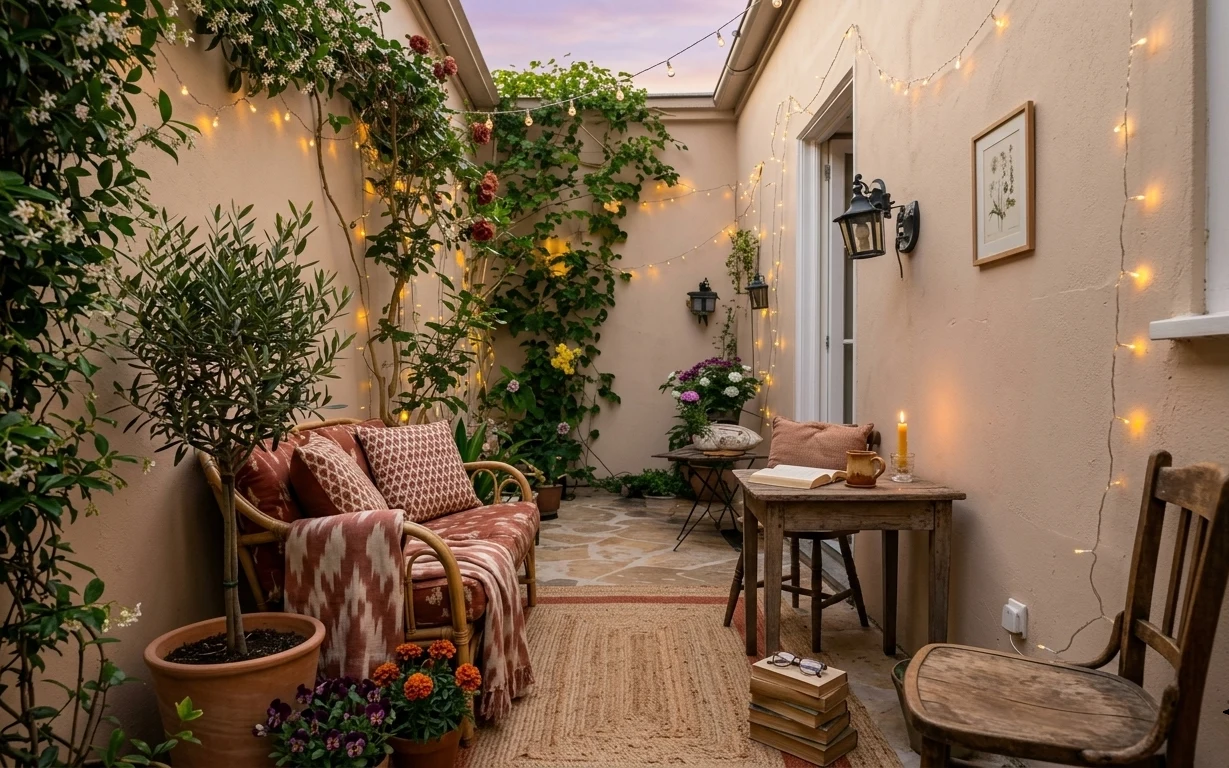
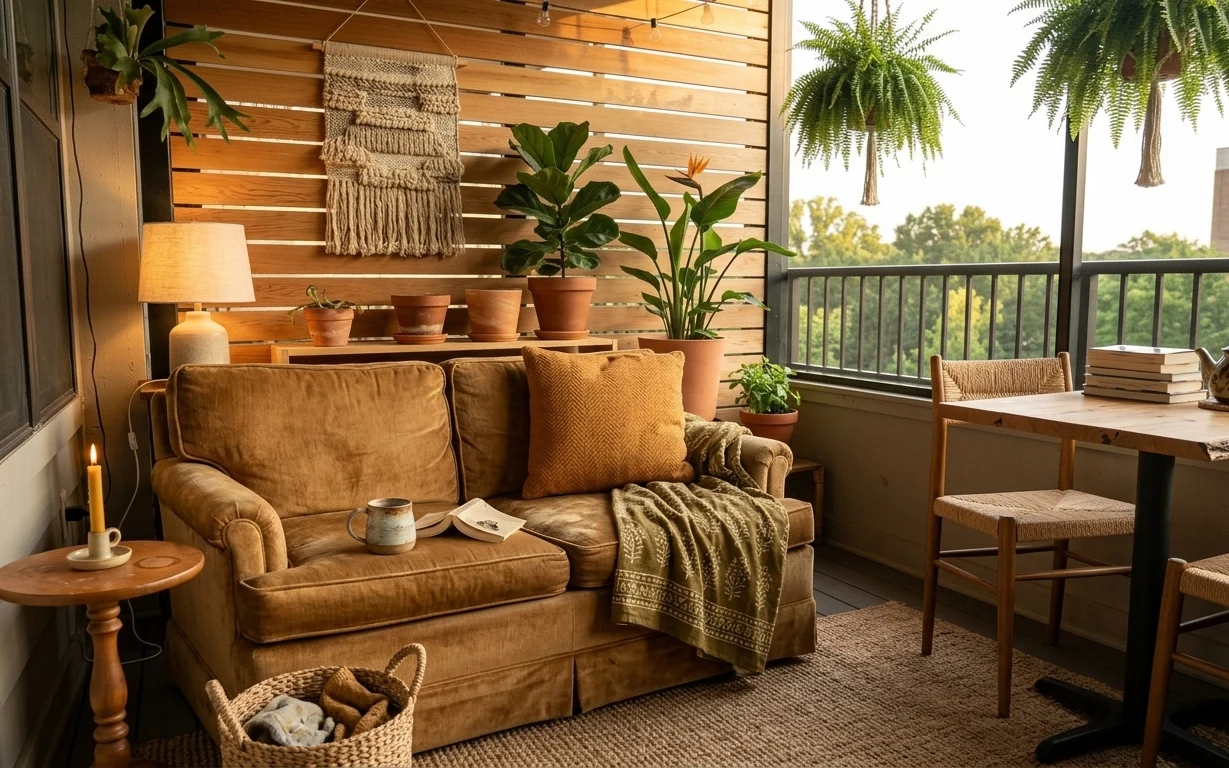
Why warm terracotta-and-green is the string-lit patio corner of 2026
The first thing this patio gets right is texture underfoot: the outdoor rug anchors everything the way a good living-room rug would. Then the warm string lights trace the walls and make the space feel “finished” without any hardwired work. On the seating, the rattan daybed reads airy, while the patterned throw blanket adds that cozy, lived-in contrast. The framed botanical print and the wood side table bring the garden theme into the corners you usually ignore. For renters, this look is totally doable because most of it is portable styling.
I used to overdo outdoor decor by hunting for matching sets, and it always ended up looking costume-y by week two. What changed my mind was watching how mixed materials can still feel intentional: rattan + stucco + stone floor + paper art. Here, the common thread is warm color—terracotta rust with forest green—so the details don’t fight each other. It’s a reminder that outdoor “cozy” is mostly lighting and textiles doing their jobs.
Layer 1 — Area rug ($200) jute-style pattern grounds the seating
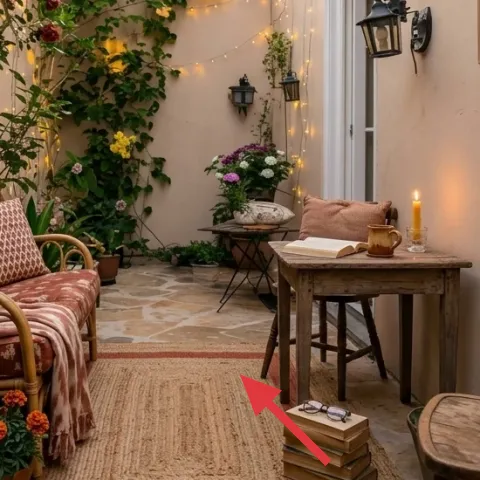
This area rug sits across the patio floor in the middle of the seating zone, which is why the whole corner feels pulled together instead of floating. I like choosing a textured, slightly patterned surface because it hides outdoor life—dust, little footprints, and the occasional spill. The trade-off is you’ll want to shake it more often than a smooth indoor rug, especially if leaves blow in. Still, it’s the fastest way to get that “design-y” look because it sets the scale for everything stacked on top. The rug also gives the daybed and chair something to visually rest on.
Pattern with plants in mind
If you’re surrounding the rug with flowering pots, pick a rug that has a neutral base so the colors don’t compete.
Layer 2 — String lights ($35) warm points of light across the walls
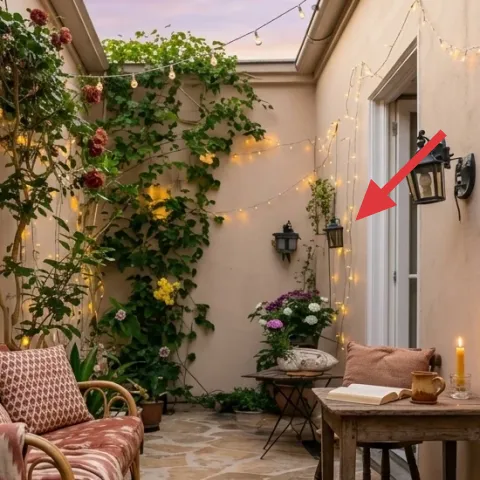
These string lights run along the patio walls and curve through the corner, creating that soft, golden-hour glow you don’t get from overhead lighting outdoors. The decision here is placement: keep the lights high enough that they read like a canopy, then let them “frame” the seating rather than just hang randomly. The trade-off is you’ll need a little patience arranging the strands so they follow the arch and don’t snag on plants. Still, compared with buying dedicated outdoor fixtures, string lights are simple, inexpensive, and packable. They also make the framed botanical print and the lantern feel more intentional.
Use the patio edges as guides
Anchor your first loops along the highest, most continuous wall line—then fill in between.
Layer 3 — Rattan daybed in an outdoor alcove ($250) airy seating with instant texture
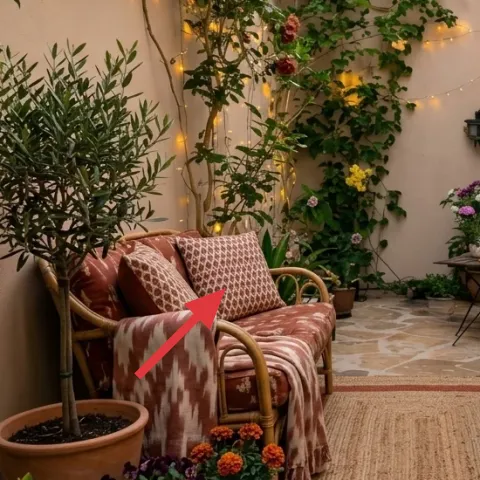
The rattan daybed is doing a lot of work: it establishes a casual “lounge” shape and brings in natural texture that matches the potted greenery. Choosing rattan outdoors is a styling move because it feels light against stucco walls and doesn’t look heavy like a big upholstered sofa would. The trade-off is rattan can show wear if it’s constantly exposed, so keep cushions sheltered when weather turns. Visually, the alcove location matters—because the daybed sits in the corner, it makes the string lights and rug feel like they were designed together. It’s also easy to move if the lease ends.
Let rattan set the palette
Once rattan is in, keep other materials (wood, paper art, textiles) in warm neutrals to avoid visual clutter.
Layer 4 — Patterned throw blanket ($45) terracotta warmth over rattan
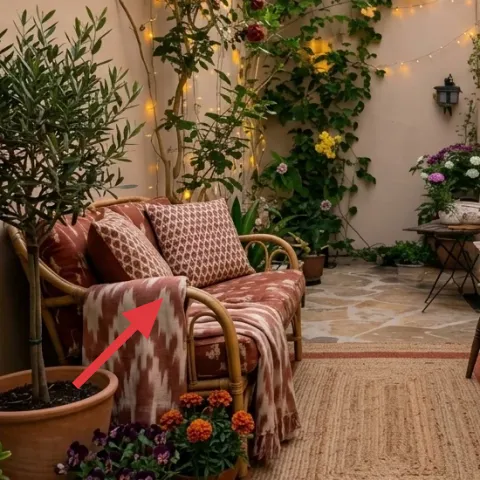
The patterned throw blanket is what makes the daybed feel styled instead of just functional. Its terracotta-and-cream tones echo the surrounding flowers and warm lighting, and the pattern adds depth without needing extra decor clutter. I’ll often choose a throw like this when I want “softness” but don’t want to buy multiple matching pillows—one hero textile can carry the look. The trade-off is the blanket needs a quick shake and straighten so it doesn’t look rumpled up close. Here, it drapes naturally over the daybed, which is exactly what gives this corner that relaxed garden-porch feel.
Watch for color drift
If the blanket’s red is too cool (more pink than terracotta), it can fight the orange garden tones under warm lights.
Layer 5 — Framed botanical print ($40) a garden theme for the wall
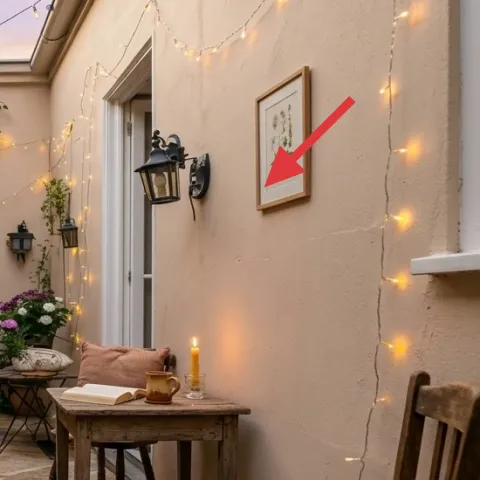
The framed botanical print is a small wall detail, but it’s important because it keeps the garden theme from staying only in the plants. A botanical print also gives the eye a “rest” point between the string lights and the cluster of flowering pots. I like framed art in this kind of corner because it’s easy to swap later, and it makes the space feel designed even during daytime when candles are unlit. The trade-off is you have to keep the frame level—otherwise it reads off. When it’s straight, though, it makes the whole patio look more intentional and less like a collection of odds and ends.
Pick art that repeats a plant color
Green leaves plus warm neutrals are the easiest pairing with terracotta and string light tones.
Layer 6 — Wood side table ($60) tabletop styling you can pack away
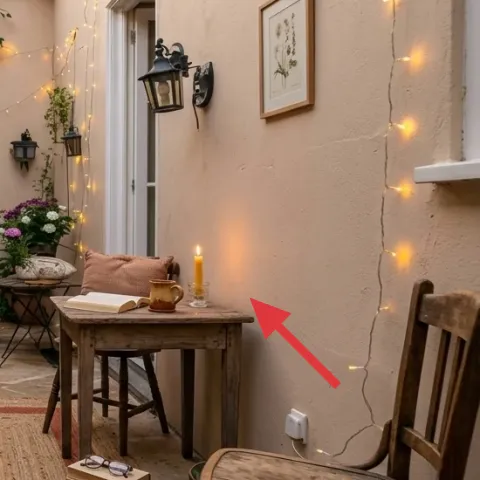
The wood side table sits beside the daybed and gives you a place for the little rituals that make outdoor spaces feel lived in. With stacked books, a small vase, and a candle, it becomes a mini vignette that matches the patio’s garden mood. I’m choosing wood here because it visually bridges rattan seating and the stucco wall—so the corner doesn’t feel like separate zones. The trade-off is a light-colored tabletop can show scuffs, but that’s easier to accept outdoors than losing visual warmth. Also, because it’s freestanding, it packs up cleanly and doesn’t depend on landlord changes.
Use height variation on purpose
Stack books, then place the vase and candle so your tallest item isn’t directly in line with the lights.
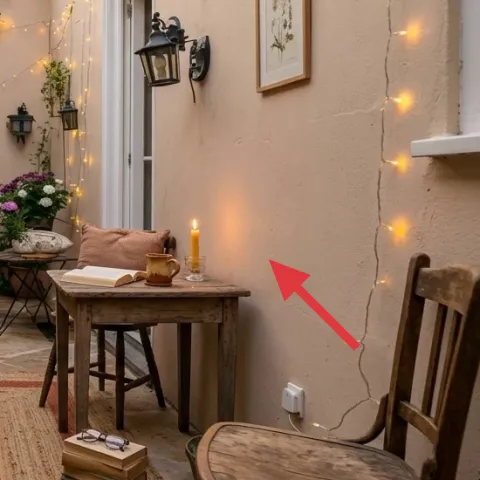
Layer 7 — Candle ($35) warm flicker for evening texture
Make it instead of buying it
This candle pour replaces a store-bought candle with a similar warm flicker using simple wax, wicks, and a reused jar.
Materials
- Wax (soy or paraffin) — ~8 oz — craft store — $10
- Wick + wick tab — 1 kit — craft store — $4
- Glass jar (reused or new) — 1 jar — home goods — $8
- Candle dye or scent (optional) — small set — craft store — $3
Steps
- Choose a jar and center the wick so it reaches the bottom without touching.
- Secure the wick tab at the jar base and keep the wick straight.
- Melt the wax gently in a heat-safe container (no rushing).
- Stir in dye or scent if using, then let the wax cool slightly.
- Pour wax slowly into the jar, stopping before the rim.
- Let the candle set until fully solid (no movement).
- Trim the wick to about 1/4 inch for a steady burn.
- Light it once and observe the melt pool—adjust wick length if needed.
- Place it on the wood side table when string lights kick in.
Total DIY cost: $25 — saves about $10 over buying.
Lighting is the quiet superpower of this corner, and the candle is where that “soft texture” becomes real. A candle flame adds a moving highlight that string lights can’t replicate—especially on wood and plant leaves. This is the trade-off: candles require attention and a safe placement spot, so keep them stable and away from loose foliage. Visually, it also connects the whole styling story—your rug and rattan give the base, while the candle provides evening mood. If you want the same effect without constant refills, pouring your own is a renter-friendly way to control the look.
Keep burn time consistent
Trim the wick before each use so the flame stays the right height for tabletop styling.
The cost, layer by layer
| Layer | Item | Cost |
|---|---|---|
| 1 | Area rug | $200 |
| 2 | String lights | $35 |
| 3 | Rattan daybed in an outdoor alcove | $250 |
| 4 | Patterned throw blanket | $45 |
| 5 | Framed botanical print | $40 |
| 6 | Wood side table | $60 |
| 7 | Candle (DIY pour) | $35 |
| Total | $665 | |
If a rattan daybed is too much, swap in a renter-friendly outdoor loveseat or a cushioned bench and spend the difference on a sturdier outdoor rug and longer string light strands.
What worked, what didn't (across the whole room)
The strongest wins here are layering: rug texture for grounding, string lights for atmosphere, and a few garden-themed decor moments. The corner reads cohesive because the colors repeat—terracotta rust and forest green—across plants, textiles, and the framed print.
What worked
- The area rug visually ties the seating together on the tile floor and hides daily scuffs.
- String lights placed along the wall lines create a canopy effect without any permanent installation.
- Rattan seating adds natural texture that looks good day or night with warm light.
- The patterned throw blanket adds color depth without needing multiple matching cushions.
- The framed botanical print gives the garden theme a spot on the wall, not just in planters.
- The wood side table makes tabletop styling feel intentional and easy to refresh weekly.
What didn't
- When the throw blanket is loosely bunched, the daybed looks styled-for-hours only.
- If string lights sag between anchor points, they draw attention away from the plants and rug.
- A too-cool-toned candle container clashes with terracotta flowers under warm lighting.
- If wall art is even slightly off-level, it stands out against the clean stucco lines.
What we'd skip if we did it again
Skip matching everything from the same retailer—rattan, wood, paper art, and textiles can be different brands and still look coherent. The cohesion here comes from repeating warm beige, terracotta rust, and forest green, not from buying a set.
Skip overcomplicating tabletop styling. If the wood side table is already holding books, keep the vase and candle minimal so the flame and flowers stay the focal points.
Skip putting lights low where they can visually clutter the seating. Aim for a higher run that frames the alcove, then let the plants fill the lower space.
Frequently asked
How long does this patio refresh take?
Most of the time is styling and getting the light strands to sit where they look best. A realistic pace is about 2–4 hours for rug placement and table/candle styling, plus another 2–3 hours to arrange plants, straighten the framed botanical print, and fine-tune the string lights. If you DIY the candle, add 1–2 hours plus setting time.
Is this renters-friendly if I can’t change anything permanent?
Yes—nothing here depends on painting or hardwired electrical work. The rug is freestanding, the string lights are plug-in or battery-friendly, and the daybed, chair, and side table can all move with the lease. Wall decor like the framed botanical print is typically handled with renter-safe hanging methods.
What if my patio is smaller than this one?
Keep the same layering logic but scale down the “anchor” item sizes. Choose a smaller area rug, shorten the string lights so they don’t spill past the seating zone, and consider one hero planter instead of multiple clusters. The framed print should stay centered on its wall section so it doesn’t crowd the corner.
What if my patio is bigger and needs more coverage?
Repeat the pattern: one grounding rug and one main light line, then extend styling through symmetry. Add a second matching lantern-style accent or another tabletop vignette, but avoid duplicating the patterned throw—use one throw as the color and texture anchor. Keep plant colors consistent with the terracotta-and-green theme.
Where should I shop differently to save money?
For savings, prioritize the rug and lighting because they set the tone, then look secondhand for the daybed and chair. Outdoor furniture often shows up thrifted or marketplace-style in late spring. For the framed botanical print, try poster versions at home decor stores and swap to a frame you can reuse.
Biggest mistake to avoid on a string-lit corner patio?
Letting the lights sag or bunch. Once the strands look uneven, everything else feels accidental, even if the plants and textiles are perfect. Use the patio’s edges as your path, start with a few intentional anchor points, and then fill in the remaining length with even spacing.
More in Outdoor & Patio
7 patio details for a string-lit patio corner
A string-lit patio corner starts with an outdoor rug, then layers in warm lighting, a rattan daybed, and simple tabletop styling. This rent…
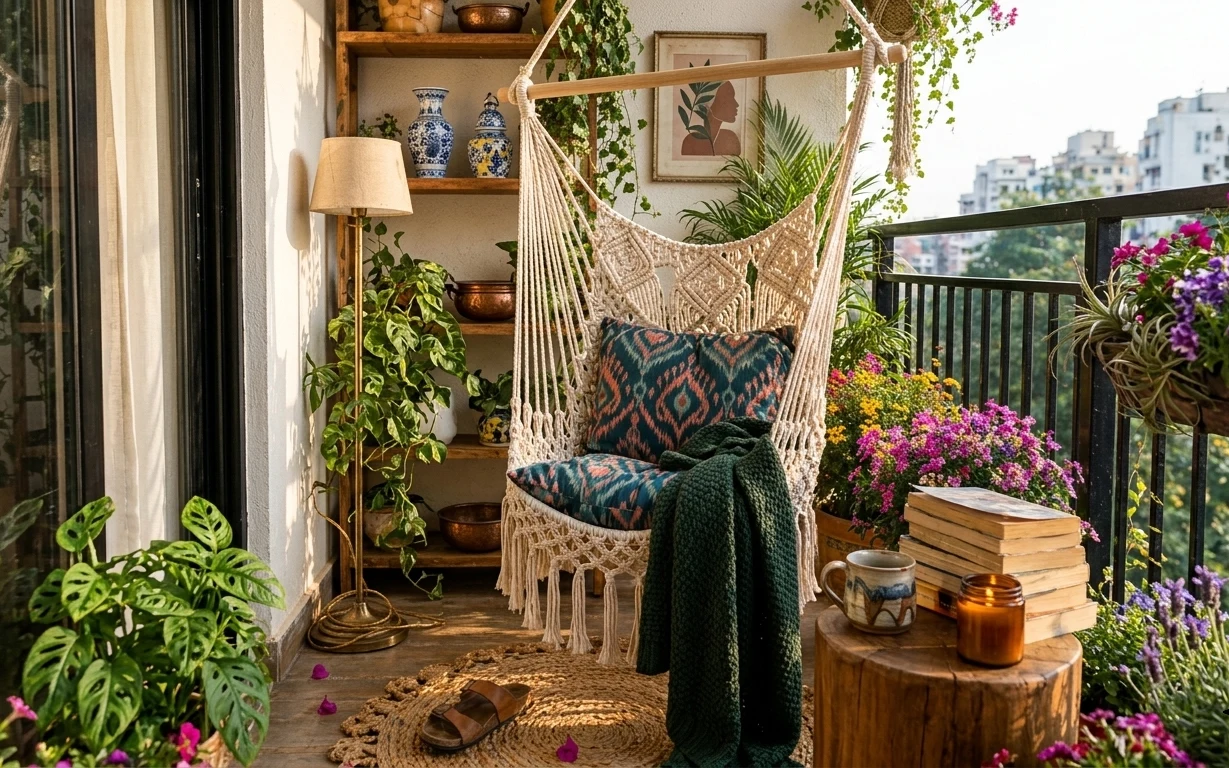
7 renter ways to soften a balcony lounge
A warm, boho-style balcony lounge look for renters—built with a big rug, layered pillows and throws, a plug-in lamp, one terracotta plant, …
7 no-drill swaps for a $600 hammock balcony refresh
A hammock balcony refresh for shared housing: add a woven rug, macramé hammock chair, warm lamp glow, dyed pillow covers, and a few shelf d…