- Best for
- Outdoor grill patios
- Cost
- $550 total, $600 ceiling
- Difficulty
- Easy (no-drill swaps)
- Time
- 1–2 afternoons
Why string-light and terracotta planter accents are the outdoor grill patio of 2026
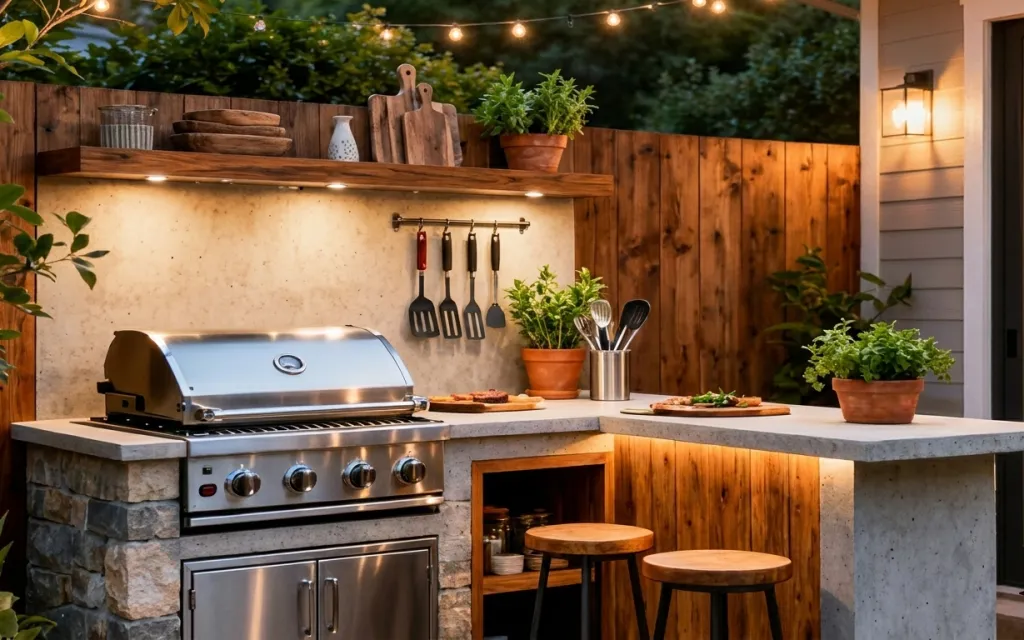
I love how this setup mixes hard surfaces—stone and concrete—with soft color from terracotta pots and fresh greenery. The string lights make the space feel intentional after dark, while the stainless grill and metal utensil rack keep everything practical for actual cooking. Notice the textures too: warm wood paneling, the matte stucco backdrop, and the slight sheen of the grill. For shared housing, the best part is that most of this is just add-and-remove styling, not a remodel.
The first time I tried to “upgrade” an outdoor space I bought matching sets, then realized everything had the same shape and the same visual weight. This time around, I leaned into contrast: warm wood, cool metal, and small hits of terracotta. The look works because the lighting is flexible, the greenery is swappable, and the counter stays styled without needing a fixed install.
Layer 1 — string lights ($35) Soft glow for evening hangouts
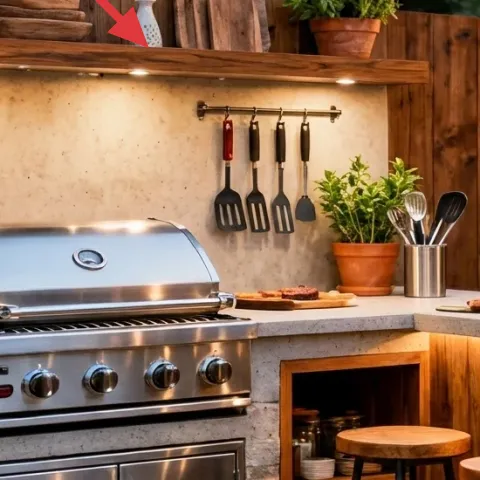
These string lights are a quick way to add warm evening light without touching the wall or ceiling. In the photo, the bulbs arc across the top line of the patio, which means the light reads “designed” instead of flat. I’d choose a plug-in set with a long cord so you can route it around railings or posts, rather than buying anything that requires hardwiring. The trade-off is that the bulbs are best as ambiance, not task lighting—so pair them with your grill light or a separate handheld source if you cook late.
Route from a power source first
Start by placing the first bulb near the plug and only then decide the loop shape, so the string doesn’t sag mid-span.
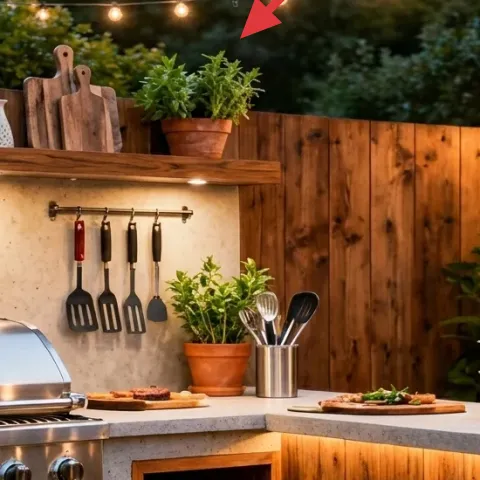
Layer 2 — painted terracotta planter pot set ($40) A color hit that moves with you
Terracotta pots are already in the hero—what changes the vibe is the color treatment and how many you cluster. Painting or coloring just the planters gives you that earthy, rustic warmth while still letting you swap the greenery as seasons change. I’d keep the plant itself simple (herbs or leafy greens) and let the terracotta do the work, because plants are inherently temporary. The trade-off: painted terracotta can scuff if it’s handled constantly, so set it where it can sit without frequent moving.
Cluster beats matching
Two or three pots grouped together look intentional; evenly spaced pots can read busier than the countertop can handle.
Layer 3 — two wooden bar stools ($120) Extra seating without extra visual bulk
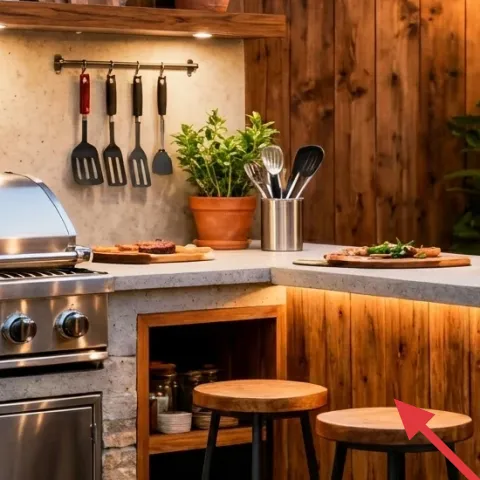
Two wooden bar stools on the deck make the countertop feel like a real serving and prep zone, not just a grill ledge. In the photo, their warm wood tones echo the paneling behind, which is why the whole look feels cohesive even though the materials are different. If you’re choosing an upgrade, I’d rather buy simple stools than add a big outdoor table—stools stack and pack more easily for a move. The trade-off is comfort: because stools are taller, look for a seat that’s not too narrow so you can actually hang around for a while.
Choose lightweight, stackable silhouettes
Stools that stack or nest reduce the “second-place-to-store-them” problem when you move.
Layer 4 — stainless gas grill ($250) The anchor you style around
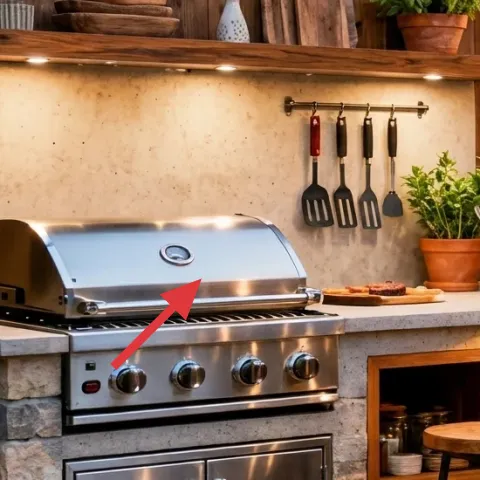
The stainless grill is the structural anchor here: it’s shiny, durable, and it naturally pulls the eye when you enter the space. Even if you don’t upgrade the grill itself, styling works best when the surrounding objects support its metal finish—notice how the utensil holder and rack match the same cool tone. If you’re shopping for a used upgrade, prioritize easy ignition and stable grates over flashy extras; you can always add decor later. The trade-off is size: a grill is heavy, so this is the one piece you’ll plan to keep longer than the rest of your patio decor.
Don’t over-layer around heat
Keep planters and textiles away from vents and any hot surfaces so nothing scorches when you grill.
Layer 5 — metal utensil rack with hanging spatulas and ladles ($45) Practical tools that read decorative
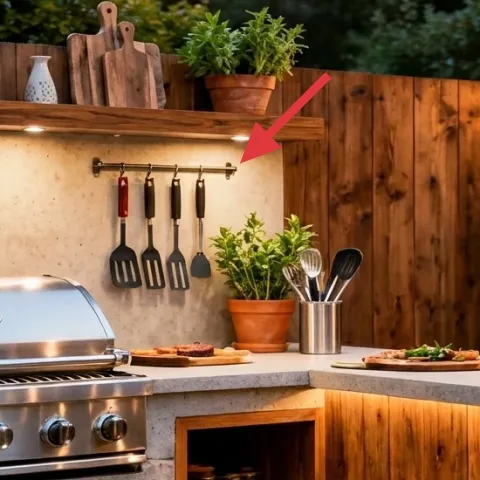
This utensil rack is doing double duty: it keeps tools accessible and turns hanging hardware into a visual pattern. The hanging spatulas and ladles in the photo add vertical lines that balance the horizontal countertop and stucco wall. When you’re recreating the look in shared housing, choose a rack that’s already freestanding, clip-mounted, or otherwise removeable—no drilling. The trade-off is that hanging tools are in view, so a quick wipe-down before guests arrive matters more than on tools stored in a drawer.
Pick hooks for the tools you actually use
If the rack can’t hold your full set, the “styled” look slips fast into clutter.
Layer 6 — wood cutting board on the counter ($25) Warmth in the prep zone
A single wood cutting board on the concrete countertop makes the whole area feel lived-in and cook-ready. In the hero, the board sits near the front edge of the counter where it reads like “today’s meal prep,” not random decor. This is also the easiest move-friendly layer: it’s flat, it wraps in a towel, and it travels without drama. The trade-off is that boards can look slightly different after washing, so keep one “display” board and one “work” board if you want the photo-perfect version to stay consistent.
Use one board, not a stack
A single board keeps the countertop from feeling crowded next to the grill and pots.
Layer 7 — stainless utensil holder ($35) Keeps counter styling tidy
The stainless utensil holder ties the metal tones together and prevents tools from turning into counter clutter. In the photo, it’s placed right on the countertop near the grill side, so it feels naturally “in use” rather than staged far away. When you’re aiming for a move-ready refresh, you’ll appreciate that it’s portable: take it with you, wipe it clean, and place it again in the same spot in the next lease. The trade-off is visibility—if it’s messy, it’s obvious—so keep it to a curated set of utensils.
Match the finish, not the brand
If the grill is stainless, a brushed steel holder keeps the palette calm.
The cost, layer by layer
| Layer | Item | Cost |
|---|---|---|
| 1 | String lights set | $35 |
| 2 | Painted terracotta planter pot set (retail equivalent) | $40 |
| 3 | Two wooden bar stools | $120 |
| 4 | Stainless gas grill | $250 |
| 5 | Metal utensil rack with hanging spatulas and ladles | $45 |
| 6 | Wood cutting board on the counter | $25 |
| 7 | Stainless utensil holder | $35 |
| Total | $550 | |
If you want a cheaper version, swap one of the stools for a single barstool (or use a low folding side table) and choose a smaller planter cluster with one statement board instead of multiple wood items. You’ll keep the warm palette and move-ready feel while cutting the biggest price jumps.
What worked, what didn't (across the whole room)
This setup works because every visible element has a job—lighting for evenings, seating for lingering, and tools staged for quick prep—so it looks styled without feeling fragile. The wood-and-stainless palette also keeps the space cohesive even when you change plants seasonally.
What worked
- String lights create depth across the top line, so the patio reads finished after dark.
- Terracotta pots add warm color that balances the cool stainless grill and utensil metal.
- Two stools make the counter feel like a dining-and-prep zone rather than a ledge.
- Hanging spatulas and ladles create a repeating pattern that looks intentional.
- One wood cutting board reinforces the rustic palette without adding clutter.
- A stainless utensil holder keeps tools contained while staying visually tidy.
What didn't
- When planters are too spread out, the countertop loses the clustered, staged effect.
- If tool storage gets chaotic, the metal hardware stops looking decorative and starts looking messy.
- Stools that are heavy or wide are harder to live with during moves than you’d expect.
- Too many small boards and extra wood pieces make the counter feel crowded next to the grill.
- Placing decorative items too close to heat zones increases mess and risk of damage.
What we'd skip if we did it again
Skip matching “set” decor. On an outdoor grill patio, matching usually means you get too much of the same texture and your counter looks staged instead of lived-in.
Skip anything that needs permanent hardware. Even if an outdoor wall would be perfect for mounting, rentals and shared spaces mean you want clip-on, freestanding, or cord-based changes that travel.
Skip oversized pieces that block access to the prep zone. The grill area needs clear movement, so prioritize a single cutting board and a tight utensil staging moment.
Frequently asked
How long does this patio refresh take?
Plan on 1–2 afternoons. String lights are the fastest win because you can drape and test the cord path immediately. Pots and counter staging usually take the bulk of the time—picking plants, spacing them, and adjusting what sits where around the grill.
Can I do this if I rent or share a backyard?
Yes, because the core moves are add-and-remove. Choose corded lighting, freestanding planters, and tools staged with removable racks or holders that don’t require drilling. The key is to avoid anything that leaves hardware holes or changes fixed surfaces.
What if my patio is smaller than this?
Use fewer pots and one stool instead of two, then lean into vertical interest with the utensil rack and the string lights line. Keep the counter styling to one wood cutting board and one utensil holder so the grill still feels open and usable.
What if my space is bigger?
Add a second lighting “loop” or extend the string lights farther across the top line, then repeat the terracotta palette with two clusters of planters. You can also add a second board—just keep it to prep-side staging rather than scattering items across the entire counter.
Where should I shop for these move-ready items?
For string lights and planters, check hardware stores and home goods retailers first, then search for used bar stools and utensil holders to keep costs down. For the grill, look local for refurbished or secondhand models if you’re not replacing everything.
Biggest mistake to avoid on an outdoor grill patio?
Over-styling near heat. Decorative items and plants look great, but if they’re too close to vents or splatter zones, you’ll move them constantly and they’ll get damaged. Leave practical clearance around the grill and stage everything within easy reach.
More in Outdoor & Patio

7 small, renter-friendly patio swaps for a $600 outdoor grill setup
A move-friendly outdoor grill patio refresh for shared housing on a $600 budget. Use no-drill string lights, easy planter color, and simple…
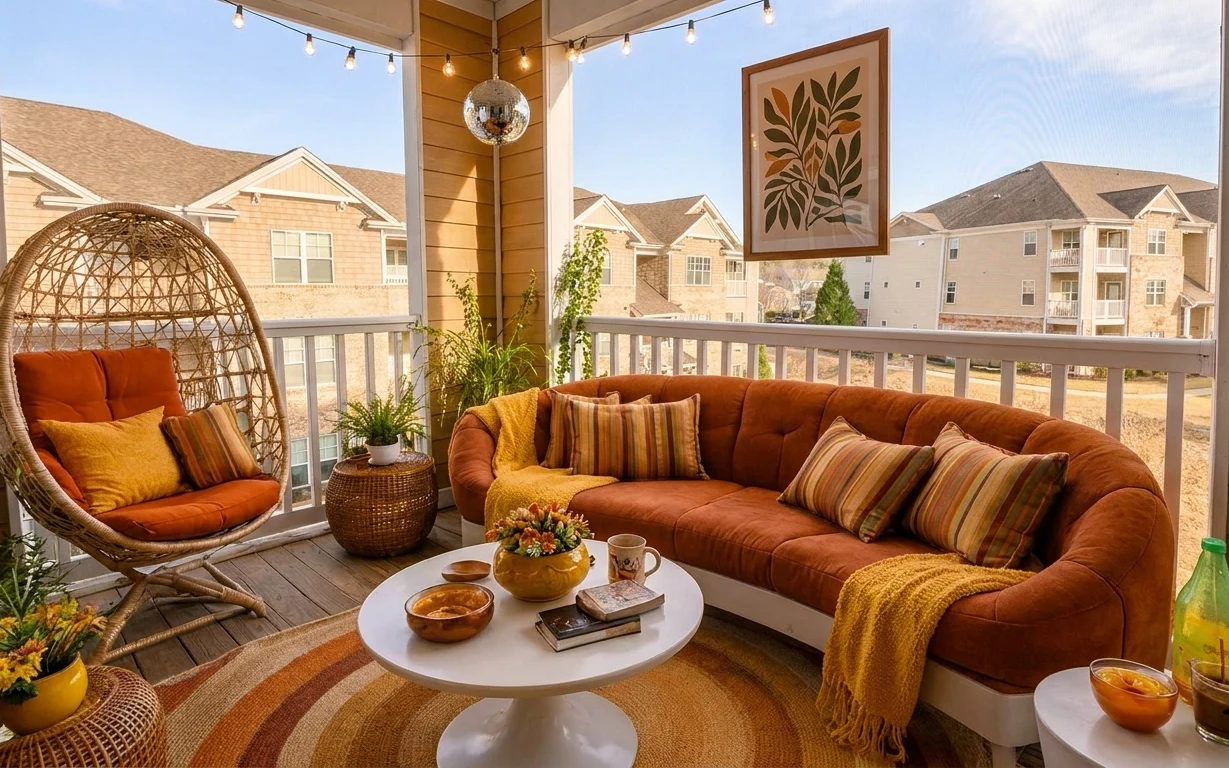
7 renter swaps for a $700 balcony seating refresh
A renter-friendly $700 balcony seating refresh built around rust cushions, a woven rug, and warm string lights. This setup leans boho: laye…
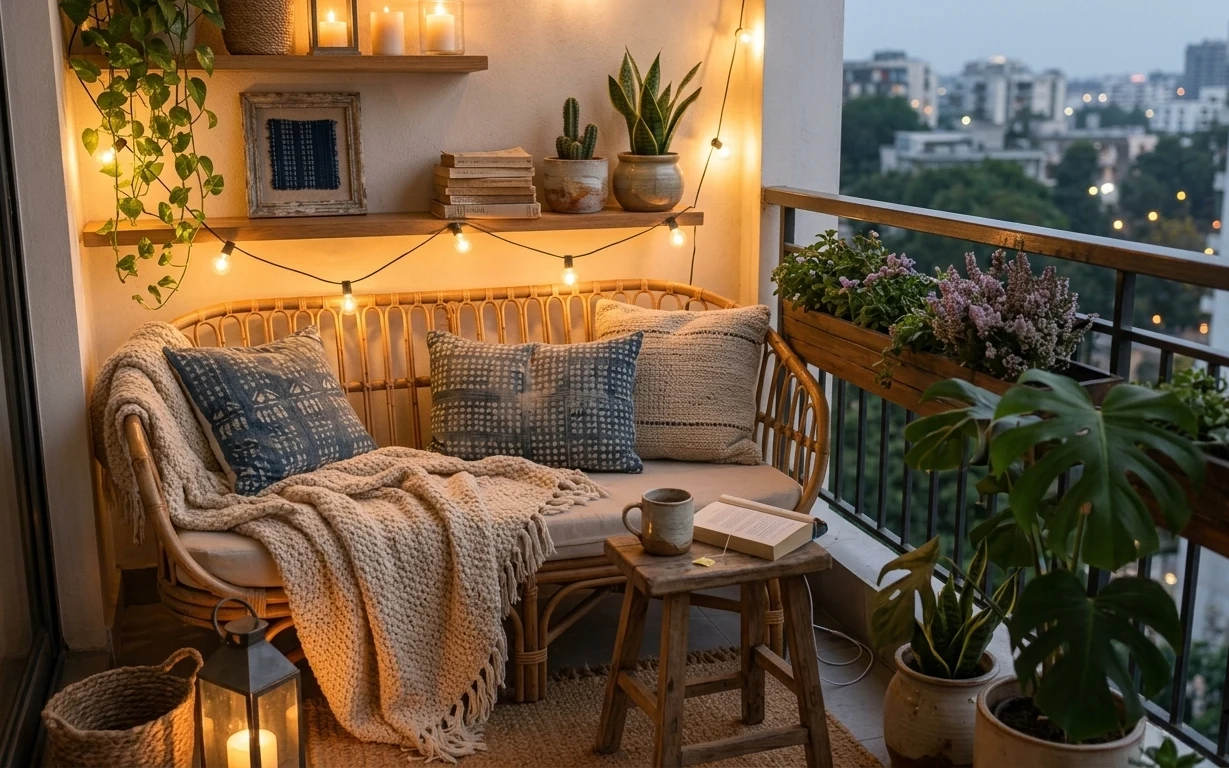
What $400 buys: a balcony daybed nook refresh
A balcony daybed nook makeover using 7 no-drill, renter-safe swaps—rug, pillows, a knit throw, framed art, warm string lights, and planters…