
- Best for
- making a tub-zone feel styled
- Cost
- $785 total (list), $800 ceiling
- Difficulty
- Moderate
- Renter-safe
- yes (most swaps); shelf/towel storage needs mounting
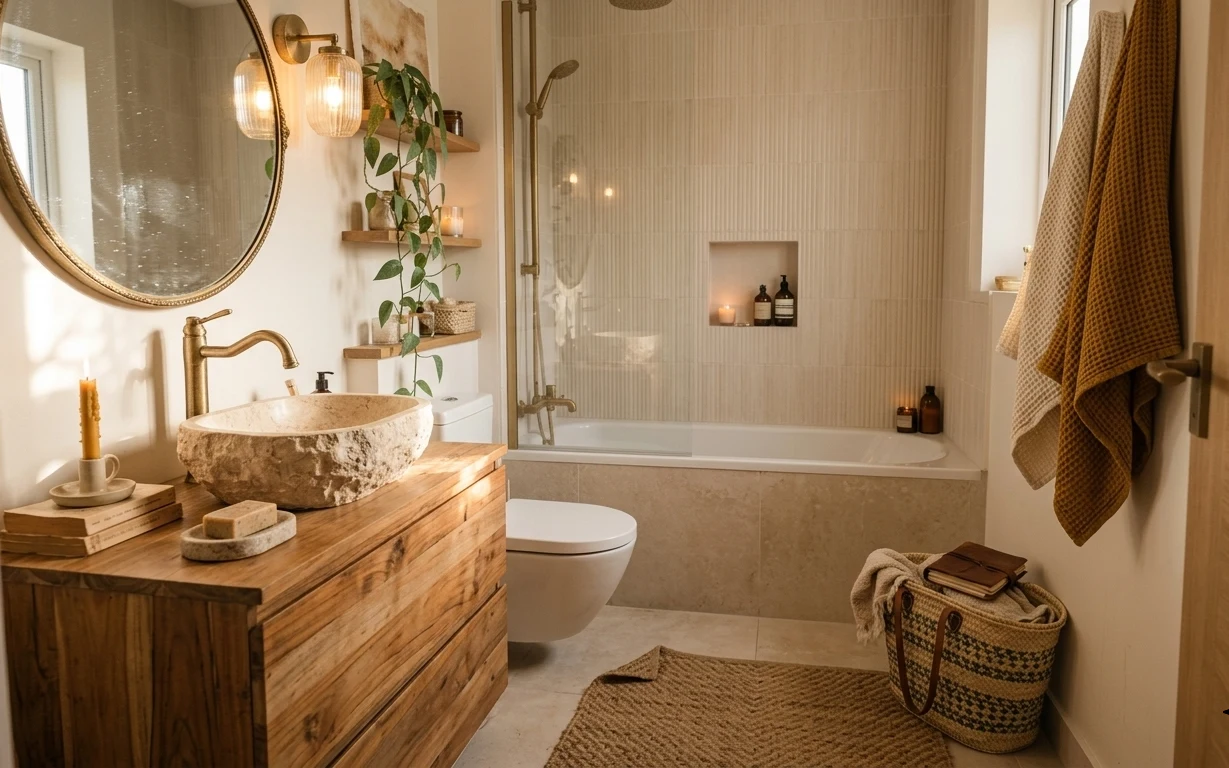
Why brass-and-stone glow is the bathroom vanity nook of 2026
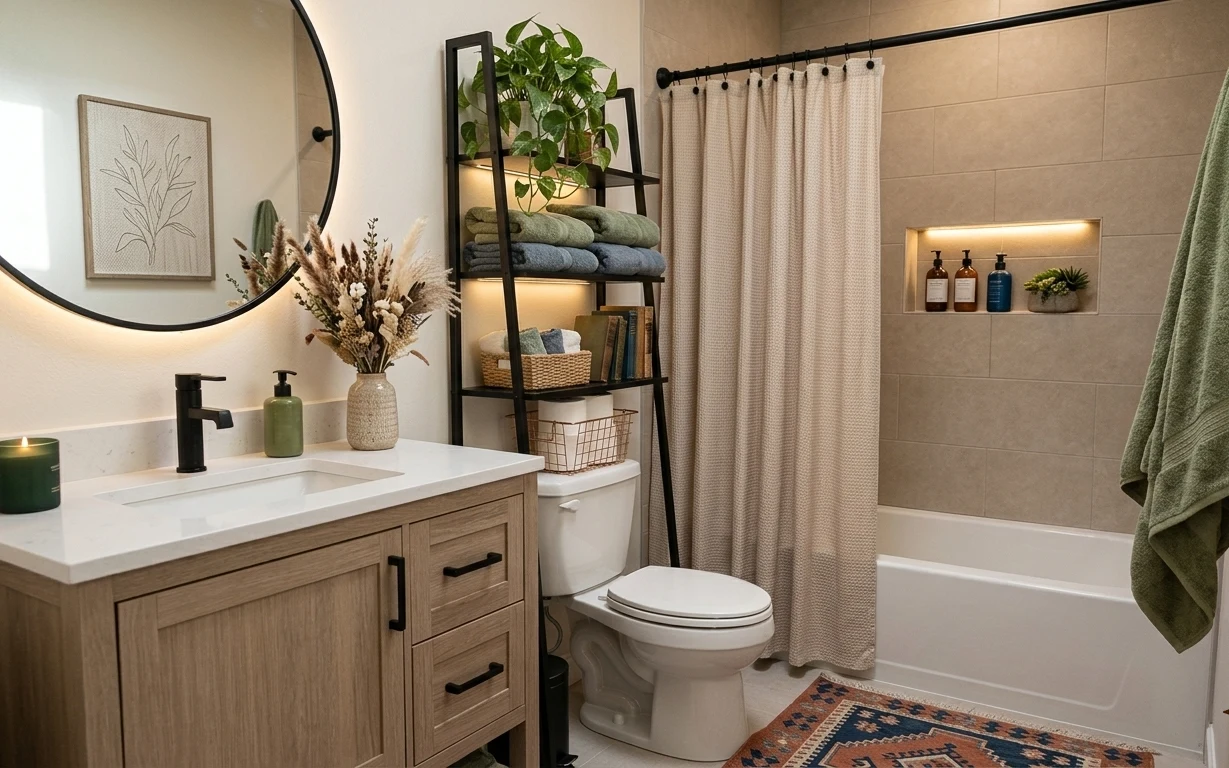
This bathroom reads like a magazine spread because the materials match: brass warmth, light stone tones, and soft textures under the vanity. You can see it in the oval brass mirror, the wood vanity with its drawer lines, and the jute-like area rug that makes the floor feel calmer. Even the tub wall has a cozy, tonal backdrop—so your styling doesn’t have to fight busy surfaces. For US homeowners, this is a satisfying weekend refresh because the “finished” look comes from placement and layering, not gut-level work.
I almost over-decorated this kind of setup the first few times I did it—more candles, more bottles, more little objects. Then I remembered what actually makes it work: a clear anchor (mirror), one vertical moment (shelf + plant), and one grounding textile (rug). Once I stopped treating the vanity like a store display and started treating it like a vignette, everything looked more intentional. This layout is basically that lesson made visible.
Layer 1 — Oval wall mirror with brass frame ($120) Makes the light feel twice as soft
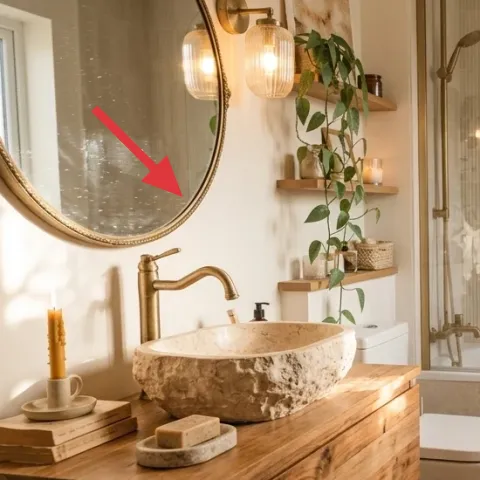
This oval brass-framed mirror is doing heavy lifting up top—because it reflects the warm ceiling glow and brings vertical shape to the left side of the vanity. In a bathroom, mirrors also help the tub zone feel connected rather than separate. Choosing an oval (instead of a rectangle) keeps the lines gentler against the straight-edged tile surround. The trade-off is that you have to keep the surface styling neat underneath, since the reflection shows everything. Keep the vanity clutter-free and let the mirror frame be the “jewelry” for the room.
Center the mirror over the vanity so it reflects the shelf
That way, the wall shelf and plant read as part of the same vignette instead of extra decor on a different wall.
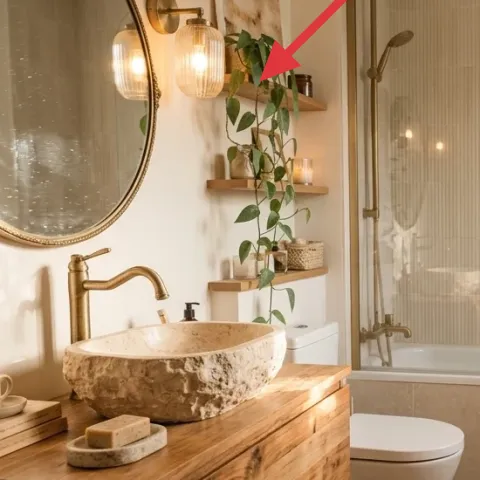
Layer 2 — Small wall shelf (behind vanity) ($45) Gives the plant a home base
The small shelf behind the vanity is where the whole nook becomes styled—plant leaves add height, and the shelf keeps small bathroom items from feeling like they’re “floating” at sink level. It also breaks up the clean tile field with a warm wood tone, which is a lot more flattering than trying to lean everything on the counter. This is a smart alternative to adding another framed piece, because shelves create depth you can rotate with the seasons. If you skip this layer, the corner can start to feel flat and too symmetrical.
Keep shelf items in a tight vertical stack
One plant + one small accessory usually looks better than five objects competing for attention.
Layer 3 — Area rug (jute-like) ($200) Anchors the whole tub zone
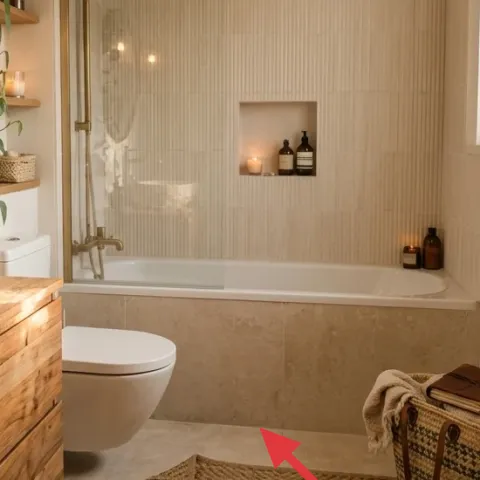
The jute-like rug at the bottom of the photo is what makes the space feel lived-in instead of showroom-clean. It visually pulls the vanity, tub, and folded towels into one floor “moment,” and its natural texture softens the tile’s shine. A rug like this also helps hide the reality of bathroom life—small damp marks and splashes—better than a shiny hard-surface look. The trade-off is you’ll want a rug with a stable backing and a placement where foot traffic doesn’t bunch the fibers. When the rug sits centered in the open floor area, the whole room reads more intentional.
Use a thin rug pad so the texture stays flat
A little grip goes a long way for bathroom rugs that get stepped on constantly.
Layer 4 — Woven storage basket (right side) ($50) Makes towels look styled, not stored
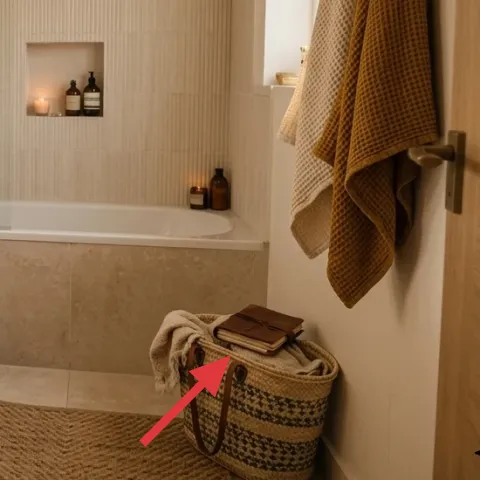
This woven basket is a simple styling trick that also functions: it holds folded towels while keeping the right side from looking bare. The texture complements the rug, so everything feels cohesive even though the items are different. A basket also gives you a natural “landing spot” for everyday bathroom clutter, which prevents the vanity from becoming the only organizer. The trade-off is that baskets can look messy if they’re overfilled, so aim for a slim stack and let one towel texture show. It’s the kind of piece that looks best after you remove the extra items, not after you add more.
Don’t place a basket where it will trap water
Keep it away from direct splashes so the woven material stays fresh instead of musty.
Layer 5 — Wood bathroom vanity with drawers ($150) Sets the warmth baseline
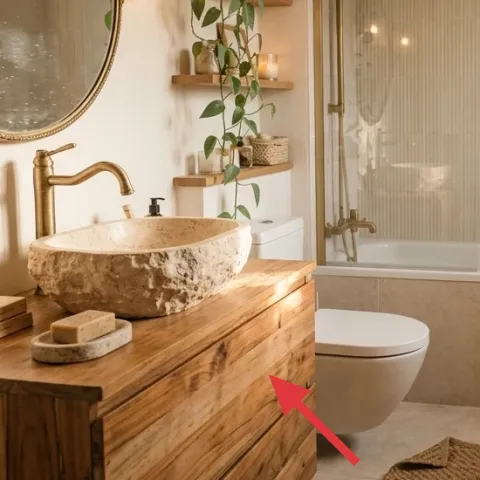
The wood vanity is the anchor that makes brass and cream feel cozy instead of cold. In the photo, the drawer lines and warm grain create structure, while the light stone sink surface keeps the whole setup bright. This choice works because the room already has a tonal tile surround; the vanity adds contrast without introducing a new color family. The trade-off of going for wood is maintenance—wipe the surface regularly and don’t let water sit around the sink edge. If you try to swap in something too pale, the brass accents won’t read as warm.
Match the wood tone across the vignette
If the vanity is medium walnut, pull the same warmth into your shelf and tray-like pieces.
Layer 6 — Brass globe ceiling light fixture (two glass shades) ($120) Keeps the mirror glow flattering
Those two brass-and-glass globes add the kind of warm, even light that bathroom mirrors need. With vanity-style lighting, you avoid the harsh shadows that can make skin and countertops look dull. The brass finish also ties directly back to the mirror frame, which is why the whole look feels coordinated without being matchy. The trade-off is that glass globes show fingerprints and smudges, so cleaning becomes part of the ownership routine. Still, once it’s dialed in, the room looks warmer in every photo.
Choose warm bulbs and keep wattage consistent
Even illumination matters more than brightness when the mirror is the focal point.
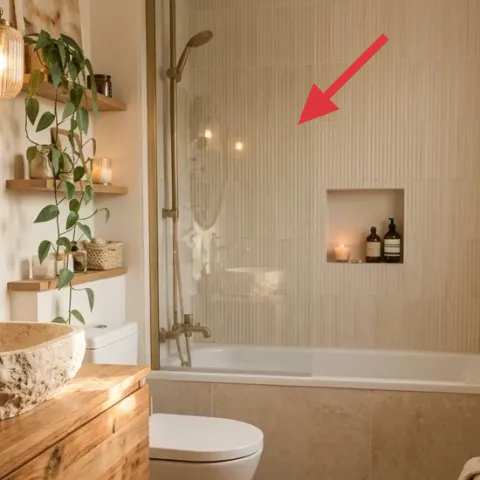
Layer 7 — White bathtub tile surround area (visible tub wall + niche art) ($100) Creates a calm backdrop for styling
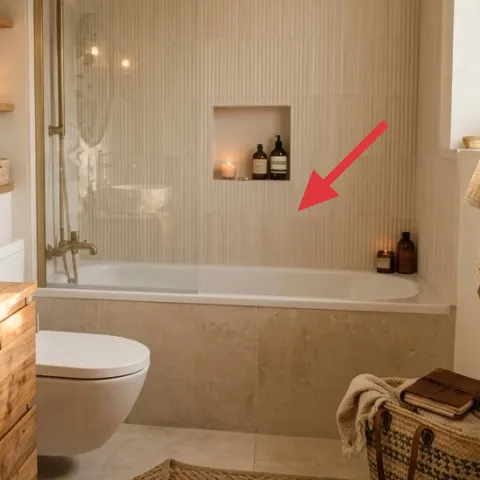
The tub wall’s tonal tile surround plus the small framed artwork in the niche makes the whole center area feel finished. When that backdrop looks intentional, you don’t have to decorate the counter to “fill the room.” This is also a practical move for homeowners: improving the visual clarity around the tub gives you that styled feeling without changing plumbing or layouts. The trade-off is restraint—too much decor in the tub-zone can compete with the texture. Let the tile and niche art do their job, then keep the towels and basket to the edges.
Let texture lead; keep decor counts low
In spaces like this, one framed piece and a couple of functional textiles beat a crowded look.
The cost, layer by layer
| Layer | Item | Cost |
|---|---|---|
| 1 | Oval wall mirror with brass frame | $120 |
| 2 | Small wall shelf (behind vanity) | $45 |
| 3 | Area rug (jute-like) | $200 |
| 4 | Woven storage basket (right side) | $50 |
| 5 | Wood bathroom vanity with drawers | $150 |
| 6 | Brass globe ceiling light fixture (two glass shades) | $120 |
| 7 | White bathtub tile surround area (niche + visible tub wall) | $100 |
| Total | $785 | |
If the rug budget is tight, choose a smaller 5×7 size in a similar neutral tone first—then add the storage basket and shelf so the nook still feels styled.
What worked, what didn't (across the whole room)
This setup works because it layers warmth in three ways: brass light, wood grain, and a textured rug. The result feels curated without needing constant refilling of decor. The only stumble is when the shelf or towels get too abundant.
What worked
- The oval mirror makes the brass ceiling light look softer instead of harsh.
- The wall shelf creates a vertical focal point behind the sink.
- The jute-like rug anchors the entire tub-and-vanity zone on the floor.
- The woven basket keeps towels in view while hiding everyday mess.
- The wood vanity warms up the tile surround without adding competing colors.
- The niche artwork gives the tub wall a reason to be there—so the room feels complete.
What didn't
- Over-styling the vanity quickly makes the reflection feel busy.
- A too-thin rug placement can bunch at the edges and look unintentional.
- If the shelf holds too many items, it stops reading as a calm plant vignette.
- Globe glass lighting shows smudges, so it needs more frequent quick wipes.
What we'd skip if we did it again
Skip adding more small decor to the vanity. A mirror plus a single sink-side styling group already reads intentional, and extra objects compete in the reflection.
Skip trying to match everything perfectly (same wood tone, same brass finish). Instead, keep the warmth family consistent and vary textures—wood, woven, and stone—so it feels collected.
Skip a rug without stable backing. Bathroom floors are unpredictable, and a rug that shifts or curls makes the whole nook look less polished even when the mirror and lighting are spot-on.
Frequently asked
How long does a bathroom vanity nook refresh like this take?
Most of the impact comes from swap-and-place work: mirror/floor texturing plus arranging towels and the shelf. Plan roughly a half-day to a full Saturday if you already have the pieces, plus an extra trip to pick up mounting hardware. If anything requires basic assembly, add 1–2 hours. The layout is forgiving because the “anchor, vertical, ground” structure keeps the look cohesive while you adjust.
What if I rent and can’t install a wall shelf?
For renters, use alternatives that still create vertical styling: a freestanding plant stand near the vanity or a tension-rod-style shelf system (where appropriate) can mimic the height role without permanent mounting. Another option is to style only on the counter and keep the shelf idea for later. The key is replacing the shelf’s vertical focus with something at roughly the same height.
My bathroom is smaller—how do I scale this down?
In a smaller bathroom, keep the rug but choose a smaller size that sits under the vanity front edge. Limit decor on the vanity to one “stack” (soap/tray + candle) so reflections don’t feel crowded. Swap the shelf and plant for a single compact plant, and let the mirror be the main reflective anchor. The goal is fewer items, not less warmth.
Where should I shop to get this warm brass-and-neutral look?
Start with the mirror and lighting finishes first—they set the brass direction. Then shop for a jute-like rug in a neutral base tone (warm beige, oat, or sand). For the shelf and storage, look for simple wood-and-woven pieces that match the warmth family. You can source towels and accessories from any home goods store; the texture mix is what makes it look designed.
What’s the biggest mistake people make with bathroom vanity styling?
The biggest mistake is treating the vanity like a display shelf for everything you own. In bathrooms, mirrors double the clutter, so the reflection makes over-styling feel worse than it looks in person. Instead, pick one main tray or grouping, add one small candle or bottle cluster, and let the mirror and lighting do the rest.
More in Bathroom
Brass-and-stone bathroom vanity nook refresh, $800
A soft-brass bathroom vanity nook refresh that leans on warm mirror light, a simple plant shelf, and a grounded jute-style rug. Built with …
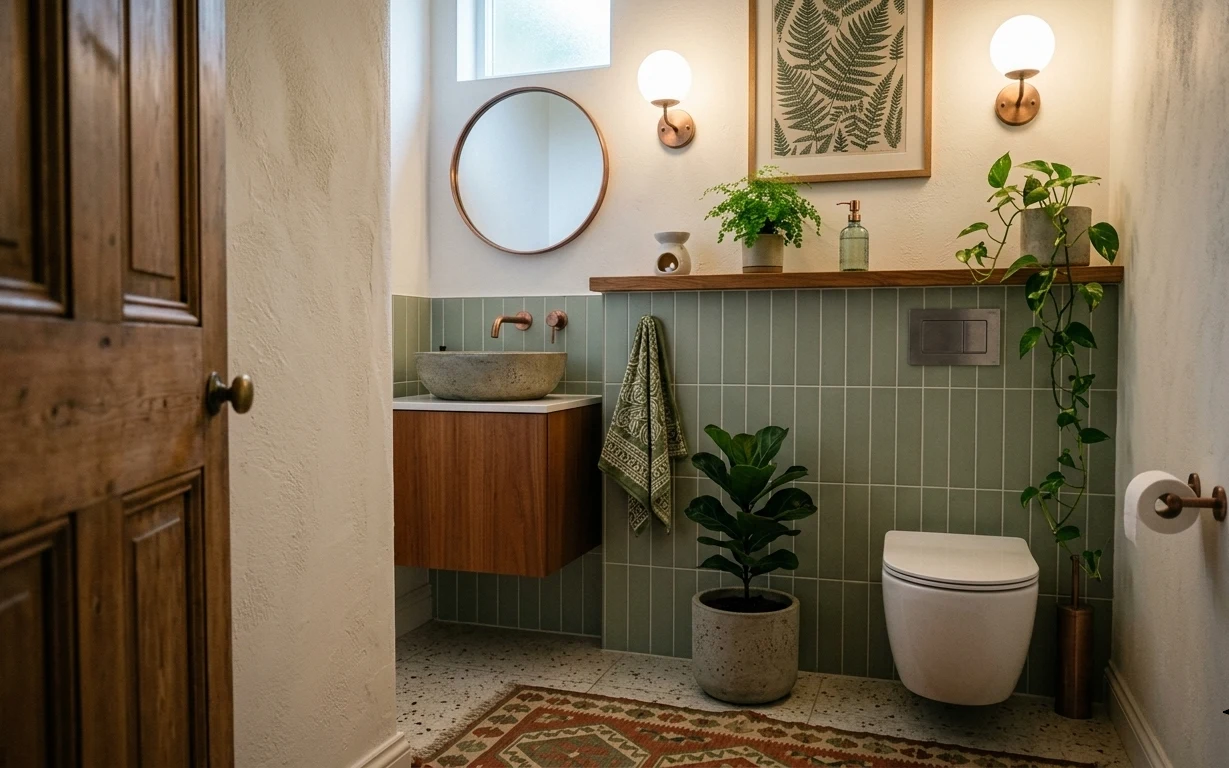
How to build a bathroom vanity nook under $500
A bathroom vanity nook refresh built around renter-safe swaps: a tile-friendly rug, a patterned towel, two live plants, and warm botanical …
6 no-drill ways to refresh a bathroom tub corner for $400
A $400 move-friendly refresh for a bathroom tub corner: swap in soft textiles, add practical storage styling, and keep everything easy to p…