- Best for
- Cozy evening seating
- Cost
- $755 total plan
- Difficulty
- Easy weekend refresh
- Time
- Half to one full weekend
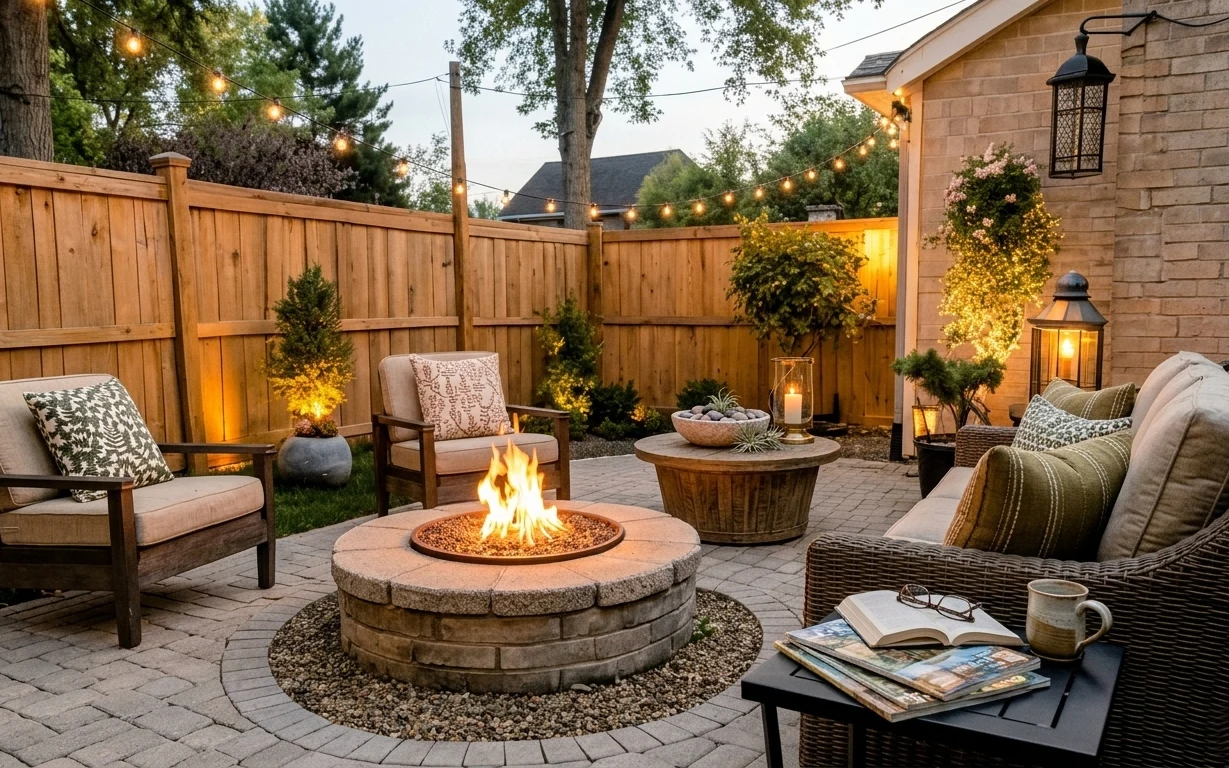
Why rust-brown accents are the patio garden seating of 2026
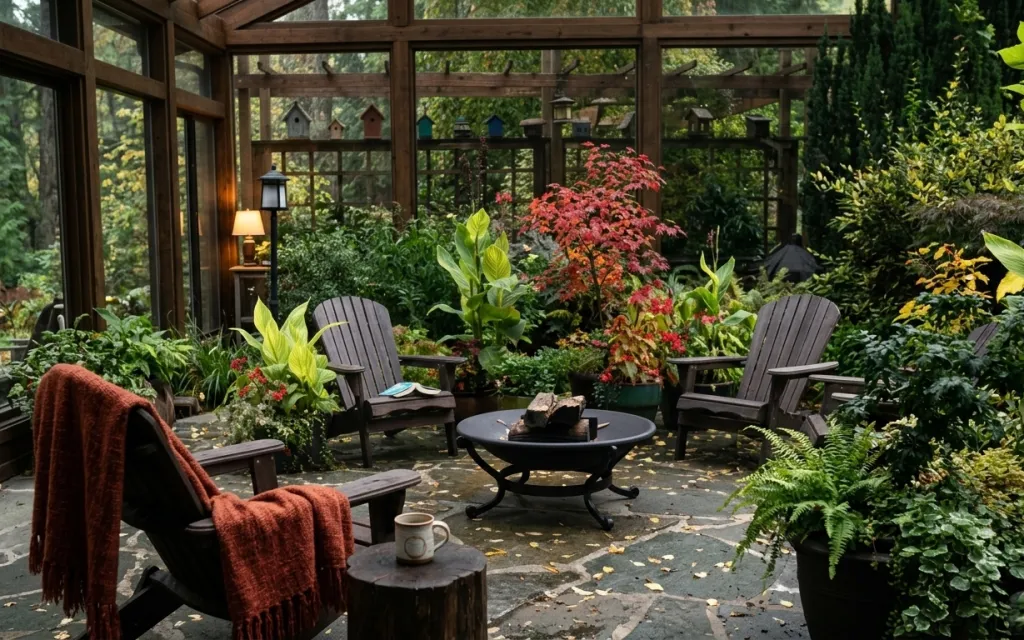
That first thing you notice here isn’t the fire pit table—it’s how the rust-brown throw blanket and the armchair make the whole patio feel calmer, even with all that greenery. The contrast is all about texture: chunky throw fabric, smooth stone patio paving, and the dark metal-and-wood look of the lantern and outdoor furniture. This is the kind of look that feels “styled,” but it’s achievable because you’re working with items you can actually move, swap, and swap again. For homeowners refreshing their own place, it’s a satisfying weekend shortcut.
I almost went too matchy on a similar patio—same chair color, same pot colors, everything too coordinated. What broke me out of that loop was noticing how this setup uses variation: deep green plants in multiple containers, a dark lantern that sits quietly, and a warm throw that gives you one unmistakable focal color. Now, instead of trying to perfect everything, I pick one warm accent and let the plants do the rest.
Layer 1 — left armchair ($170) for the “sit-and-stay” base

This left armchair is the anchor because it’s the largest comfortable shape in the foreground, and its curved silhouette gives your eyes an easy place to land before they travel to the fire pit table. In a garden setting, you don’t want all your furniture to look the same—so choosing a wood-toned, slatted outdoor chair (instead of sleeker metal) keeps it rustic and grounded against the stone patio floor. The trade-off is that slats show dust faster than solid cushions, but the upside is airflow and a lighter visual footprint. If one chair feels like “too little,” remember: it still reads as a set because the other armchair mirrors it.
Balance slats with soft textiles
Wood-and-slat chairs look best when you add one warm fabric element like the throw blanket, so the patio doesn’t feel all hard edges and leaves.
Layer 2 — rust-brown throw blanket ($45) for one warm focal color
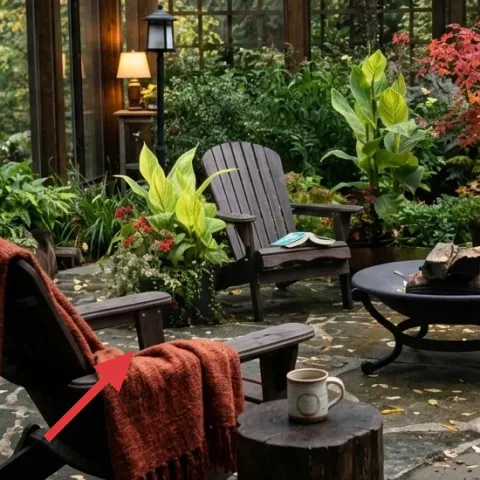
The rust-brown throw blanket is doing a lot of visual work: it adds color, but it also adds “texture contrast” against the deep green plants and the darker outdoor furniture. A simple drape across the left armchair reads intentional without needing perfectly folded edges, which matters outdoors where wind and use happen. The obvious alternative is another neutral—gray or black—but rust looks warmer and pulls your eye toward the seating area, especially with the stone patio floor underneath. The trade-off is maintenance: throws need quick shake-offs after storms so the fabric doesn’t pick up grit.
Drape, don’t tuck
A loose throw reads casual and lived-in; tucking it tightly can make the chair look formal instead of cozy.
Layer 3 — round fire pit table ($220) for the center-of-gravity moment
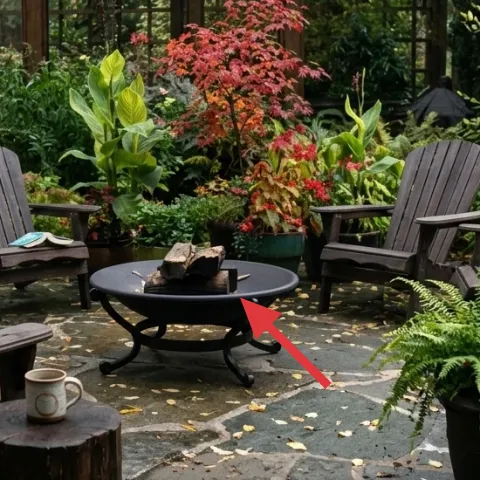
The round fire pit table is the centerpiece because it creates a shared “circle” between both armchairs. A round shape also softens the patio geometry—rectangular window framing and straight paving lines—so everything doesn’t feel angular. Choosing a tabletop fire pit (instead of a standalone fire bowl) keeps the space functional: you get the glow and a surface for small things. The trade-off is that placement matters; set it where the chairs can comfortably face it, and don’t overload the surface. In this photo, the small-scale logs and stones are visible without crowding the scene.
Keep the tabletop clear during use
Even when the flame is subtle, avoid stacking décor or loose fabrics near the fire pit table—outdoor heat moves fast.
Layer 4 — black lantern on side table ($90) for warm, controlled light
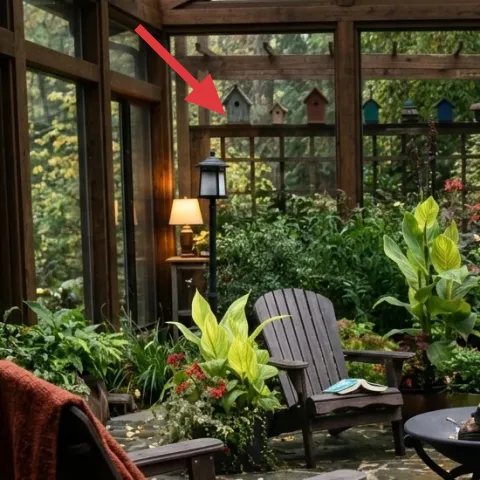
This black lantern on the round side table brings the warm lamplight mood without turning the patio into a runway of lights. The dark finish grounds the brightness from the flame area, while the glass-and-metal silhouette looks at home next to wood wall and window framing. If you went with a bright white string light instead, you’d lose that “quiet evening” feeling and the garden details would feel flatter. The trade-off is that lantern light isn’t as even as overhead fixtures—so it’s best when paired with a seating focal point like the fire pit table.
Point light toward the plants, not just the chairs
Lantern light should graze leaves and fronds so the patio depth shows up after dark.
Layer 5 — round side table ($100) for a landing spot near the seats

The round side table is small, but it matters because it creates a “micro-surface” right by the left chair and lantern. That’s where your hands go—mug, small tray, lantern placement—so the seating feels complete rather than temporary. A round top also echoes the fire pit table, which helps the whole patio look cohesive even with different shapes in the background. The alternative would be a rectangular patio side table, but the straight edges can fight the curved center. The trade-off is stability: choose a table with a wide base so it doesn’t wobble on uneven stone patio paving.
Use it for light, not décor clutter
When you keep the side table simple—lantern plus one small item—it reads intentional in daylight and evening.
Layer 6 — large flowering tree in a planter ($70) for vertical drama
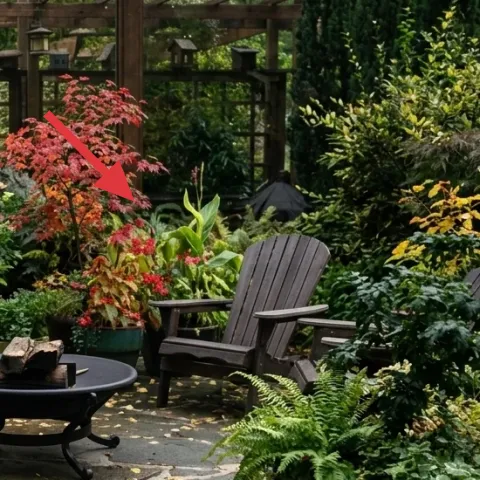
The large flowering tree in a planter does the heavy lifting on height. That tall, colorful shape gives your eye a “vertical track” so the patio doesn’t feel like it’s only about chairs and table. In a garden setting, this is the difference between flat and lush: even when plants are in the background, the flowering tree makes the scene look layered. The trade-off is cost and care—big plants cost more and need watering schedules—but you can start with a smaller flowering tree and size up later. The look here relies on that upward motion more than on extra décor.
Pick one flowering moment
Let one planter do the blooms; then fill around it with ferns and shrubs for texture.
Layer 7 — potted fern ($60) with a DIY-painted planter pot
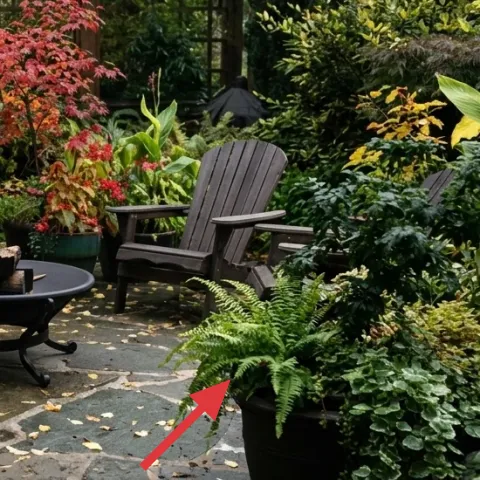
Make it instead of buying it
Paint the planter pot that holds the potted fern so the foliage reads richer against the stone patio floor and dark furniture.
Materials
- Outdoor primer (spray or brush-on) — 1 can — home improvement store — $8
- Outdoor-rated paint (matte) — 1 small can — home improvement store — $7
- Painter’s tape — 1 roll — hardware store — $6
- Foam brush/paint brush — 1 pack — hardware store — $10
- Sandpaper (220–320 grit) — 1 sheet/pack — hardware store — $4
Steps
- Wash the planter pot with soap and water, then let it dry fully.
- Lightly scuff the surface with sandpaper so primer can grip.
- Tape off any rim areas you want to keep unpainted.
- Apply outdoor primer in thin coats and let it dry completely.
- Paint the planter pot with an even first coat.
- Let it dry, then add a second coat for solid color.
- Remove tape carefully.
- Let the paint cure overnight before moving the plant back outside.
Total DIY cost: $35 — saves about $25 over buying.
The potted fern works as the “soft edge” plant—its fronds add movement and fill in the space where chairs and the fire pit table don’t reach. Because it’s in the foreground, the planter color matters: painting the pot makes the fern look more intentional and less like an afterthought among all the other planters. The trade-off is that painted pots need outdoor paint made for weather, or you’ll see scuffing over time. The visual win is huge: you keep the same plant, but it reads like part of the design plan instead of just a spot for greenery.
Match the pot to your warm accent
Even a subtle rust tone on the planter ties the fern to the rust-brown throw blanket without making everything match perfectly.
The cost, layer by layer
| Layer | Item | Cost |
|---|---|---|
| 1 | left armchair | $170 |
| 2 | rust-brown throw blanket | $45 |
| 3 | round fire pit table | $220 |
| 4 | black lantern on side table | $90 |
| 5 | round side table | $100 |
| 6 | large flowering tree in a planter | $70 |
| 7 | potted fern in painted planter pot (DIY) | $60 |
| Total | $755 | |
For a cheaper version, start with thrifted or secondhand armchairs, choose a smaller fire pit table, and use one statement flowering planter plus a couple of inexpensive ferns. Keep lighting simple with a single black lantern and one warm throw.
What worked, what didn't (across the whole room)
The patio reads balanced because the seating shapes frame one clear center and the plants add depth without clutter. The warm lantern light makes the scene feel inviting after sunset, but only if the tabletop stays practical. The only weak spot is relying on too many “similar” greens—depth improves when one planter blooms.
What worked
- The left armchair gives a clear foreground focal point against the stone patio floor.
- The rust-brown throw blanket adds one warm color that looks intentional, not accidental.
- The round fire pit table creates an obvious seating circle between both armchairs.
- The black lantern on the round side table adds warm, controlled light without overhead glare.
- The large flowering tree in a planter provides vertical depth so the patio doesn’t feel flat.
- The potted fern softens the corners with delicate fronds near the ground.
What didn't
- Too many flowering plants would compete with each other and make the center less clear.
- Using bright, cool-white lighting can flatten the wood-and-plant tones.
- Letting décor crowd the fire pit table makes the patio feel less usable.
- If the throw blanket looks too tightly folded, the whole seating area reads formal instead of lived-in.
- Skipping the planter pot color makes the fern blend in with surrounding greens.
What we'd skip if we did it again
Skip buying multiple matching planters. Pick one planter pot color (then DIY-paint extras if needed) so the greenery looks curated, not uniform.
Skip cool-toned lighting. A black lantern with warm light keeps the wood wall and window framing cozy, while bright whites tend to wash out the garden colors.
Skip clutter on the round fire pit table. The scene already has texture from the rust-brown throw and layered plants—keeping the tabletop simple preserves the focal point.
Frequently asked
How long does a refresh like this usually take?
If you’re starting from “mostly ready” patio basics, plan on a half-day for sourcing and a full weekend for setting up furniture and plants. Painting the planter pot (if you DIY) adds a day for drying and curing. The quickest win is ordering one cohesive warm textile, then spacing plants so they layer behind and around the seating.
What if I rent and can’t make permanent changes?
This setup is inherently renter-friendly because it relies on movable items: armchairs, a side table, a lantern, and potted plants. Even the DIY portion (painting a planter pot) doesn’t affect walls or floors. When you shop, prioritize things you can take with you—like the throw blanket and the lantern—then build the plant layers around them.
My patio is smaller—how do I adapt the layout?
Keep the “circle” concept but scale down the centerpiece. Instead of a large fire pit table, choose a smaller version that still sits between the chairs. For plants, use fewer containers but keep the height: one flowering planter plus two ferns can still create depth. Leave a clear path on the stone patio floor so the seating feels easy to use.
Where’s the best place to shop for these exact pieces?
Start with big-ticket items at patio furniture retailers or marketplaces, then fill in with lighting and textiles from home goods stores. Ferns and flowering planters are often cheapest at local nurseries where you can see leaf health in person. For the lantern and throw, look for materials that match weather exposure—so the patio stays good-looking longer.
What’s the biggest mistake people make with outdoor seating styling?
Over-lighting and over-planting in the same style. If every plant blooms at the same level and every light is the same brightness, the scene gets noisy and your fire pit table loses its role. Pick one warm accent textile, one warm lantern, one flowering focal plant, and then fill with texture plants like ferns.
More in Outdoor & Patio

Rust-and-green patio garden seating refresh, $800
A patio garden seating setup with rust-brown warmth and deep-green plants—now you can recreate the look for about $800. This weekend-friend…
Under $500: move-ready patio seating area refresh with 7 no-drill swaps
A warm, backyard patio seating area refresh on a $500 shared-housing budget—using seven move-friendly upgrades (pillows, string lights, a l…
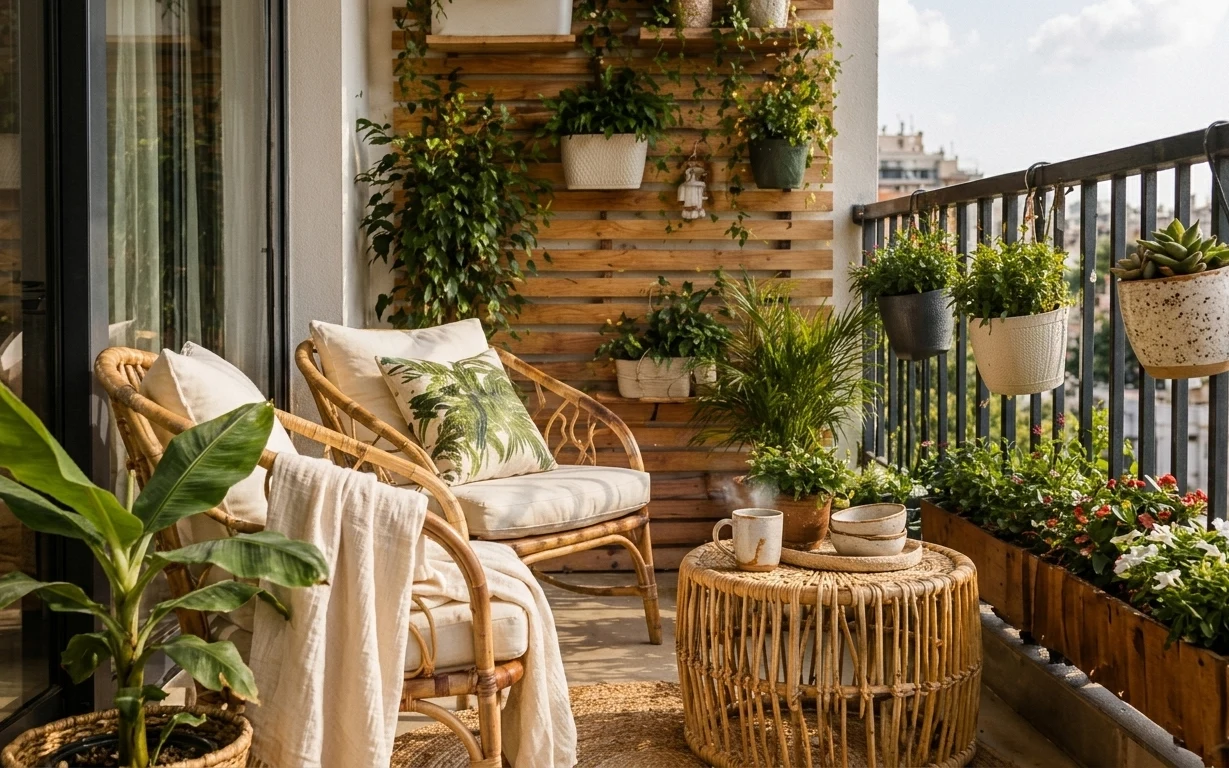
Under $600: a greenery-forward balcony seating refresh
A greenery-forward balcony seating nook is all about flexible swaps: rug underfoot, rattan textures, and railing planters. This $600 refres…