- Square footage
- Balcony corners (under 50 sq ft)
- Cost
- $570 total for 7 swaps
- Difficulty
- Easy
- Renter-safe
- Yes (no drilling planters assumed)
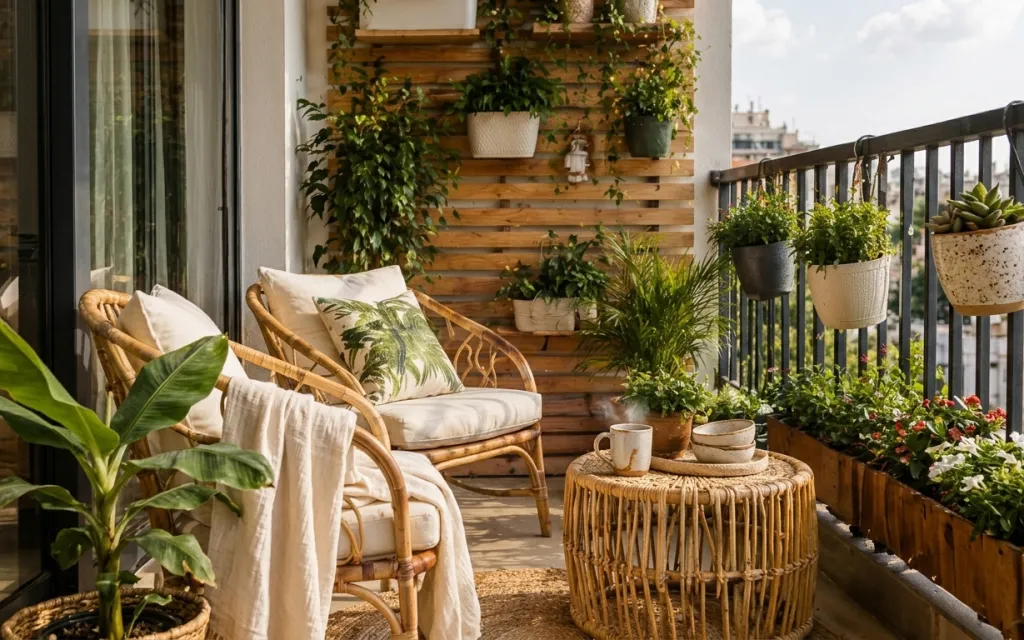
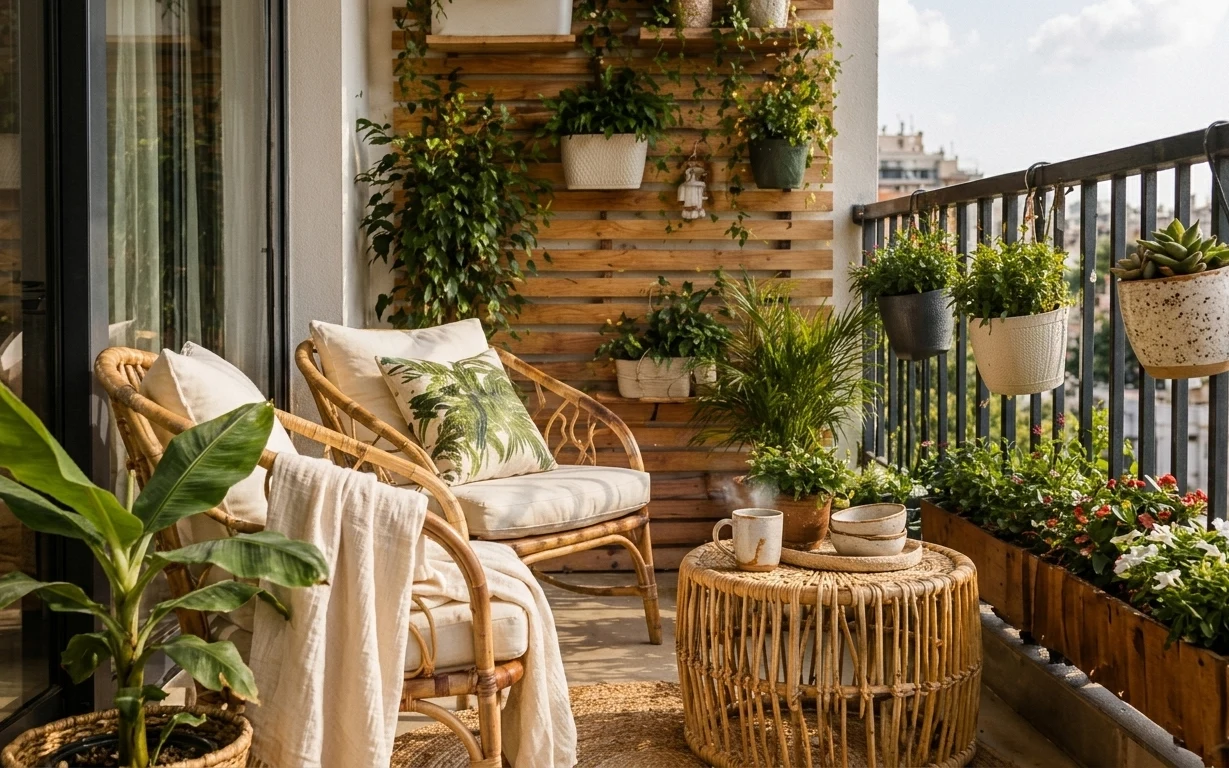
Why greenery-on-rattan setup is the balcony seating nook of 2026
What I love about this balcony is how the plants and textures do the heavy lifting. A woven rug mat grounds the seating, while cream cushions and a white linen throw soften the rattan frames. The wooden slat planter wall adds structure, and the ceramic mugs on the side table make it feel ready for an actual morning routine. This is very doable for shared housing, because the “big” visual impact comes from things you can box up and bring to the next lease.
I used to overthink outdoor decorating and end up with either too many small decor pieces or not enough softness. The shift for me was noticing that the best look here isn’t just “plants everywhere”—it’s the contrast of rough wood, woven fiber, and crisp light textiles. Once I started matching texture to texture (linen against rattan, green against cream), everything stopped looking random.
Layer 1 — woven area rug mat ($150) Patterned enough to hide patio wear
This woven rug mat is the anchor under the chairs, and it’s the easiest way to make a balcony feel like a room instead of an outdoor landing. Look at how it sits under the front legs of the rattan: it visually ties the seating together and cushions the feel underfoot. The trade-off is that woven textures shed a little and need quick shake-downs, but that’s a small price for the lived-in look. Compared with a smooth flat outdoor mat, this one hides scuffs and dirt tracks better day to day.
Pick texture over perfect flatness
Go for woven patterns that forgive muddy shoes; they read “designed” even when life isn’t.
Layer 2 — cream chair cushion cover set ($30) Freshens the green-to-cream contrast
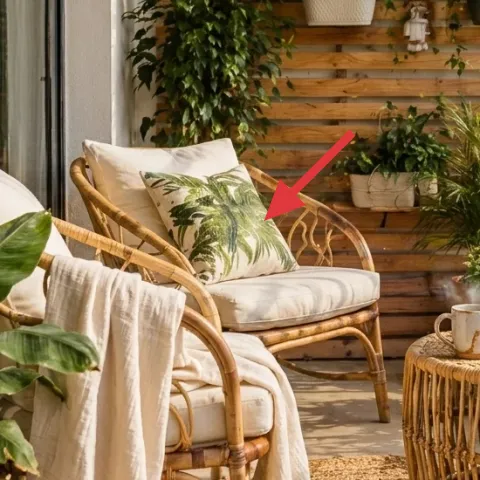
These cream chair cushion covers pull the whole palette together by acting like a neutral buffer for all the green foliage. They also keep the rattan frame from feeling too heavy, since the cushion color mirrors the light tones in the wooden slat backdrop. The obvious alternative would be matching the cushions to the plants, but that can make everything look busy fast—cream keeps the plants the star. Keep the covers removable so they pack flat and can be swapped between chairs at your next place.
Make it instead of buying it
DIY dyed pillow covers in a soft off-white wash so your cushion reads creamy next to the greenery, without buying a new set.
Materials
- Plain off-white pillow covers — 2 — craft store — $12
- Fabric dye (light neutral) — 1 package — craft store — $8
- Salt (for dye setting) — 1 small bag — grocery/market — $2
- Rubber gloves — 1 pair — pharmacy — $2
Steps
- Soak the pillow covers according to the dye instructions so the fabric takes color evenly.
- Dissolve the dye and salt in water to your chosen shade depth (aim for a “cream-wash,” not a strong color).
- Submerge and agitate the covers until the color looks uniform along the seams.
- Rinse in cool water until it runs clear, then follow the dye brand’s setting step (often warm wash or heat set).
- Air-dry fully, then fluff and reinstall on the cushion inserts.
Total DIY cost: $24 — saves about $6 over buying.
Layer 3 — white linen throw blanket ($35) Adds crisp softness over rattan
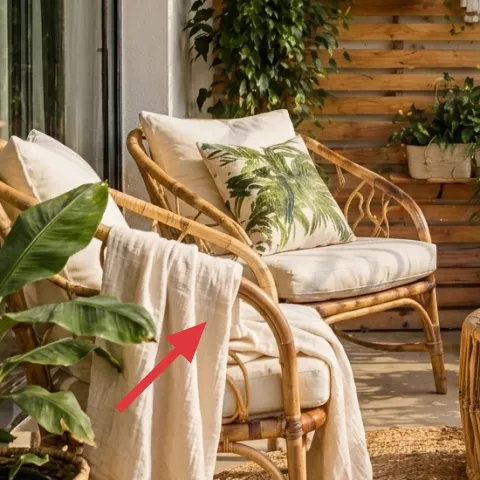
This white linen throw draped across the chair reads like “intentional mess” in the best way: it gives you a bright, breathable layer right where the rattan would otherwise feel dry and structural. Linen’s texture is visible at close range, so it upgrades the whole corner even when you only use one blanket. The trade-off is that linen shows wrinkles, but that’s part of the relaxed outdoor look. A knit throw could be cozier, yet it can look too heavy outdoors and trap more dust when the air gets breezy.
Linen works like a light filter
Against green plants, crisp white reads fresh even in daylight, without competing with the foliage.
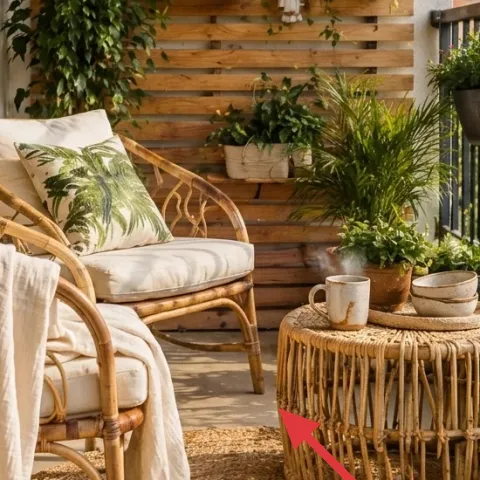
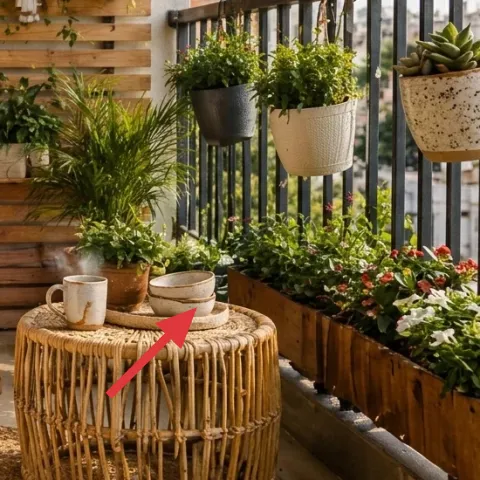
Layer 4 — round woven rattan side table ($180) Gives you a place for plants + mugs
The round woven rattan side table is doing two jobs at once here: it supports the tabletop ceramics and it repeats the rattan rhythm from the chairs. The round shape is also more forgiving on a balcony, where you want movement without sharp corners. I like this over a square or glass-top table because the woven texture ties back to the rug mat and keeps the space feeling warm. The trade-off is that woven surfaces can snag, so plan to use coasters for drinks and keep a quick wipe-down routine.
Style with height, not just more objects
Add one small plant plus one mug; the different heights look “curated” without extra clutter.
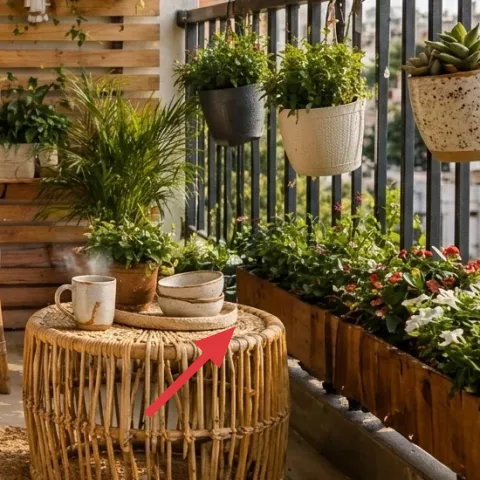
Layer 5 — ceramic mugs on the side table ($35) Makes the setup feel actually used
These ceramic mugs add a believable moment—coffee, tea, or a quick rinse—so the balcony doesn’t read like a photo set. The creamy tones echo the cushions and the rug, while the matte glaze keeps the focus on texture instead of shine. The alternative would be decorative glassware, but it tends to look fragile and less livable outdoors. Ceramic also survives the “real life” cycle of spills and quick wipes better. Keep the mugs grouped rather than scattered so the table stays balanced next to the round shape.
Matte beats mirror on bright days
In daylight, shiny glass can flare; matte ceramics stay calm and readable.
Layer 6 — hanging plant planters on the railing ($40) Creates a vertical green band
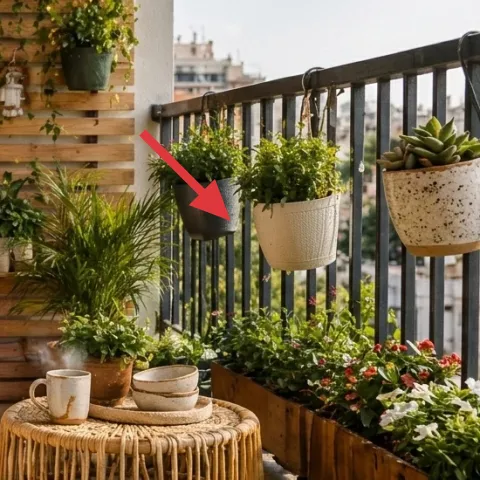
The hanging planters on the railing give you a vertical line of greenery that makes the balcony look fuller without taking up floor space. What makes this work is the mix of pot sizes and the way the foliage spills at different lengths. If you only used one large planter, the sightline would feel flat; hanging planters spread the look across the whole railing height. The trade-off is managing water, since overhead planters need a basic empty-and-refill rhythm. For move-friendly setups, choose lightweight planters you can lift off and repot later.
Don’t overload a single hanger
Weight adds up fast once the soil is wet—stick to a few planters per rail section and check stability.
Layer 7 — mixed potted plants along the railing ($100) Keeps the color layered, not one-note
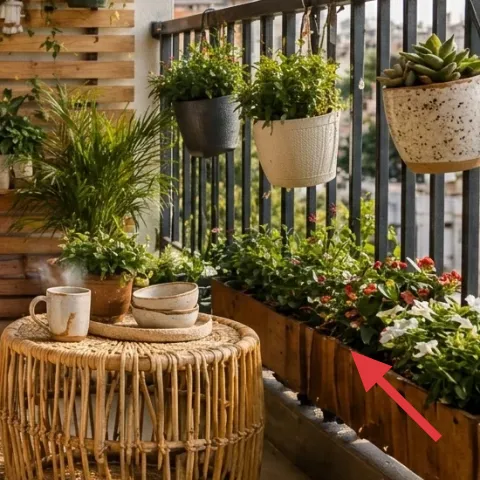
The mixed potted plants along the railing are what keeps the whole scene from looking like one big “green blob.” You can see different leaf shapes and growth habits, which is exactly what makes the balcony feel natural and collected rather than matchy. I’d rather buy three smaller plants that vary in texture than one plant with the same silhouette, because variety reads at a glance. This also lets you swap one plant out over time as it gets leggy. Choose plants that tolerate your balcony light levels so the look stays full for weeks, not days.
Match leaf texture to your textiles
Pair fine, feathery leaves with linen and woven fibers for a calmer rhythm.
The cost, layer by layer
| Layer | Item | Cost |
|---|---|---|
| 1 | Woven area rug mat | $150 |
| 2 | Cream chair cushion cover set (DIY) | $30 |
| 3 | White linen throw blanket | $35 |
| 4 | Round woven rattan side table | $180 |
| 5 | Ceramic mugs on the side table | $35 |
| 6 | Hanging plant planters on the railing | $40 |
| 7 | Mixed potted plants along the railing | $100 |
| Total | $570 | |
If you need a cheaper version, keep the rattan vibe but switch the side table to a simpler woven top or a thrifted bamboo table, and choose two plants instead of three. The rug mat and cushion color matter more for the overall look than expensive planter styling.
What worked, what didn't (across the whole room)
The biggest win is how the textures—woven rug, rattan furniture, and linen—make the plants look intentional instead of accidental. The rail planters add vertical interest without cluttering the floor, and the ceramic mugs make the scene feel lived-in. The main drawback is practical: watering overhead planters is the one routine you’ll actually notice.
What worked
- The woven rug mat grounds two chairs so the balcony reads like a usable seating zone.
- Cream cushion covers soften rattan and keep the greenery from taking over the palette.
- A white linen throw adds visible texture without making the corner feel heavy.
- The round woven side table repeats the rattan look and supports plants plus daily-use ceramics.
- Vertical railing planters create coverage even when balcony floor space is limited.
- Mixing plant leaf shapes makes the scene look collected rather than one-note green.
What didn't
- Overhead planters demand a quick empty-and-refill routine to avoid drips and mess.
- Too many similarly shaped plants can make the railing feel flat from across the balcony.
- Light textiles can pick up pollen and dust faster outdoors, so quick shake-outs help.
- Placing ceramics in a single cluster can look busy if the table surface is crowded.
What we'd skip if we did it again
Skip the “all-neutral” plant plan. If every pot has the same leaf shape, the balcony loses the collected look and starts feeling like a filler shelf. Instead, keep the colors calm (creams and woods) but vary leaf textures so each plant reads as its own shape.
Skip buying matching cushions in the first shade that looks close. Small undertone differences show up next to green foliage fast. A dyed cream-wash cover reads cohesive because it sits between the linen throw and the plants, instead of competing with either.
Skip heavy or hard-to-move planters for shared-housing setups. Once the next lease start date arrives, dense planters become a stress point. Choose lighter hanging planters and mixed small pots that lift out easily, then repot on move day without losing your whole palette.
Frequently asked
How long does this kind of balcony refresh take?
For most people, plan on 2–4 hours total: one hour for setting the rug mat, one for arranging the chairs and throw, and another for placing plants and styling the side table. The “extra” time usually comes from finding the best sightline along the railing so the plants drape at different lengths.
Is this renter-friendly if I can’t drill anything into the railing or wall?
The core of the look is movable: a rug mat, removable cushion covers, a linen throw, and lightweight pots you can reposition. For planters, prioritize options that clip, hang with removable hardware, or sit securely on the rail without screws. Keep your choices lightweight so you can lift everything into boxes quickly.
What if my balcony is smaller or narrower than this one?
On a smaller balcony, keep the rug mat and one chair as your “anchor,” then use railing planters for the rest of the visual weight. A round side table also helps because it doesn’t eat corner space like a square table. Avoid adding more than two plant clusters in the same line so the eye stays calm.
What if my balcony gets less light than this photo?
Swap in plants that match your light level (lower light usually needs slower-growing greens). The style still works because the look comes from leaf texture variety and cream-and-wood contrast, not a specific plant species. Choose fewer plants first, then add one new pot each time you notice a spot is stable.
Where should I shop differently to keep it budget-friendly?
For the biggest savings, prioritize the woven rug mat and linen throw from discount retailers or home clearance sections, since they do a lot of visual work. Plants are often cheaper at local nurseries and market days. If you see ceramic mugs at thrift stores in a matching cream tone, that’s an easy upgrade with minimal cost.
Biggest mistake for this room type?
The most common miss is treating the balcony like a “decor shelf” instead of a layered living setup. When the only accents are small objects, the space looks busy but not finished. Start with the rug mat and cushion color first, then add one side table styling moment, and only then fill in with planters.
More in Outdoor & Patio
Under $600: a greenery-forward balcony seating refresh
A greenery-forward balcony seating nook is all about flexible swaps: rug underfoot, rattan textures, and railing planters. This $600 refres…
7 renter porch upgrades for $500 with a no-drill rug and pillows
A bright porch lounge refresh with renter-safe swaps that don’t require permission: rug, layered textiles, and plants. This $500 plan focus…

7 renter-friendly ways to soften a patio seating area
A patio seating refresh for shared renters: $400 worth of move-friendly swaps (rug, throws, lights, and planters) keeps the look intentiona…