- Best for
- plant styling + wall texture
- Cost
- Under $500
- Difficulty
- Easy (mostly styling)
- Time
- 1 afternoon
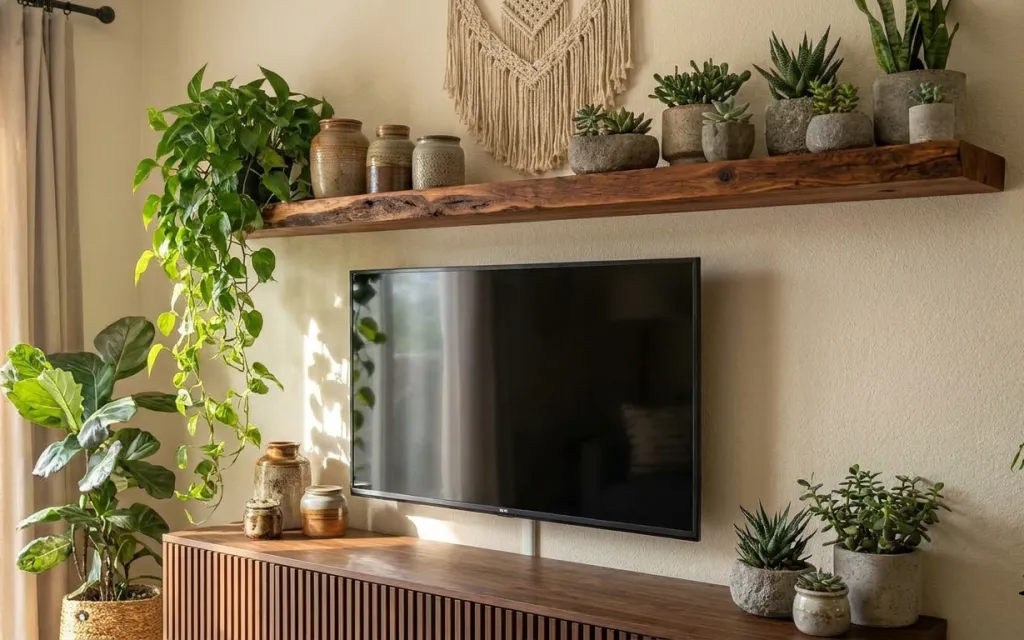
Why olive-and-cream console styling is the TV plant wall of 2026
This corner works because the textures repeat at different heights: drapey beige on the left, the fringed macramé high on the wall, and then the wood console and tabletop acting like a warm anchor. The plants aren’t one-note, either—there’s a large leafy plant with soft stems, plus low succulents in stoneware tones. Those materials (textured cord, matte plant leaves, and warm wood grain) photograph well even in daylight. For shared housing, the best part is that everything here is meant to pack: textiles fold, planters lift out, and wall decor can be swapped without taking the wall with it.
I’ve moved so many times that I now scan every “decor” purchase for what’s left behind. Years ago I bought a wall solution that looked great in one apartment and then turned into a half-empty box after the move—no one wants that. What changed my mind here is choosing freestanding or clip-on-friendly pieces and sticking to soft goods that can travel. The result is a layered wall moment that stays flexible when leases don’t.
Layer 1 — beige curtain panel pair ($50) Drapes light without overcommitting

A pair of beige curtain panels adds instant vertical softness, especially when the wall is light stucco and the decor leans earthy-neutrals. In the photo, the curtains hang straight and airy, so the plant-heavy styling doesn’t feel crowded. Buying panels instead of trying to “make do” with a small cloth keeps the line of sight calm: you get height, but not a loud pattern. The trade-off is that curtains take floor-space while you move—so fold them with a little wrap around the rod pocket and keep the hardware separate. It’s still far easier than any wall install.
Hang for height, not for perfection
If the landlord’s hardware placement is fixed, aim for a slightly higher ceiling line by using the existing rod position and keeping folds even from the start.
Layer 2 — macramé wall hanging ($55) Adds boho texture above the console
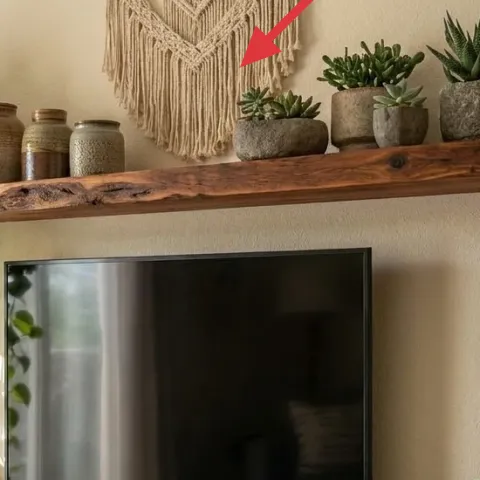
The macramé wall hanging is what makes the palette feel intentional instead of “plants on a table.” Its cream cord and fringe create a gentle texture gradient—busy enough to read, but not sharp or glossy. Because the decor is high up, it also helps balance the large leafy plant volume on the left and the succulent clusters on the right. The move-friendly part is that macramé is usually designed to come down easily; it doesn’t require replacing any fixed surfaces. The trade-off is scale: go too small and it disappears, so picking a medium-width piece that can hold its own in the center reads best.
Why cord works in shared spaces
Cord textures are forgiving on walls—minor unevenness in stucco or old paint doesn’t matter once the hanging sits flat and shadowed.
Layer 3 — wood TV media console ($120) Brings warm grain between wall and plants
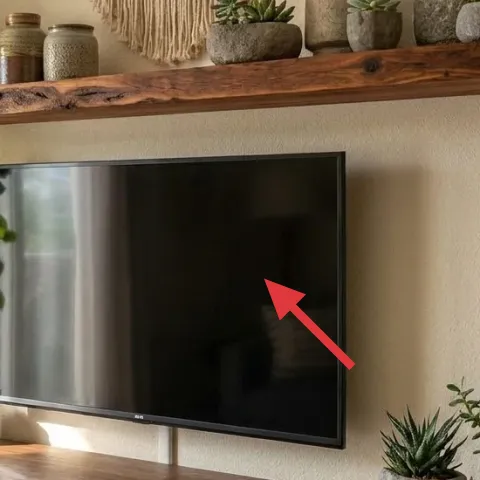
The wood TV media console is the visual “floor” of the setup: warm walnut-brown tone, straight lines, and enough flat area to stage jars and planters. That matters because the wall is otherwise plain, and the plants are the only color anchors—without a console, everything would compete. A console also gives you a controlled staging zone, so the succulents don’t look scattered. The trade-off I’d accept is that you’ll need to measure for your TV footprint and keep clearance for airflow behind the screen. Still, consoles are typically lighter than full entertainment units and can break down for moving more easily than wall-to-wall options.
Avoid heavy add-ons on top
If the console top feels crowded, skip stacking tall planters on the far edge—leaning shifts during moves can knock fragile pots.
Layer 4 — large leafy plant in woven planter ($60) Adds volume and soft movement
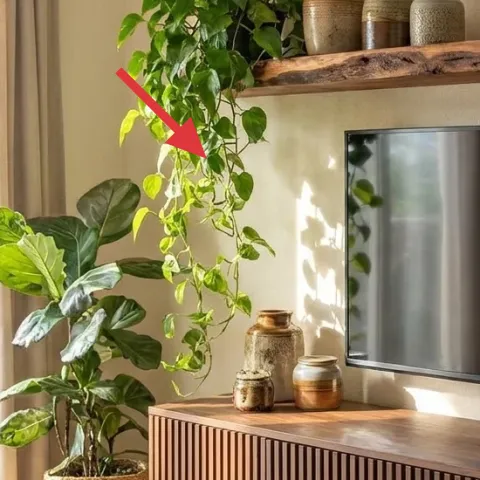
The large leafy plant in a woven planter is the “center-left” moment here—broad leaves, matte green, and that relaxed, boho shape that makes the wall feel lived-in. Visually, it fills the space that a small vase would leave empty, and the woven basket texture picks up the macramé’s handmade feel. For a shared-house refresh, it’s also a smart investment: plant shape reads even when the rest of the decor changes next year. The trade-off is maintenance—leafy plants need consistent light and occasional watering—but the pot itself is easy to lift out, wrap, and transport.
Pick a plant shape with staying power
If the room lighting varies, choose a plant with sturdy stems and replaceable leaves rather than something delicate that drops fast.
Layer 5 — glass storage jars ($30) Turns “random clutter” into a styled group
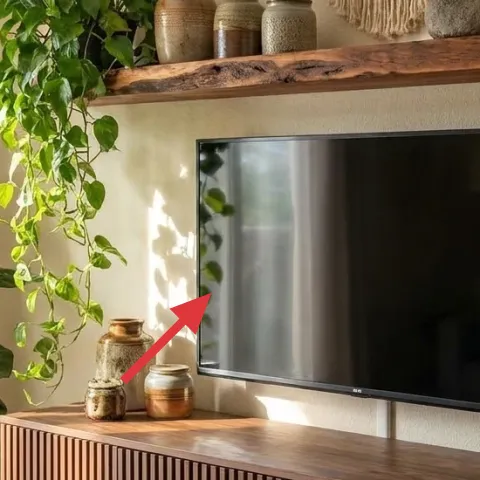
Those glass storage jars work because they’re functional and decorative at the same time. Their clear and warm tones echo the wood console, while the lids and surfaces add small visual highlights that prevent the shelf from looking flat. This kind of object grouping is a great shared-housing trick: the jars pack flat (or at least nest), and the styling doesn’t depend on permanent changes. The trade-off is that glass is breakable—so wrap each jar individually and keep them in a box with dividers. In the photo, the jars sit near the plant line, which creates a clear staging rhythm instead of a random scatter.
Make a mini-height ladder
Mix one taller jar with a shorter one so the group reads as a plan, not a single shelf moment.
Layer 6 — small succulent plants in gray ceramic pots on floating shelf ($70) DIY the look with painted terracotta
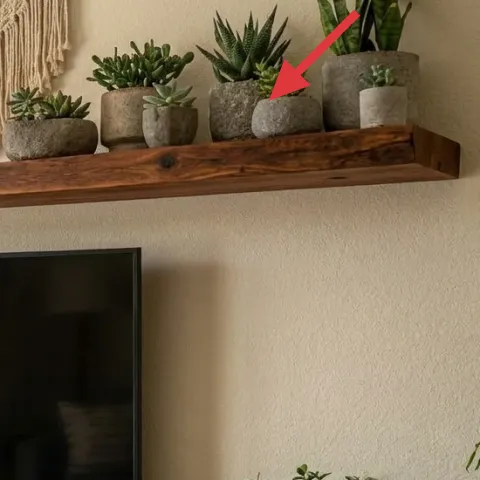
This layer is all about the shelf’s right-side rhythm: compact succulents, matte gray pots, and a tight grouping that looks curated without needing a gallery layout. The gray reads neutral against the warm wood and cream wall, and the succulents keep the shape clean so the wall doesn’t feel cluttered. Buying a ready-made set is the easiest, but DIY keeps it cheaper and lets the pots match any future palette. The trade-off is prep: painted pots take a little time to dry and should be sealed for durability, especially if they’ll see watering. Still, it’s one of the most move-friendly decor swaps because it’s literally a bundle of objects you can wrap.
Make it instead of buying it
Paint a terracotta planter set in matte gray to mimic the succulent pot tones without replacing any fixed wall pieces.
Materials
- Terracotta pots (4 small), assorted sizes — $20
- Matte gray spray paint — $15
- Small paint brush (detail) — $10
- Light sandpaper (fine grit) — $8
- Painter’s tape — $3
Steps
- Lightly sand the terracotta so paint grips evenly.
- Wipe dust off and set pots on a protected surface to prevent overspray.
- Apply matte gray spray paint in thin coats, rotating pots for even coverage.
- Use the small brush to smooth seams and cover edges where spray misses.
- Let pots dry fully, then remove tape (if used for clean bands).
- Check corners for thin spots and add one last coat if needed.
Total DIY cost: $56 — saves about $14 over buying.
Layer 7 — small potted succulents on right console ($35) Completes the right-side balance

The right console succulents are smaller, but they do important “composition work”: they create a visual counterweight to the large leafy plant on the left and they bring low, calm color near the TV. In the photo, the pots are grouped closely, which keeps the overall look tidy instead of scattered. For this type of refresh, small pots are a smart choice because they’re easy to swap later—one pot can move to a different shelf, table, or windowsill in the next place. The trade-off is that succulents can be slow to fill out, so choose compact rosettes or clustered plants that already read full from a distance.
Cluster, don’t line them up
Group 2–3 small pots together so they share a shadow shape; separated pots often look accidental in photos.
The cost, layer by layer
| Layer | Item | Cost |
|---|---|---|
| 1 | beige curtain panel pair | $50 |
| 2 | macramé wall hanging | $55 |
| 3 | wood TV media console | $120 |
| 4 | large leafy plant in woven planter | $60 |
| 5 | glass storage jars | $30 |
| 6 | small succulent pot set (DIY ~$56 materials) | $70 |
| 7 | small potted succulents on right console | $35 |
| Total | $420 | |
A cheaper variant keeps the same layout but swaps the wood console for a basic freestanding media stand and uses smaller plant groupings. Curtain panels can be replaced with a single-room-length panel per side to lower cost while still preserving the vertical softness.
What worked, what didn't (across the whole room)
The best reads came from repeating texture: macramé up high, wood in the middle, and matte plants across the console surface. Grouping small objects (jars and succulents) made the TV area look intentional instead of like décor landed mid-move. The only area that could tip into messy quickly was the shelf: too many different pot shapes reduces the calm, neutral effect.
What worked
- Beige curtain panels soften the bright wall and give the left side a calmer vertical frame.
- Macramé adds handmade texture that photographs well without relying on color changes.
- The wood TV media console creates a warm staging zone for jars and pots.
- Plant height variety (leafy + low succulents) keeps the composition balanced around the TV.
- Gray ceramic pots keep the palette neutral while still feeling textured.
What didn't
- A single planter alone reads flat; grouping makes the shelf look designed.
- Too many jar sizes can turn the arrangement into clutter instead of a tidy ladder of heights.
- Following a “buy all matching pots” approach can look uniform and less interesting.
- Skipping curtain height makes the plant wall feel top-heavy.
What we'd skip if we did it again
Skip a matching “set” mentality for the pots and jars. The look here relies on texture variety (woven, ceramic, clear glass) rather than identical shapes. If everything is the same, the arrangement starts to read like store display items instead of personal styling.
Skip anything that requires wall work you can’t undo cleanly. A shared apartment has a clock on it, and heavy installs are the easiest way to end up with decor you can’t bring forward to the next lease.
Skip fragile glass on the farthest edge of the console. Jars look great, but the safest staging is toward the center so they don’t get knocked during everyday movement and packing.
Frequently asked
How long does a refresh like this take in a shared apartment?
Plan for about 60–120 minutes on a first pass: hang the macramé and curtain panels, then stage the plants and jars. The DIY-painted pots add another window of drying time, but you can still do the rest that day. If everything is pre-boxed for moving, setup on move-in day is quick.
Is this renter-friendly without drilling into walls?
Yes—the macramé can be hung using removable hooks, and the curtains use existing rods or standard mounting hardware you’re not replacing. The main “look” comes from objects and textiles you can lift down and pack. The key is avoiding permanent installs and keeping any wall contact lightweight and removable.
What if the room is smaller than the photo?
Go smaller by clustering fewer pots and keeping the shelf staging tighter. Choose a curtain length that still reaches high but doesn’t pool at the floor, and keep the jar group to two or three pieces. The composition works best when the plant heights create a clear ladder rather than covering every visible surface.
What if there’s less natural light than this scene?
Choose plants that tolerate lower light and keep the textiles light. Matte gray pots and warm wood still read well, but you may want to rely more on the curtain line and the macramé texture instead of bright leaf color. Small succulents can also be swapped seasonally to keep the wall looking full.
Where are the easiest places to shop for these items?
For curtains and basic storage jars, look at home goods retailers and budget online sellers. Indoor plants and pots are easiest at garden centers or local plant shops because you can pick shapes that match the image scale. Macramé wall hangings are widely available in craft and home decor shops, usually in ready-to-hang sizes.
More in Living Room

Under $500: move-ready TV plant wall with warm earth tones
A TV plant wall refresh for shared housing: curtains, macramé, a wood media console look, and layered planters that pack up in boxes. This …
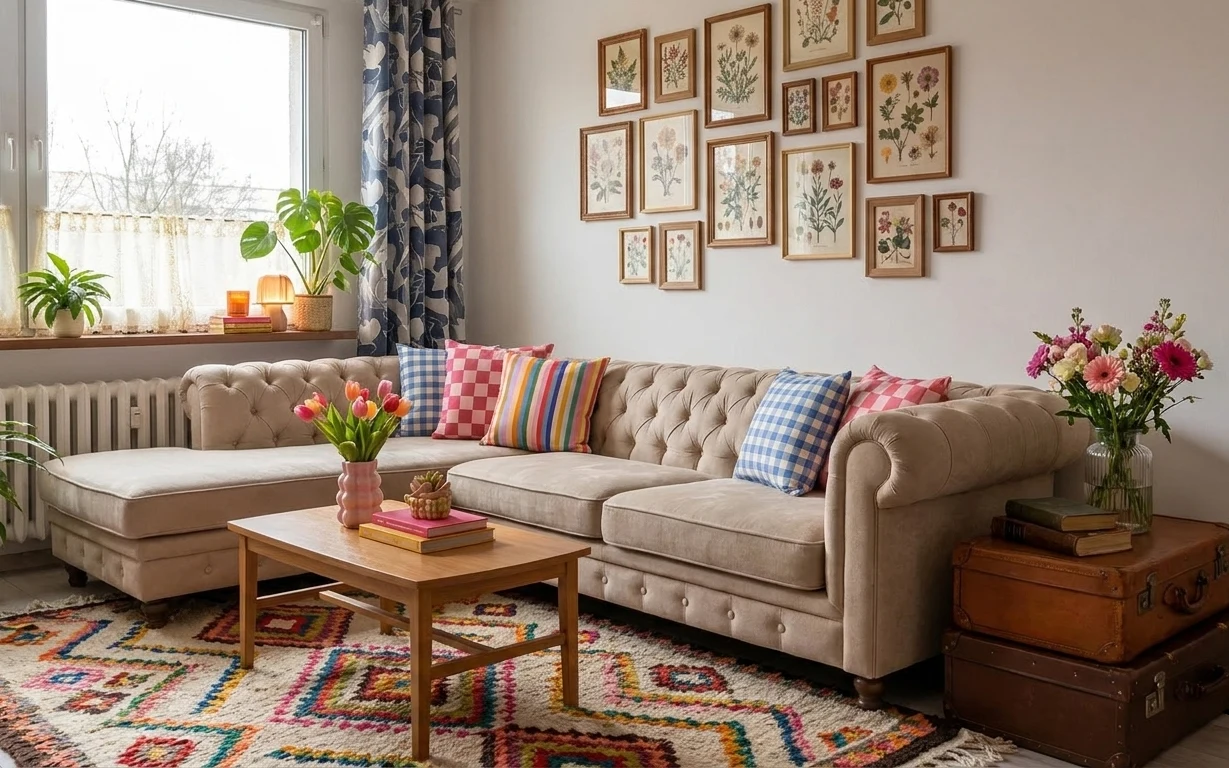
Under $350: a renter-friendly sofa-corner refresh with color
A renter-friendly sofa-corner refresh that brings boho color and structure using a patterned rug, blue curtains, a plug-in lamp, and a sing…
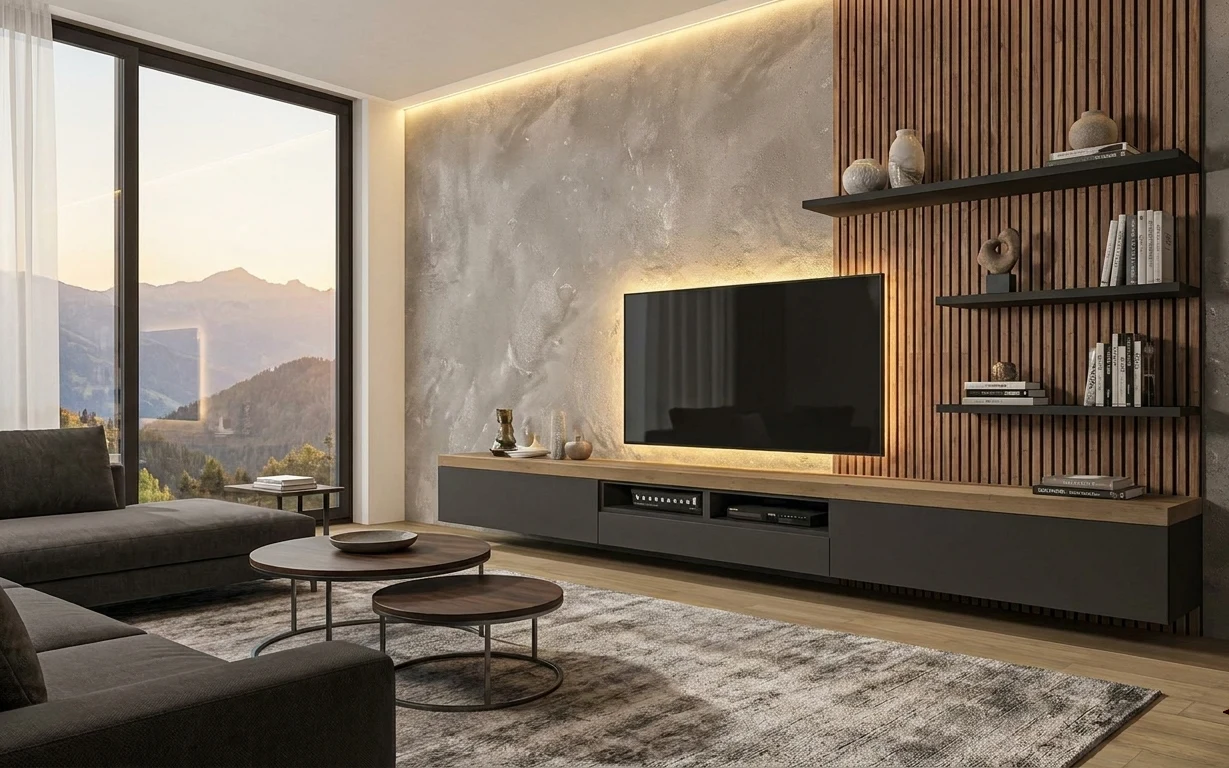
Under $700: renter-friendly TV lounge nook refresh
A renter-friendly TV lounge nook refresh that leans on one big rug, warm LED glow, peel-and-stick wood slats, and soft sheers. The whole lo…