
- Best for
- Weekend bedroom refresh with one high-impact DIY
- Time
- One weekend (about 6–10 hours total)
- Total cost
- Under $800
- Renter-safe
- Mostly (DIY is only paint on your own bed frame)
Why this sage-and-cream bedroom is the bedroom of 2026
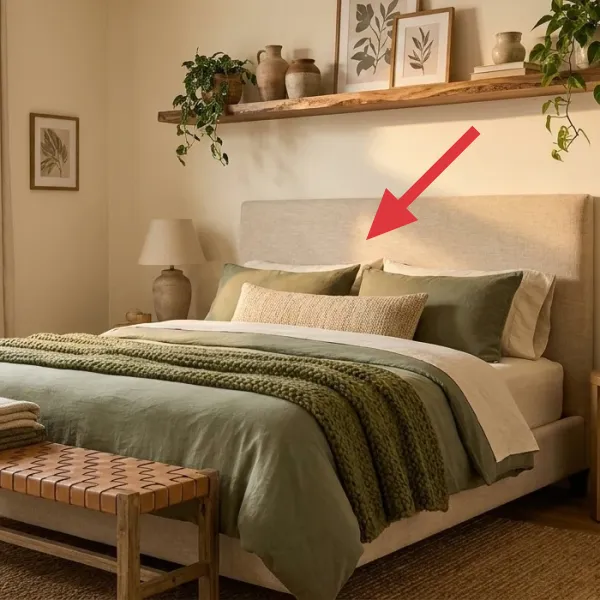
This setup leans into cream walls, sage green bedding, and warm walnut tones—exactly the palette you see in recent apartment spreads from magazines like Architectural Digest. Notice the mix of textures: woven rug fibers underfoot, linen-looking curtains at the arched window, and a thick throw folded across the bed cover. The framed botanical prints add structure without going too matchy. For US homeowners on a weekend timeline, the good news is you can chase this feel with a few high-impact swaps and one refresh, not a full renovation.
I used to overthink bedrooms by chasing “the perfect headboard” and ignoring everything else. Then I realized the most noticeable shift usually comes from grounding the room (rug size) and softening the light (curtains), not from buying a whole new bed. When I stopped treating bedding as a one-piece decision and started layering a throw and a single color-pop pillow, the bed looked finished immediately. This is the same logic: start with foundation, then add texture, then add art.
Layer 1 — Area rug ($200) grounds the bed zone
That rug is doing heavy lifting: it visually “holds” the bed, bench, and both nightstand zones so the room reads intentional instead of scattered. In a bedroom with warm wood flooring, a larger flatweave or low-pile rug in oatmeal/neutral tones keeps the space calm and gives the bedding somewhere to land. The obvious alternative is a smaller rug that sits under just the bed legs, but you’ll lose the cohesive grid the photo has. Trade-off: larger rugs cost more upfront, but they make every other choice look better—especially curtains and wall art placement.
Rug size rule for this layout
Go big enough that the front legs of a bench or bed sit on the rug, so the textiles feel anchored, not floating.
Layer 2 — Curtain panels ($80) frames the arched window
These curtain panels are light in color and drape with a relaxed, slightly gathered line, which is why the arched window still feels bright instead of blocked. If your windows don’t naturally look “designed,” curtains help you create that vertical rhythm the room needs. The trade-off for this look is sheer-ish softness: you may need blackout liners if you’re sensitive to morning light, but visually you’ll get the same warm spread. Choose panels that hit near the floor and hang them wide of the frame so the arch reads intentional rather than boxed-in.
Why the cream matters
Cream curtains keep the palette cohesive with the wall color and let sage bedding do the storytelling.
Layer 3 — Throw blanket ($40) adds texture across the bed cover
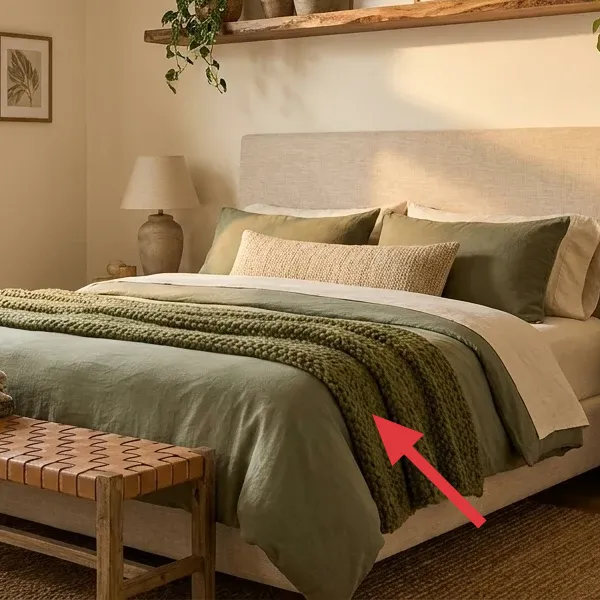
The throw blanket folded near the foot of the bed gives you that “lived-in” texture without adding visual clutter. Look at how it changes the bed’s surface: even with a simple bed cover, the throw’s thicker weave creates depth and breaks up the flat planes of cream and sage. The alternative would be adding more pillows only, but that can push the room into busy territory fast. By using one throw in a muted neutral (like oatmeal or sand), you keep the bedroom airy while still giving your eye a focal point at the foot.
Fold direction matters
Fold the throw lengthwise so the knit or weave pattern runs parallel to the bed, which looks cleaner from across the room.
Layer 4 — Throw pillow ($30) brings the sage note forward
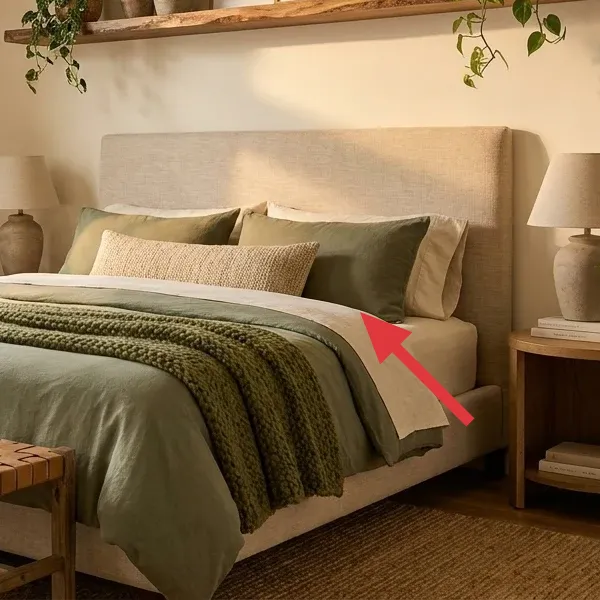
This throw pillow is the color cue that ties everything together—sage against cream reads fresh rather than heavy. Instead of picking a pillow that’s too saturated, match the value (lightness/darkness) of your bedding and let undertones do the work. If you go with a high-contrast pillow, you’ll lose the soft, botanical feel you see here. Trade-off: you’re limiting yourself to one main accent color, but that’s why the room feels coordinated. Start with a sage-toned pillow cover and keep the rest of the bedding neutral.
Don’t pick a “different green”
If your sage leans too blue or too gray compared to the bedding, the colors won’t harmonize—everything looks off by a shade.
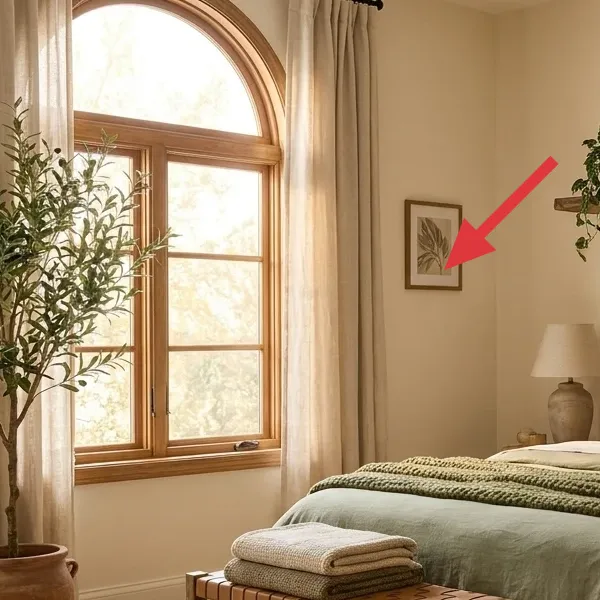
Layer 5 — Framed botanical prints (2 on the wall) ($80) adds vertical calm
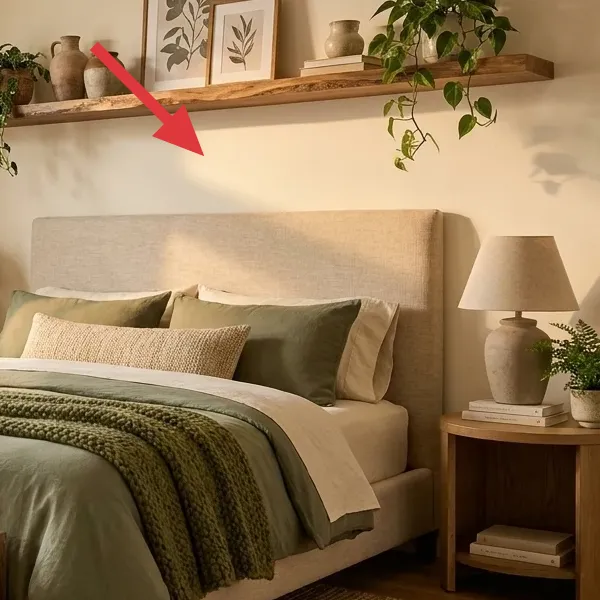
The framed botanical prints on the wall keep the room from feeling blank while still echoing the plants. This is an easy way to add structure at eye level, especially in bedrooms where you don’t want loud patterns competing with bedding. The “obvious” alternative is a big abstract print, but it can overpower the soft palette and make the bed area feel too busy. Trade-off: botanicals are more curated—pick prints with similar line weight or muted greens so they match the bedding undertones and the overall cream warmth.
Match the art to the plants
Using botanical prints with the existing leafy plant look keeps the room feeling intentional, not random decor.
Layer 6 — Table lamps ($60) softens the corners at night
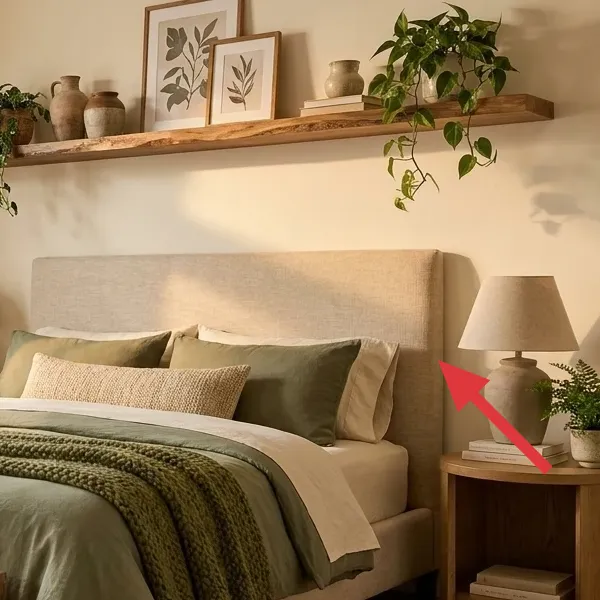
These table lamps give you warm light at two heights, which is why the bedroom feels gentle rather than dim or flat. You don’t need a ceiling upgrade for this look—just lamps with shades that diffuse light. The cheaper swap is a single lamp in one corner, but the bed area will still feel darker from the opposite side. Trade-off: matching lamps takes a little patience, but buying one lamp now and adding a second later still keeps the vibe. Aim for warm bulbs and shades that lean off-white, like the ones in the photo.
Check bulb warmth
Use warm bulbs so the cream walls read creamy, not bluish, after dark.
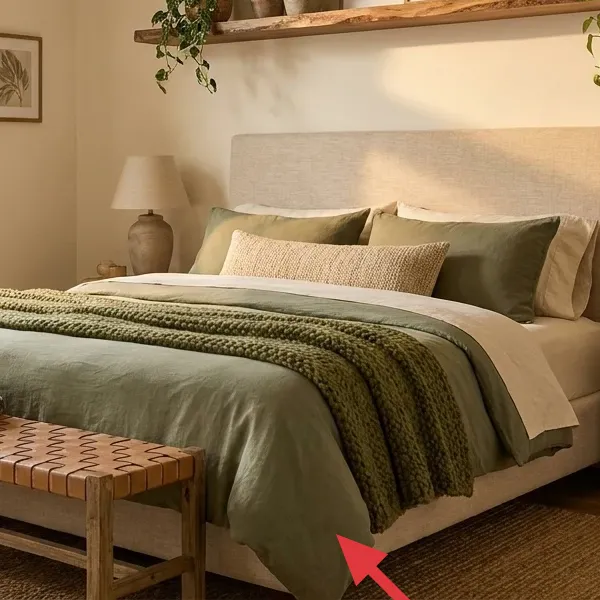
Layer 7 — Upholstered bed frame with headboard ($250) makes the bed look finished
The headboard is the backbone here: it’s tall enough to frame the pillows, and the upholstered texture keeps the room from looking too formal. If you’re on a budget, you don’t necessarily need a new bed frame—you need yours to look fresh and intentional against the creamy wall. The “obvious” alternative is replacing the bed, but that’s slow, expensive, and often not necessary. Trade-off: a refresh takes time and careful prep, but you get the biggest visual payoff because the bed is the first thing your eye lands on.
Make it instead of buying it
Refresh your existing upholstered bed frame by repainting the supporting wood/base (where visible) so the whole bed reads cleaner against the cream walls.
Materials
- Paint, 1 gallon — satin finish — roller/brush supplies — $70
- Painter’s tape — 1 roll — $9
- Sandpaper (assorted grits) — 1 pack — $12
- Drop cloths/old sheets — $8
- Clean cloths — $5
Steps
- Move the bed into a ventilated area and protect floors with a drop cloth.
- Remove any loose items and tape off upholstery edges you don’t want painted.
- Lightly sand the visible wooden/base surfaces to scuff the finish.
- Wipe off dust with a clean, dry cloth so paint sticks.
- Apply the first coat evenly with a brush/roller in thin layers.
- Let the first coat dry until it’s no longer tacky (about 4 hours).
- Lightly sand again for a smoother topcoat surface.
- Apply a second coat and keep a steady stroke direction for an even look.
- Let the paint cure fully before pushing the bed back into place (overnight to 24 hours).
- Remove tape carefully while the paint is fully set to avoid pulling.
Total DIY cost: $104 — saves about $146 over buying.
The cost, layer by layer
| Layer | Item | Cost |
|---|---|---|
| 1 | Area rug | $200 |
| 2 | Curtain panel pair | $80 |
| 3 | Throw blanket | $40 |
| 4 | Throw pillow cover | $30 |
| 5 | Framed botanical print (16×20) | $80 |
| 6 | Plug-in table lamp | $60 |
| 7 | Thrifted upholstered bed frame | $250 |
| Total | $740 | |
If you want a cheaper variant, keep layers 1 (rug), 2 (curtains), and 5 (prints) but swap layer 6 to a single lamp and layer 7 to a used bed-frame listing with good upholstery—then spend the difference on a better rug pad.
What worked, what didn't (across the whole room)
The biggest wins came from grounding the bed zone with a properly sized rug and softening the daylight with cream curtain panels. The layered textiles made the bed look styled even without lots of extra decor, and the botanicals kept everything cohesive with the plants.
What worked
- The larger area rug made the bed, bench, and nightstands read as one designed zone.
- Cream curtain panels added vertical height around the arched window without making the room feel heavy.
- The folded throw blanket created texture where the eye naturally rests when you walk in.
- One sage throw pillow pulled the color from the bedding and made the palette feel intentional.
- Framed botanical prints gave the walls structure without competing with the plants.
- Table lamps softened corners at night, so the room stayed calm after dark.
What didn't
- When I tried a darker rug first, the warm wood floor and cream walls looked less unified.
- Adding two accent colors in the pillows made the bed feel busy instead of serene.
- Hang-too-narrow curtains box in an arched window, especially in rooms with large daylight.
- Buying cheaper framed prints with thick borders made the botanical theme look mismatched.
- Using a cool-bulb lamp turned the cream walls gray after sunset.
What we'd skip if we did it again
Skip replacing the entire bed frame as your first move. In this room type, the bed already has the right silhouette—your goal is to refresh the visible surfaces so the headboard and base look crisp against cream.
Skip going curtain-short or hanging them only inside the window trim. For arched windows, you want width and height: it’s what makes the room feel airy while still tailored.
Skip adding multiple statement prints at once. Keep the botanical theme simple—two framed prints is enough—then let the plants and layered textiles do the rest.
Frequently asked
How long does this bedroom refresh take?
If you’re doing the DIY bed-frame refresh, plan about 6–10 hours spread across one weekend, plus overnight drying/cure time. Shopping and prep are usually the slow parts—measuring for rug and curtain height helps. The non-DIY layers (rug, curtains, pillow cover, framed print, lamps) go in quickly once you’ve picked sizes.
What if I rent and can’t paint anything?
You can still copy almost all of this look. Skip the bed-frame refresh and DIY: instead, focus on the rug size, cream curtain panels, and textile layering. For the bed frame itself, use placement and styling—add the throw blanket and one sage pillow cover—so the headboard reads cohesive even if the base stays as-is.
My room is smaller—how do I adjust the plan?
Go smaller with the rug only if you can still get it under the front legs of the bench or at least beyond the bed width. For curtains, hang them wider than the trim but keep the panels proportional so they don’t overwhelm the arched opening. Stick to one wall-art cluster (two framed botanical prints) and keep the pillow palette to cream + sage.
What if my room is larger and feels empty?
Add presence by upsizing your rug and making sure it reaches beyond the bench and nightstand area. You can also increase curtain width so the arched window gets a fuller frame, and consider repeating the botanical motif with a matching second print if your wall has space. Keep the bedding layering simple—one throw plus one accent pillow—so it still feels calm.
Where should I shop for the closest version of this look?
For the rug and curtains, prioritize neutral oatmeal/cream colors in widely available size ranges so you can nail proportions. For framed botanicals, look for 16×20 prints with simple matting and muted greens to match the bedding undertone. For lamps, choose off-white shades and warm bulbs so the cream walls read creamy at night.
What’s the biggest mistake people make with this kind of bedroom styling?
The most common miss is undersizing the rug and hanging curtains too narrow. When those two pieces are off, everything else looks accidental—art, lamps, and textiles included. Get the rug anchoring correct first, then hang curtains to frame the arch, and only then fine-tune with throw texture and one sage accent pillow.
More in Bedroom

Under $800: a sage-and-cream bedroom refresh with one DIY
A sage-and-cream bedroom refresh you can finish on a weekend, using an area rug, curtain panels, layered textiles, and wall art. This plan …

Under $500 boho bed nook refresh: rug, rust duvet, macramé
A boho bed nook refresh built for shared housing: warm rust bedding, a blue-and-rust medallion rug, and a move-friendly macramé wall hangin…

Under $400 for an arch daybed nook: 7 move-friendly upgrades
Arch daybed nook refresh with warm neutrals for shared housing, built around a $400 budget. You’ll swap in move-friendly wall art, rug, cur…