- Best for
- Layered, warm earthy bedroom styling
- Time
- 2–4 hours (mostly textiles)
- Total cost
- $485 for the full refresh
- Renter-safe
- Yes—no-drill swaps that pack away
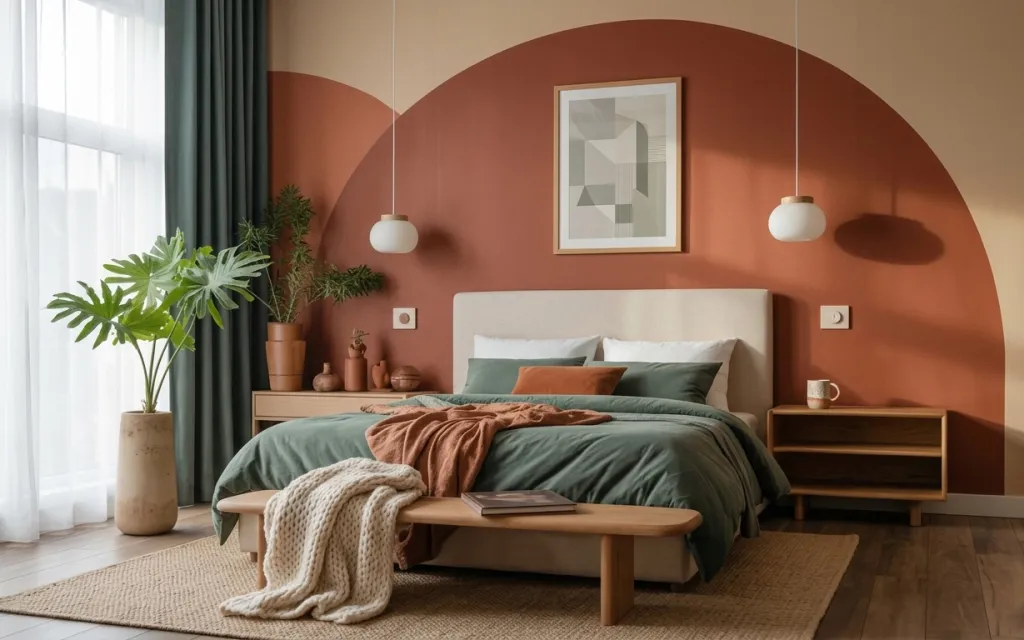
Why warm earthy-neutrals is the bed nook of 2026
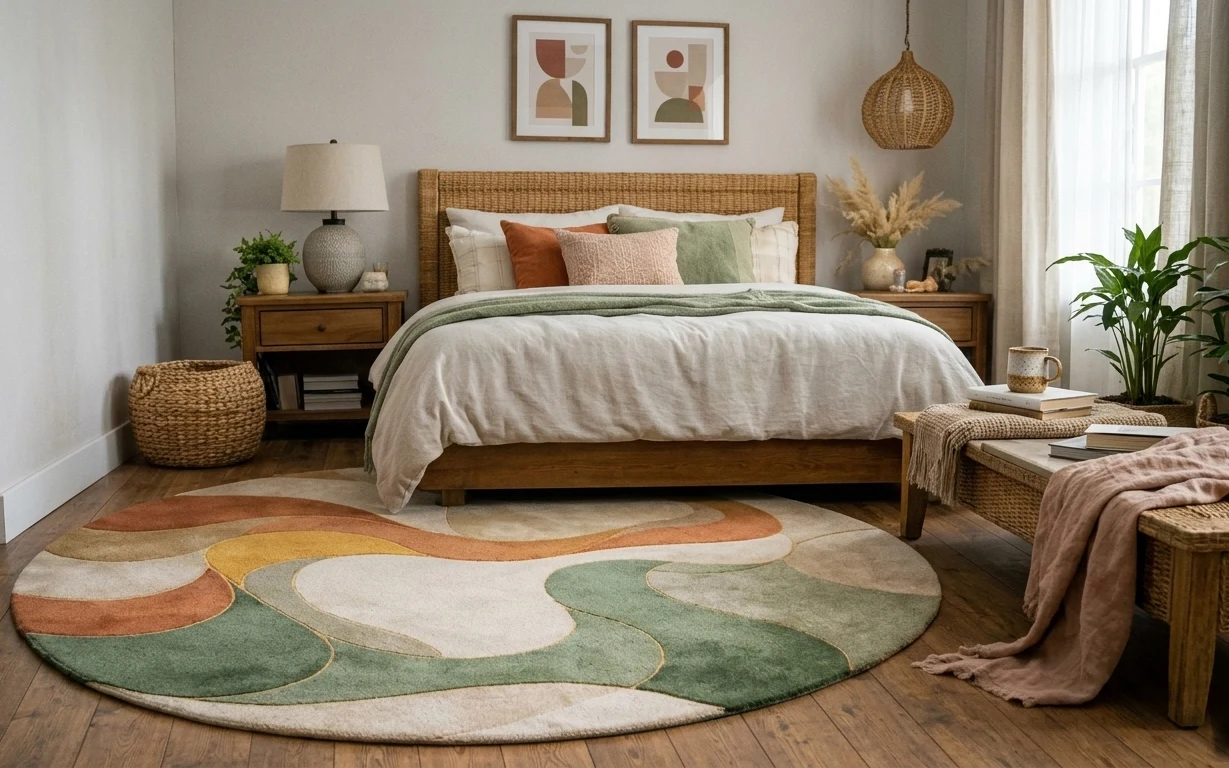
The first thing this setup nails is texture: the jute-look rug anchors the whole room, and the sage green bed cover gives it that calm, cultivated base. Then come the accents—rust orange in a single pillow, plus dark green curtains that soften the light coming through the window. The framed abstract print and terracotta wall color do the heavy lifting visually, so the decor can stay move-friendly and renter-safe.
I caught myself wanting to “fix” the wall with another big thing—like a whole matching set—until I remembered how often those end up boxed up later. What changed my mind here was noticing how the palette stays consistent: warm terracotta + soft sage + one rust note. When those repeat, the room reads styled even with just a few movable pieces.
Layer 1 — jute-look area rug 5×7 ($160) Trade-off: hides wear, doesn’t look precious
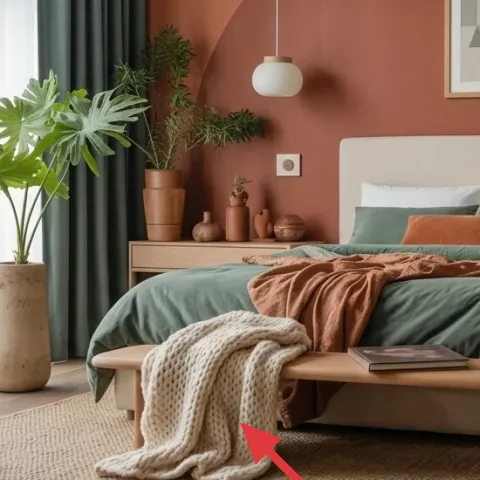
This jute-look area rug sits under the bed and reaches far enough to connect the window side to the bedside area. In a rental, that matters because flooring is usually locked in—so the rug becomes the “new baseboard” you can actually control. I like this over a silky flatweave because the slightly rough texture hides foot traffic and small spills better. It also gives the terracotta wall and sage textiles something natural to bounce off, instead of making everything feel too smooth. The trade-off is vacuuming a little more often to keep it looking clean.
Texture first
Pick the rougher, less-shiny layer first; then the pillows and print can stay simpler.
Layer 2 — throw pillow cover in rust orange ($20) One punch of color, placed near the center
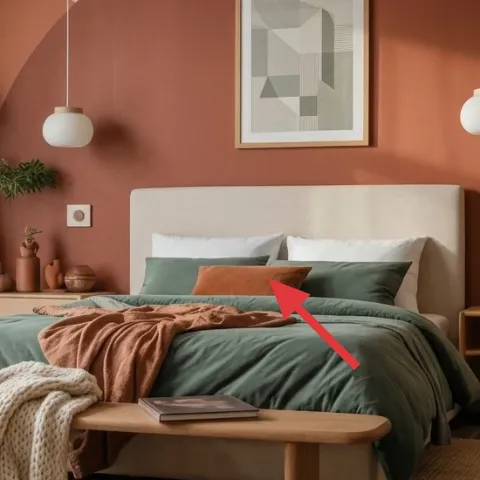
This rust orange throw pillow cover is the smallest item in the room that still reads on purpose, because it lands right where the eye hits the bed. The color works with terracotta without matching it exactly, so it feels intentional instead of accidental. I chose a single rust note over repeating multiple oranges, because too many matching accents can start to look busy. The pillow also helps the layered bedding feel “finished” even when the bed cover is a solid color. The trade-off is that rust tones can skew either warm or dusty depending on lighting, so it’s worth checking the fabric in the late-day light.
Why one pillow works
One color accent reads as a decision when the rest of the bed stays in softer greens and creams.
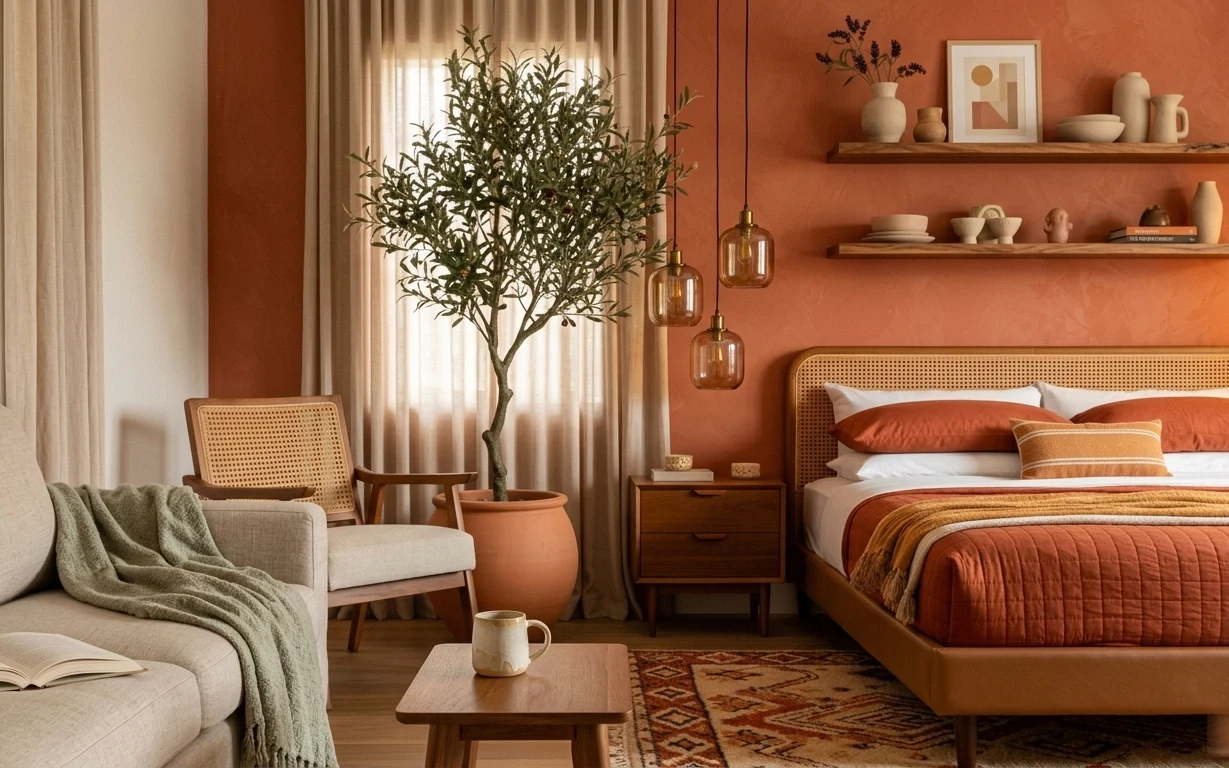
Layer 3 — dark green curtain panel pair ($60) Blocked light, softer edges
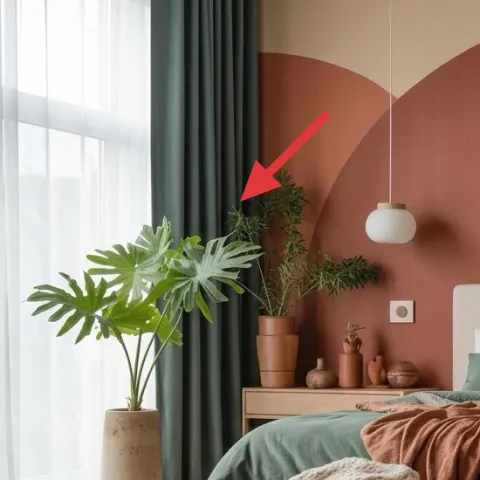
These dark green curtain panels frame the window and add a deeper color layer that makes the sage textiles feel richer. Curtains also do a rental-friendly job that paint can’t: they smooth the visual “grid” of windows and curtains when you’re standing in the room. I’d skip lightweight sheers alone here, because they make the bed nook feel more temporary and less grounded. The trade-off with darker panels is they can slightly reduce daylight, so the room needs that warm terracotta wall glow (which this setup already has) or at least a brighter bulb choice on your lamp fixtures.
Don’t buy the wrong length
Short curtains make everything feel cramped; aim for panels that touch (or nearly touch) the floor.
Layer 4 — framed abstract print 16×20 ($50) DIY substitutes a big wall focal point
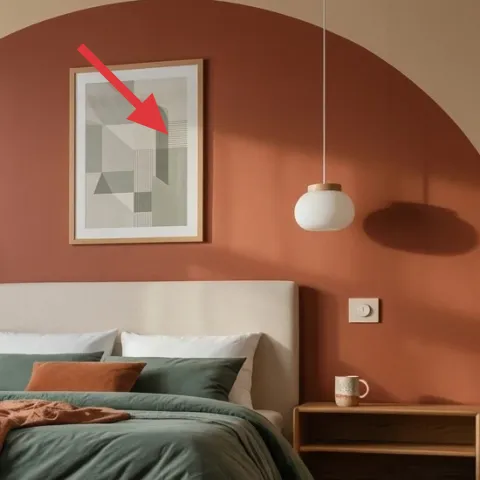
The framed abstract print gives the wall a calm “gallery” note without adding clutter above the bed. The colors inside echo the room—neutral creams and muted geometry—so it doesn’t fight the terracotta accent. I like going with an abstract instead of a landscape here because the shapes stay modern with the bed’s clean lines. Since framed art is easy to pack and rehang later, it’s one of the safest ways to change the mood in a rental. This DIY also keeps cost down while still looking tailored to the palette.
Make it instead of buying it
Hand-paint a simple geometric abstract on cardstock, then slide it into a 16×20 frame so the colors match the sage-and-terracotta bed nook.
Materials
- Cardstock (sturdy white) — 1 sheet — craft store — $12
- Acrylic craft paint set (2–4 colors) — small set — craft store — $6
- Painter’s tape — 1 roll — craft store — $8
- Small foam roller or wide brush — 1 — craft store — $8
- 16×20 frame (or frame you already own) — 1 — thrift or home goods — $4
Steps
- Cut cardstock to the exact inner opening size of your frame.
- Lightly tape a few geometric sections (rectangles and one angled block).
- Paint the largest shapes in a cream base, leaving one section unpainted.
- Paint muted sage and terracotta tones in separate taped sections.
- Remove tape while the paint is still slightly tacky for cleaner edges.
- Let the paint dry fully.
- Check the image from across the room and add one darker accent shape if it feels flat.
- Dry again completely, then slide the artwork into the frame.
Total DIY cost: $38 — saves about $12 over buying.
Layer 5 — wood side table with shelf ($90) Warm wood in a single, useful spot
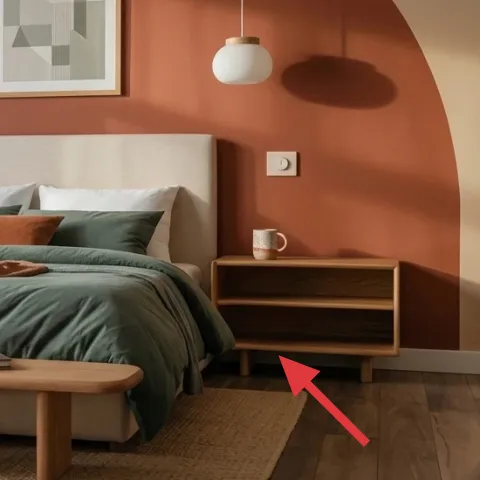
This wood side table sits on the right side and anchors the bedtime styling with a flat surface for small objects. The color temperature matches the floor, which keeps the room from feeling like everything is floating on top of the terracotta wall. I went with a table that has a visible shelf because it gives a place for books or small decor without needing extra wall mounting. It’s also easier to replicate across rentals: you can move it room to room and keep the same styling bowl-of-neutral look. The trade-off is that open shelves can collect dust, so grouping items into a tray helps it look intentional.
Use it as a styling stage
One tray and one small plant reads styled; five random objects reads clutter.
Layer 6 — decorative ceramic pots and tray ($25) Small objects that repeat the palette
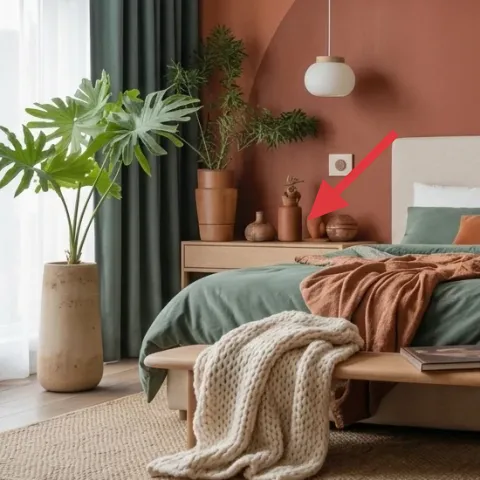
On the bed side, the decorative ceramic pots and tray bring in the “quiet ceramics” texture that makes earthy rooms feel finished. This layer is doing double duty: it adds color repetition (warm clay + soft neutrals) and it keeps everyday items from looking like clutter. I prefer mixed pot sizes on a tray over a single big planter because it lets the arrangement look curated at both close-up and from the doorway. You can swap the contents seasonally—stems in summer, dried branches later—without changing the container. The trade-off is that ceramics look best with a little breathing space between pieces.
Group by height
Keep one item taller than the others so the arrangement has a clear silhouette.
Layer 7 — sage green bed cover ($80) Solid base color that stays calm
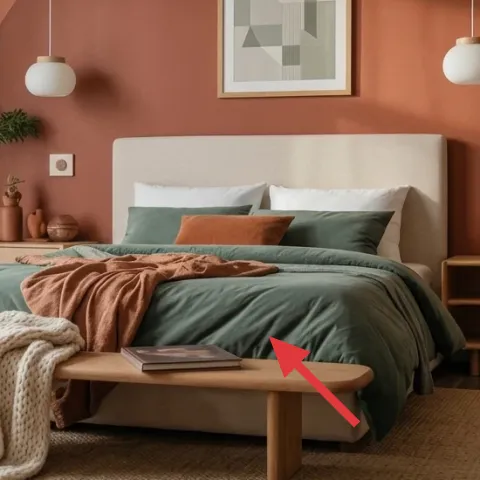
The sage green bed cover is the biggest fabric “area” in the photo, and that’s why it sets the tone for the whole palette. It pairs naturally with terracotta because both live in the warm-neutral family, while the green keeps the room from reading orange-heavy. I’d rather replace a bed cover than add more patterned pieces, because solids are easier to pack and easier to re-style in future rentals. The trade-off is that solid bedding shows wrinkles a bit more, so choosing a fabric with some weight helps it fall cleaner. Once the cover is in place, the rust pillow reads like a deliberate accent instead of random color.
Match the undertone, not just the color
Sage can turn gray or yellow quickly—pick one that looks balanced next to the terracotta wall.
The cost, layer by layer
| Layer | Item | Cost |
|---|---|---|
| 1 | jute-look area rug 5×7 | $160 |
| 2 | throw pillow cover in rust orange | $20 |
| 3 | dark green curtain panel pair | $60 |
| 4 | framed abstract print 16×20 (DIY option) | $50 |
| 5 | wood side table with shelf | $90 |
| 6 | decorative ceramic pots and tray | $25 |
| 7 | sage green bed cover | $80 |
| Total | $485 | |
Cheaper variant: swap the curtain pair for a single lighter panel per side, choose a budget flatwoven rug (still jute-look), and use a thrifted frame with the same DIY cardstock art.
What worked, what didn't (across the whole room)
This bed nook reads cohesive because the palette repeats in small ways: terracotta wall, sage textiles, and one rust accent. The strongest wins come from texture—rug and curtains—and from keeping the styling confined to surfaces you can control. The main downside is that darker window treatments can feel too heavy if the room lacks warm light.
What worked
- The jute-look rug grounds the bed and makes the terracotta wall feel intentional instead of loud.
- Rust orange shows up in one pillow only, so the color stays like an accent, not a second theme.
- Dark green curtains add depth and soften the window line without any permanent changes.
- A framed abstract print keeps the wall modern while echoing the muted tones already in the room.
- The wood side table ties into the floor warmth and gives a realistic styling surface for daily items.
- Ceramic pots on a tray keep small decor tidy and easy to swap at lease end.
What didn't
- Trying to match too many items in rust can make the bed area feel visually crowded.
- Light-colored curtains alone can make the whole nook feel temporary against a bold wall.
- If the framed print is too busy, it competes with the terracotta curve behind the bed.
- A bedside setup with no tray tends to look cluttered, even when the objects are “small.”
What we'd skip if we did it again
Skip patterned bedding if the wall is already doing something bold. When the terracotta accent and the curtains are present, a busy duvet-like cover can steal attention from the clean geometry and make the palette feel noisy.
Skip buying multiple matching “sets” for bedside styling. One table, one tray, and one plant at a time keep the look curated; anything extra usually ends up packed away later and breaks the rhythm.
Skip going too small on the rug. A rug that stops short of the bed footprint doesn’t connect the nook, and the room starts to feel segmented instead of layered.
Frequently asked
How long does this bed nook refresh take for a renter?
Most of the time is fabric-based: swapping curtains and getting the rug positioned so it feels centered under the bed. If the framed print is DIY, plan one extra block of drying time (and a few minutes to tweak the composition before it goes in the frame). Expect about 2–4 hours total, plus any thrift/online shopping time.
What if I can’t change the curtains right away?
Start with the rug and the bed cover—those are the biggest visual anchors. Then add the rust orange pillow and the framed abstract print so the room still reads cohesive. Later, curtains can be upgraded to deepen contrast; until then, keep window textiles light and simple so they don’t compete with the terracotta wall.
Can this work in a smaller or larger bedroom?
In a smaller room, keep the rug size but reduce the bedside “stuff”—one tray and one plant arrangement only. In a larger room, you can extend the curtain height and use a slightly fuller rug so the bed doesn’t feel like it’s floating. The key is repeating the sage + terracotta palette with just one rust accent.
Where should I shop for these exact pieces without blowing the budget?
For the rug, look for jute-look or flatwoven options in department stores or discount home sites. Curtains and pillow covers are often cheapest during seasonal home sales. For the framed print, DIY cardstock art lets you keep the look while skipping the most expensive wall-art markup.
What’s the biggest mistake people make with warm earthy bedroom palettes?
Buying too many competing “warm” colors at once. If everything is terracotta, rust, and caramel, the room loses the calm base that makes the palette feel grown-up. Pick the wall color family, choose one bed cover shade, and add rust only as a single accent—then build texture with fabrics and ceramics.
Is the DIY framed art durable enough for real life?
Cardstock artwork behind glass is surprisingly durable because it’s protected from daily dust and handling. Use sturdy cardstock, let paint dry fully, and keep the frame glass clean. If the idea is temporary, a simple swap later is easy: remove the paper, insert a new one, and keep the same frame.
More in Bedroom

5 renter-friendly no-drill swaps for a $500 bed nook refresh
A warm, terracotta-bed-nook look is achievable for about $500 with no drilling—mostly textiles, one framed print, and move-friendly bedside…
6 renter-safe bedroom swaps for a $300 refresh
A $300 bedroom refresh built for shared housing: one patterned rug, a warm throw, framed art, and renter-safe lighting and curtains—plus DI…
7 earthy swaps for a $600 bedroom refresh
A $600 bedroom refresh built around warm terracotta, cane textures, and move-friendly swaps. See seven layer-by-layer upgrades that pack in…