
- Best for
- Weekend bathroom vanity corner refresh
- Cost
- $510 total (budget $600)
- Time
- 4–6 hours, spread over a weekend
- Difficulty
- Confident DIY (frame paint + minor swaps)
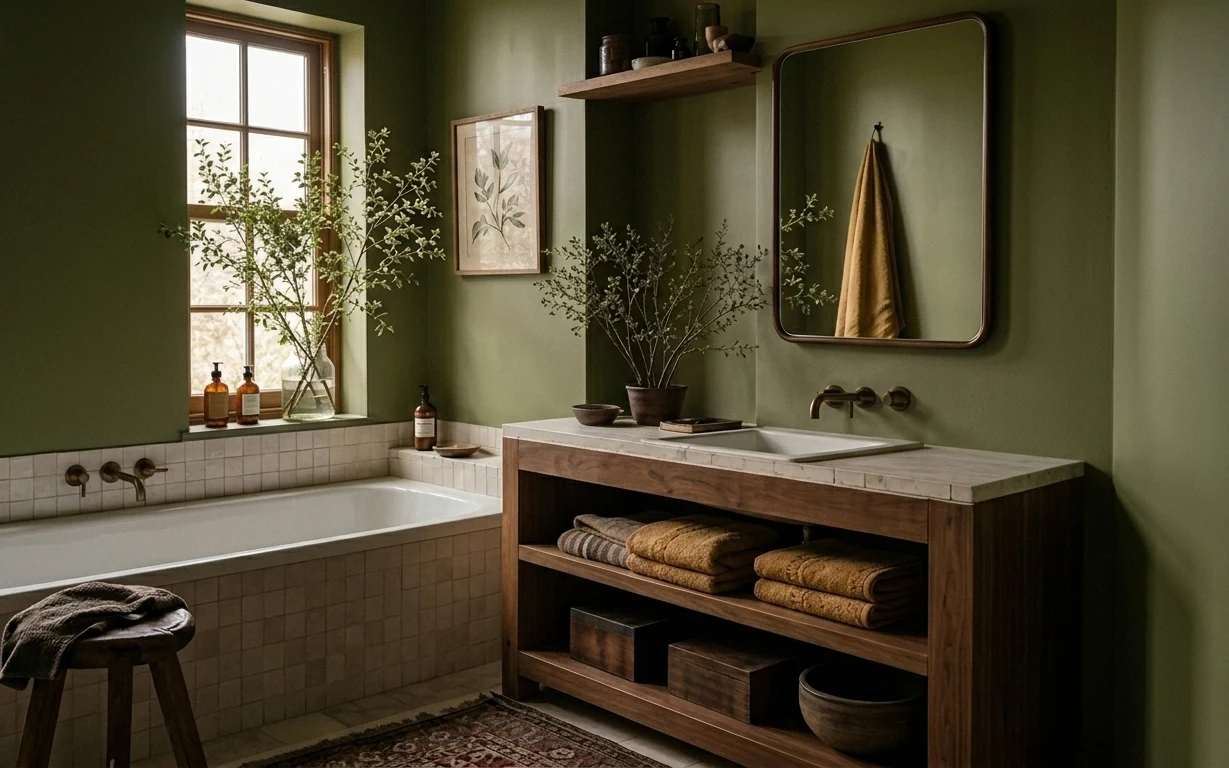
Why olive-green tile-and-wood calm is the bathroom vanity corner of 2026
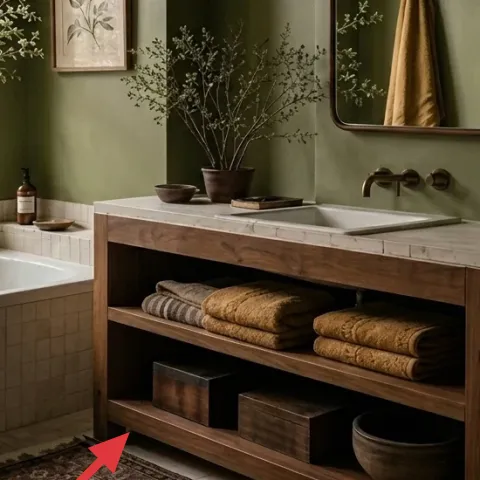
Start with the places your eyes land first: the vanity, the mirror, and the floor. In this setup, the olive-green walls and the white tile backsplash create a crisp frame for warm walnut wood, while the bath rug anchors everything in softer texture. I love how the wood vanity shelves carry folded towels, and how the framed botanical print stays light instead of competing with the greenery. For homeowners on a weekend timeline, you can get this same “quietly styled” feeling through a few targeted buys and one DIY paint job.
I almost overcomplicated this kind of corner the first time I redid my own bathroom. I bought a bunch of small things, but the surfaces still looked flat because nothing had a clear visual order. What fixed it was choosing one hero on the wall (the framed botanical print) and then repeating the same earthy tones in the rug, mirror shape, and plant stems. The result feels collected, not cluttered.
Layer 1 — Bath rug on the floor ($80) Softens tile underfoot
A bath rug like this one is the fastest way to make bathroom tile feel less stark. It adds that medium-scale pattern that still reads “earthy” against the cream-and-white tile, and it also gives your folded towels-and-wood shelves a warmer base to sit on visually. The trade-off is that rugs take a little extra care—shake or vacuum regularly so lint doesn’t build up in the fibers. If the alternative is bare tile, you lose the cozy contrast that lets the whole vanity corner feel finished instead of temporary.
Size matters more than pattern
Choose a rug that lands under at least the front edge of the vanity area so it frames the zone instead of looking like a doormat.
Layer 2 — Rectangular framed botanical print above the vanity ($80) Crisp botanical linework
This framed botanical print is small enough to feel calm, but it still gives the wall a focal point above the vanity. Because the print sits over the white tile backsplash, it interrupts the hard geometry with softer organic lines, and that keeps the olive-green wall from feeling too heavy. The trade-off here is that a frame can either look intentional or look random, depending on the finish. That’s exactly where the DIY helps: match the frame finish to the room’s warm wood so everything feels like one set.
Make it instead of buying it
DIY-paint the existing or replacement frame for the botanical print so the finish matches the warm walnut wood tones.
Materials
- Spray paint (oil-rubbed bronze tone) — 12 oz — hardware store — $12
- Primer for slick surfaces — small can — hardware store — $8
- Painter’s tape — 1 roll — hardware store — $6
- Fine-grit sandpaper (180–220) — 1 sheet pack — hardware store — $4
- Degreasing cleaner/wipes — 1 pack — grocery or hardware store — $5
Steps
- Degrease the frame and let it fully dry so paint sticks to bathroom humidity residue.
- Lightly sand the frame to roughen the finish for better grip.
- Tape off the glass or print edge so you don’t paint over anything you want to keep clean.
- Spray on primer in thin, even coats; let it dry fully.
- Sand lightly (optional) to knock down any tiny bumps, then wipe dust.
- Spray the bronze-tone paint in thin coats, drying between coats until coverage looks even.
- Let the finish cure undisturbed per the can’s instructions.
- Reassemble and hang so the frame matches the vanity wood warmth.
Total DIY cost: $35 — saves about $45 over buying.
Make it look built-in
Keep the botanical print centered and level so it visually balances the arched mirror and doesn’t tip the room toward “accidental.”
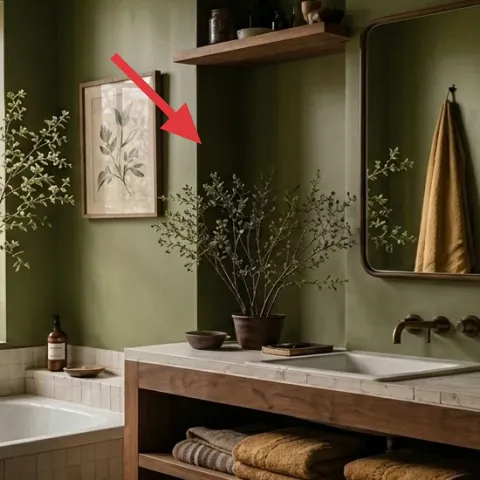
Layer 3 — Vase with thin branches on the vanity ($40) Vertical lines for breathing room
The vase with thin branches adds movement without taking over the counter, which is key in a vanity corner where you’re already working with a sink, a faucet, and open shelving. Those airy stems also echo the shape of the arched mirror—both have curves and upward energy—so the styling feels cohesive instead of pasted on. I like using this kind of “light” greenery rather than a chunky bouquet because it won’t compete with towels folded underneath. The trade-off is less color impact, but you gain a cleaner look that suits earthy-neutrals walls.
Skip high-watery stems
Choose stems that won’t drip or sag quickly so the arrangement stays upright between refreshes.
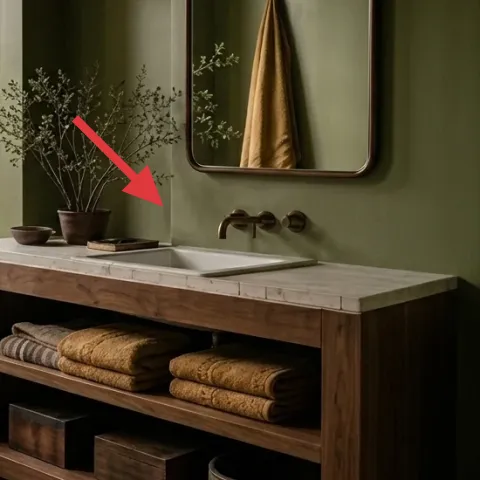
Layer 4 — Ceramic bowl on the vanity countertop ($20) A catchall that looks styled
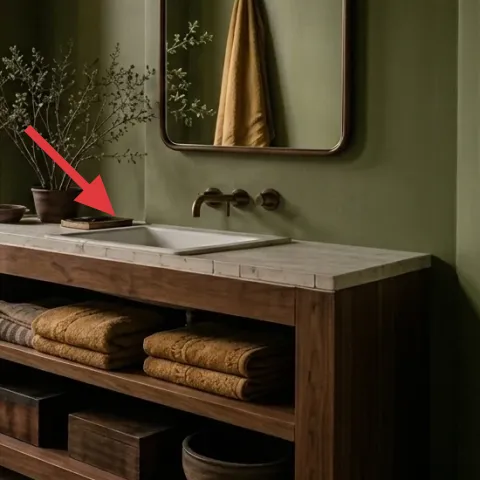
That ceramic bowl is doing real work: it gives you a designated place for small daily-use items while still reading as part of the décor. In a bathroom, counters tend to collect tiny clutter fast—cotton rounds, a bar of soap, a hair tie—and the bowl makes the mess look curated. The trade-off is that bowls have a “finished or empty” feeling; if you use it, keep it filled with one small element like the folded towel corner, a couple of grooming items, or a simple decorative stem. Without it, the countertop can feel like it’s missing a step.
Keep it low-profile
Pick a bowl shape that doesn’t block the sightline from the mirror to the sink area.
Layer 5 — Bathroom faucet on the vanity ($50) Small hardware swap, big polish
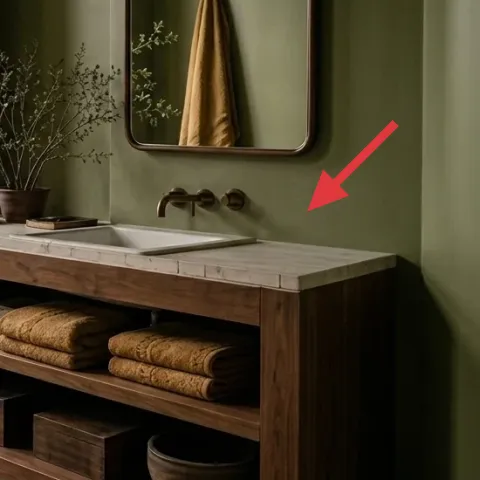
Even when the vanity stays the same, upgrading faucet details changes how “clean” the whole room reads. The faucet shown here sits against white tile and a light wood surface, so a more cohesive finish makes the backsplash feel intentional instead of utilitarian. The trade-off is cost versus impact: a full vanity replacement is overkill, but a faucet refresh can still make the sink area look new. If you’re choosing between “just paint and art” or “do one fixture,” this is the middle path that gives the sink zone better presence.
Avoid mismatched finishes
If the faucet finish doesn’t relate to the mirror hardware or towel hook, it can look random even with great decor.
Layer 6 — Large arched mirror above the vanity ($40) Shape that flatters the corner
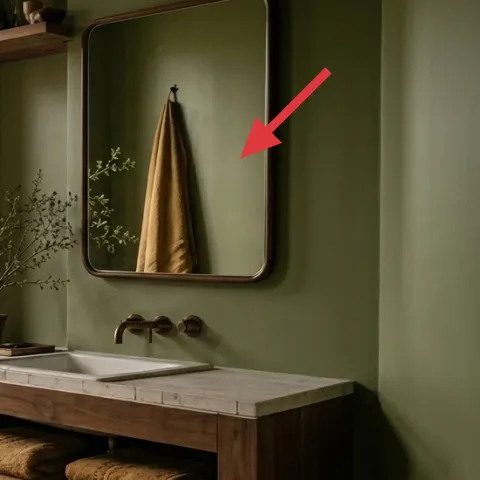
The large arched mirror is one of the strongest visual anchors in the room because it echoes the wall curve and brings extra brightness into the vanity zone. In a small bathroom, mirror placement can make or break the layout, and this one sits high and centered enough to keep the reflection clean. The trade-off is that mirrors show details—water spots, fingerprints, and even clutter—so you’ll want a quick wipe-down routine. Choosing an arched shape over a flat rectangle also softens the tile lines and keeps the earthy-neutrals palette from looking too strict.
Clean it like you’d clean glass for art
Use a streak-free cleaner and dry cloth so the reflection stays crisp, not hazy.
Layer 7 — Wood bathroom vanity with open shelves ($200) Warm storage that looks like decor
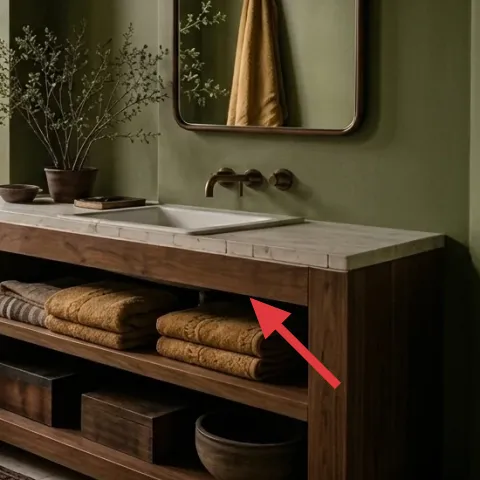
The wood vanity with open shelves is the reason this corner feels warm instead of sterile. The open storage lets folded towels act as texture—stacking and spacing create that casual, lived-in rhythm you can’t get with a closed cabinet alone. The trade-off is that open shelving means you have to style it a little; if everything is the same folded height, it can look rigid. Vary towel stacks slightly and add one “vertical” element like the vase so the shelves read as intentional. Compared to swapping the entire vanity, styling the shelves and matching finishes is the weekend win.
Repeat the wood tone
Pull the same warm wood note into your frame or hardware so the room looks designed, not assembled.
The cost, layer by layer
| Layer | Item | Cost |
|---|---|---|
| 1 | Bath rug (5×7) | $80 |
| 2 | Rectangular framed botanical print (DIY frame paint) | $80 |
| 3 | Indoor plant stems in a vase | $40 |
| 4 | Decorative ceramic bowl | $20 |
| 5 | Bathroom faucet | $50 |
| 6 | Large arched mirror | $40 |
| 7 | Wood bathroom vanity with open shelves | $200 |
| Total | $510 | |
If you want to go cheaper, start with the rug and the framed botanical print frame paint first. Those two changes do a lot visually for the least cash, and they also make the faucet, mirror, and plant styling feel more “put together” even if you delay hardware.
What worked, what didn't (across the whole room)
This vanity corner lands well because it balances hard surfaces (tile, sink) with soft textures (rug, towels, branches). The arched mirror shape and botanical print keep the olive-green wall from feeling too heavy.
What worked
- The bath rug adds contrast against tile so the floor feels warmer during daily routines.
- The framed botanical print brings organic linework that sits comfortably over the white backsplash.
- The thin-branch vase adds height without crowding the sink area.
- The ceramic bowl creates a designated spot for small items, which reduces daily countertop clutter.
- The arched mirror shape softens straight grout lines and makes the corner feel cohesive.
- The open-shelf vanity makes towels look like styling rather than random storage.
What didn't
- When towel stacks match perfectly in height, the shelves can look too stiff instead of lived-in.
- If the ceramic bowl sits empty, the countertop reads unfinished and starts attracting loose items.
- A mirror that’s not wiped frequently shows fingerprints and water spots that distract from the look.
- Picking a faucet finish that doesn’t relate to the mirror hardware makes the sink area feel disconnected.
- If the rug edges curl or shift, the floor looks untidy even when everything else is styled.
What we'd skip if we did it again
Skip replacing the whole vanity first. It’s tempting, but the warm wood already works; a rug, a frame refresh, and a mirror placement tweak get you 80% of the “new bathroom” feeling for less time and less money.
Skip low-effort decor piles that don’t have a home. A ceramic bowl gives small items a container; without one, the counter will drift back into a messy, hard-to-style state.
Skip buying random hardware finishes “because it matches the trend.” Instead, match the faucet and mirror hardware finishes so the sink zone looks intentional, not like separate purchases.
Frequently asked
How long does a bathroom vanity corner refresh take?
Most of the time goes into small, high-accuracy tasks: leveling the framed botanical print, making sure the arched mirror is centered, and styling towels so they look intentional. If the DIY is only frame painting, plan about 1–2 hours of prep and spray time plus dry/cure windows. The non-DIY steps (rug swap and plant styling) are fast, so an honest weekend timeline is 4–6 hours.
What if I’m renting and can’t paint or change hardware?
You can still get the same effect by keeping the faucet and walls as-is. Focus on the bath rug, the framed botanical print (or just repaint the frame), and the arched mirror placement if it already has hooks. For the counter, use a ceramic bowl as the organizing anchor. Swap the plant stems to add height and softness without touching the structure.
My bathroom is smaller—should I scale anything down?
Don’t automatically downsize the mirror. A large arched mirror often helps a small bathroom feel taller because it pulls the eye up. For the rug, aim for full coverage under the vanity area rather than a tiny mat. Keep the plant stems tall and airy, but reduce the counter items to one bowl and a few styled pieces so everything stays visually calm.
What’s the cheapest place to start if my budget is tighter?
Start with the bath rug and the framed botanical print frame finish. Those two elements immediately soften tile and make the wall feel finished without committing to fixtures. Then add the vase with thin branches and a ceramic bowl for a curated counter. If you have extra room in the budget, the faucet and mirror hardware finish upgrades are next.
Where should I shop for these exact pieces?
For rugs and framed botanical prints, try mid-range home stores for the right size (5×7 works in many vanity corners). For mirrors and furniture, look for used or open-box options locally or online—an arched mirror shape is the key detail, not a specific brand. Indoor plant stems and vases are easy to source and you can match them to the room’s olive-green palette quickly.
What’s the biggest mistake that makes a bathroom vanity corner look unfinished?
Empty countertop + mismatched finishes is the big one. If there’s no bowl or container, the counter will collect random items and look messy. If the faucet finish doesn’t relate to the mirror and towel hardware, the sink area reads like it’s from a different room. The fix is simple: keep one organizing piece on the counter and match metal tones across the corner.
More in Bathroom
7 earthy-bathroom swaps for a $600 refresh
A $600 weekend refresh for a bathroom vanity corner: rug, botanical print, greenery, and a brighter mirror setup. These swaps keep the eart…
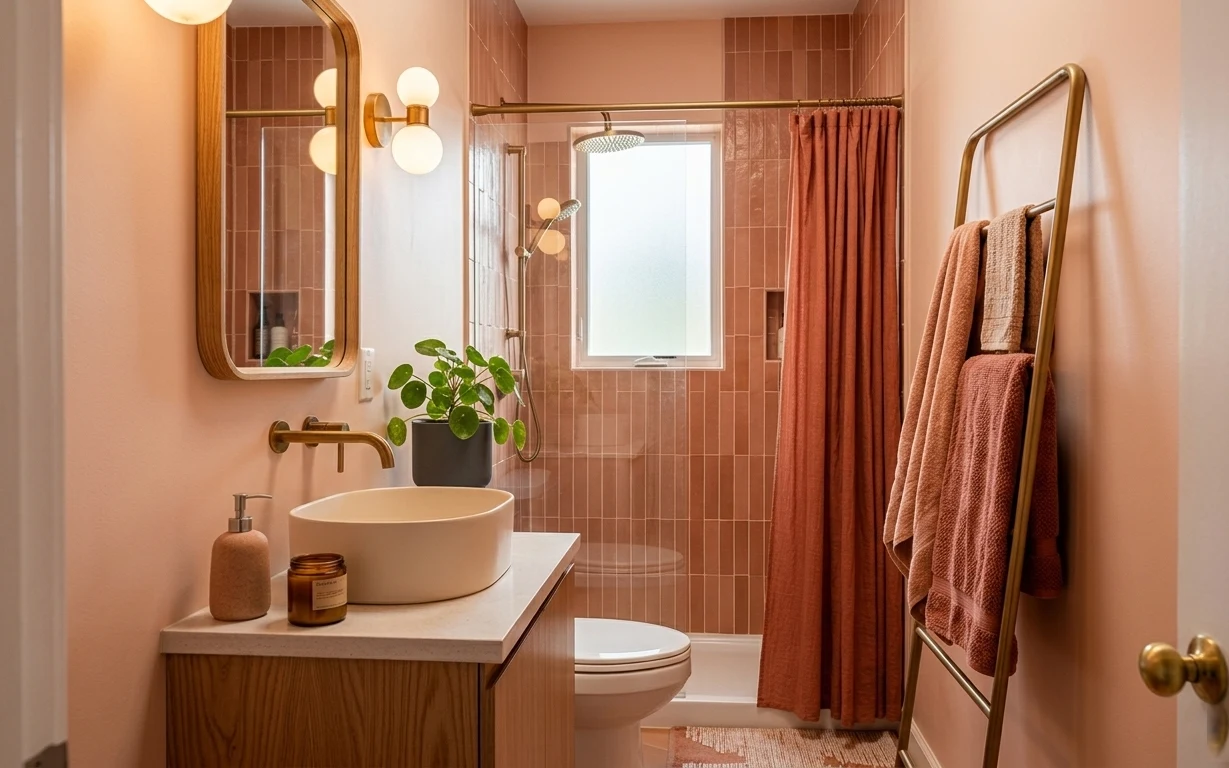
What $500 buys: a terracotta-and-brass bathroom refresh
A terracotta shower curtain, warm-toned vanity paint, and a bold arched mirror make this bathroom feel intentional again. This weekend refr…
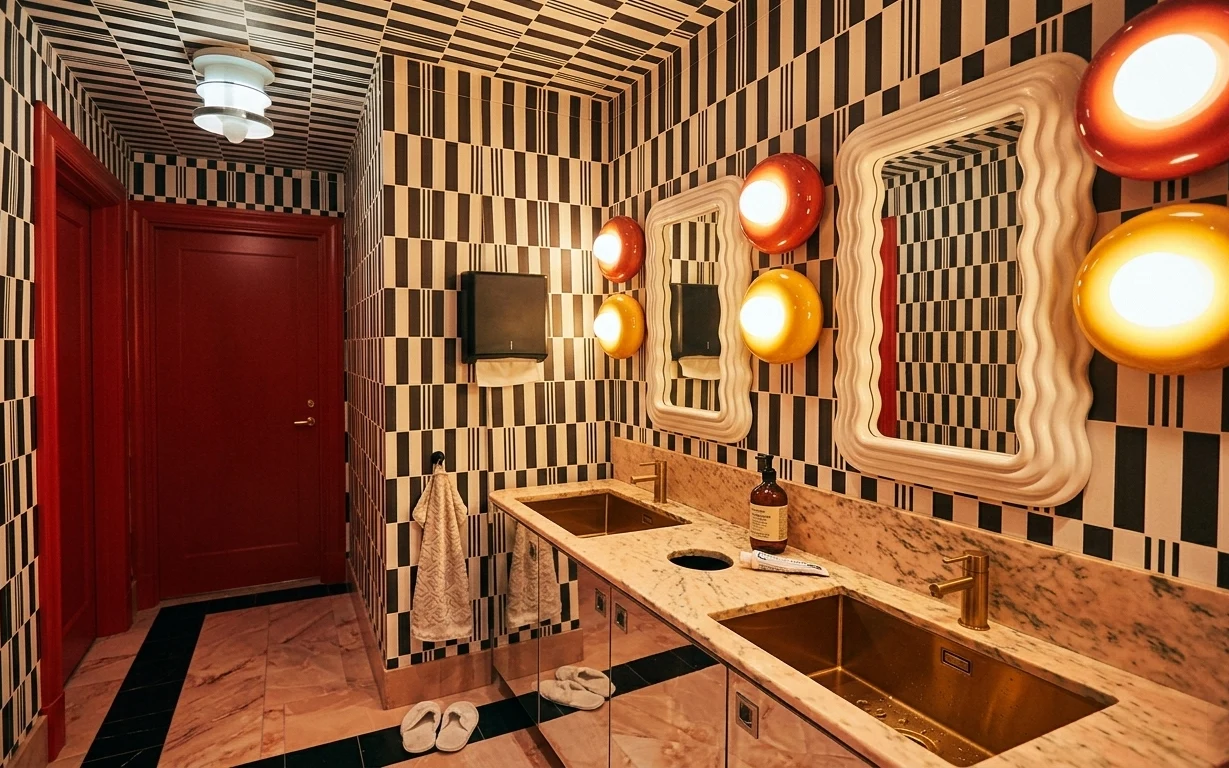
7 renter swaps for a retro bathroom refresh, $400
A retro bathroom refresh for renters on a $400 budget: swap in a soft black bath mat, style beige towels and flip-flops, and add no-drill b…