- Square footage
- Small corner makeover
- Cost
- About $565 (budget $600)
- Difficulty
- DIY cordwork + easy swaps
- Renter-safe
- No drilling required
Why earthy-neutrals are the window-and-cat corner of 2026
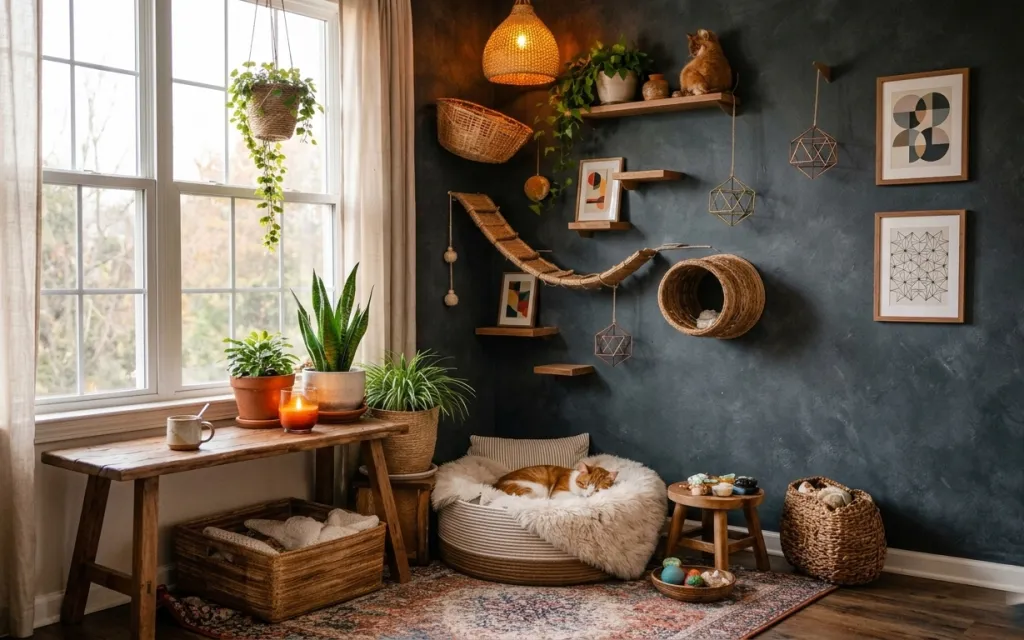
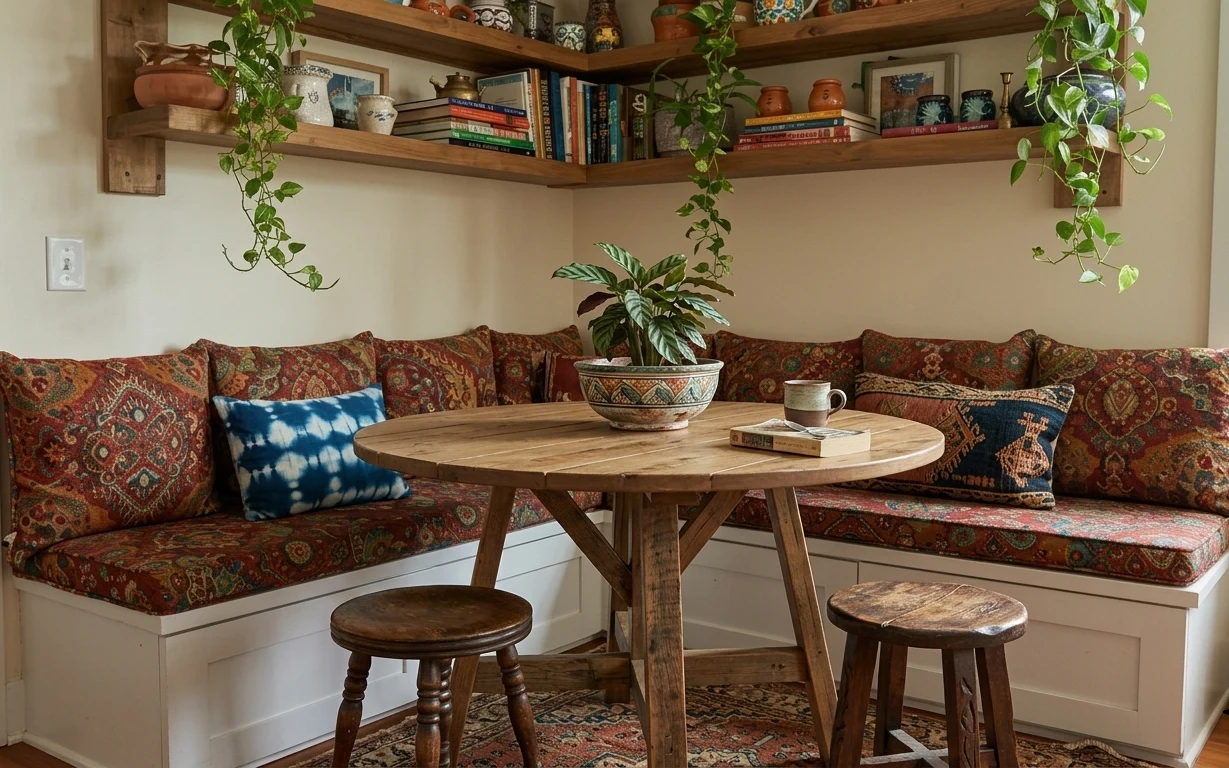
That dark blue-gray wall is the anchor, and everything else is basically “texture on top of texture.” The large area rug has an earthy, mottled pattern that reads like it’s been lived on—in a good way. Cream floor-length curtains soften the window’s brightness, while the candle glow adds a second lighting temperature. Even the macramé-style wall hanging pulls the eye upward, so the whole corner feels styled instead of crowded.
I almost did the mistake I always do: I picked wall decor first and only later realized I hadn’t earned the right to go bold. In this kind of compact shared-space setup, the rug and curtains do the heavy lifting, then the smaller items (frames, candles, plants) can actually look intentional. Once I started thinking “packable layers,” the layout made sense fast.
Layer 1 — large area rug with earthy pattern ($200) Pattern that hides real-life spills
The rug is doing two jobs at once: it grounds the wood floor and it hides the “shared house chaos” that lands on the floor without permission. Choose an earthy, multitone pattern (not solid) because it disguises crumbs and water rings better than a single-color foundation. In this corner, the rug also ties the warm wood table and bench into the darker wall, so the room doesn’t feel split into two halves. The trade-off is that patterned rugs can feel busy if the rest of your textiles are loud—here, the curtains stay neutral, and the pillows are simple.
Pick a rug color story, not just a vibe
Match two tones from your wall (deep gray-blue + a warm neutral), then let everything else be secondary.
Layer 2 — cream floor-length curtains ($80) Softer than blinds, still easy to take with you
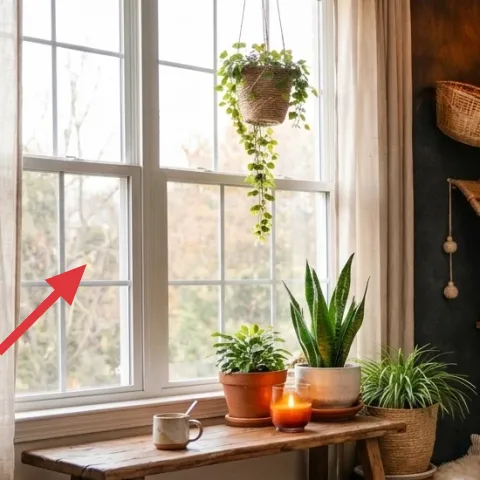
Cream curtains change the feel of a window instantly because they add movement and vertical softness without any installation drama. In a shared housing move, you want something you can fold flat and pack into a couple of boxes, and curtain panels are perfect for that. The warm cream also counterbalances the darker wall color, so your plants and art don’t look “stuck” in one area. I’m choosing curtains over a decorative window film look because they’re forgiving and swap-friendly at your next lease. The only real downside: you’ll need a tension rod setup in the new place if the hardware differs.
Keep the curtain texture light
Sheer-to-lightweight fabrics read airy in daylight and look intentional at night with a candle.
Layer 3 — candle in a small glass holder ($35) The warm glow that makes daylight décor feel finished
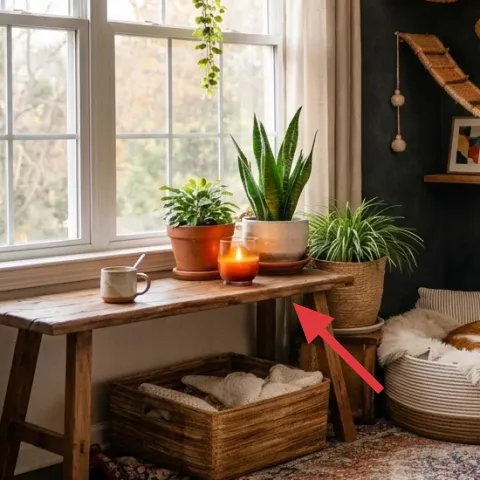
A candle in a small glass holder gives you that “evening styled” look without adding another big device. It’s placed near the table, so the light bounces off the wood and makes the corner feel lived-in instead of staged. This is a better play than chasing a second floor lamp because a candle is plug-free, moveable, and easy to box up. The trade-off is obvious—flame safety and time—but the visual payoff is instant, especially against the dark wall. For a similar effect, keep the candle holder compact so it doesn’t dominate the tabletop.
Don’t let glass holders crowd your plants
Leave a little breathing room so leaves don’t snag, and keep burning candles away from hanging greenery.
Layer 4 — large framed abstract art print ($80) One bold print balances all the texture
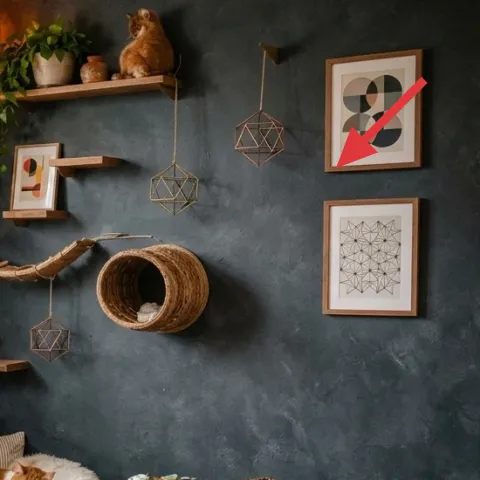
One large framed abstract print is what keeps the corner from feeling like “just plants and soft stuff.” The clean geometry inside the frame interrupts all the organic textures—rug fibers, curtain drape, and the woven macramé—and that contrast is what makes the look feel designed. This is also the easiest item in the whole refresh to pack: pop it in a frame box and you’re done. The trade-off is that large art can feel pricey if you buy new, so consider secondhand frames and prints that still read crisp from a few feet away. In this space, the art sits high enough to pull the eye up.
Choose a frame that reads warm in photos
Wood or warm-toned frames keep the boho palette from turning cold.
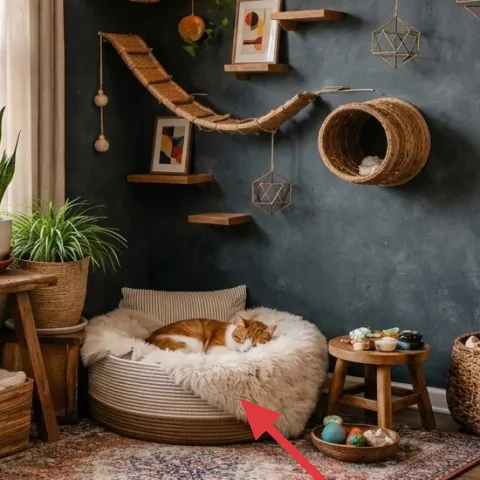
Layer 5 — macramé-style wall hanging hammock ($90) DIY wall texture you can remove at move-out
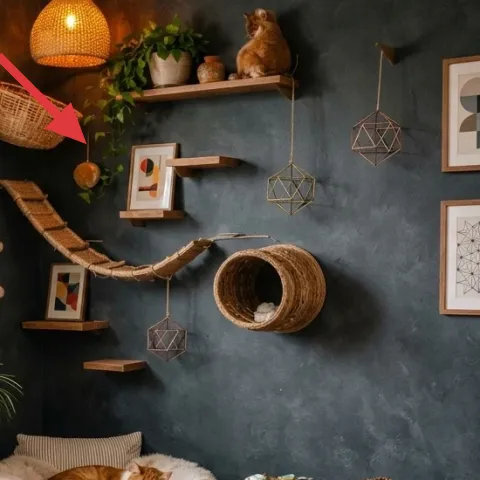
A macramé-style wall hanging hammock adds that “vertical softness” the wall otherwise lacks, especially on a dark painted backdrop. It works because it’s airy—cords create light-and-shadow without adding visual weight—so the corner still feels breathable even when you have rug, curtains, and multiple plants. This is the swap I’d make over buying more framed prints, since woven texture reads differently and doesn’t compete with your art. And it’s move-friendly: it’s made to come down. The trade-off: cord work looks best when your knots are consistent, so plan for a little patience.
Make it instead of buying it
DIY a macramé wall hanging hammock using cord, a simple dowel, and no-drill hooks so it packs flat and comes down easily.
Materials
- Macramé cotton cord — ~80 ft — craft store — $35
- Wooden dowel (for the top bar) — 18–24 in — hardware store — $12
- Command hook multi-pack — 1 set — box store — $8
- Thick twine (for tying ends) — 1 spool — craft store — $7
- Sheer fabric scrap or small cord wrap (for finishing) — 1 — craft store — $10
Steps
- Cut your cord lengths (make them uneven only if you want an intentional drape pattern).
- Wrap the cord ends around the dowel and tie securely so the top stays stable.
- Form the first knot rows on a flat surface, keeping spacing consistent as you work.
- Continue knotting until the hammock shape feels right for the wall height you’re aiming for.
- Tuck and tighten the cord ends, then trim only after the knot rows look even.
- Hang with no-drill hooks by looping the hanging points above the top knot line.
Total DIY cost: $72 — saves about $18 over buying.
Layer 6 — multiple potted plants on the wooden table ($30) Green that reads “done” without extra furniture
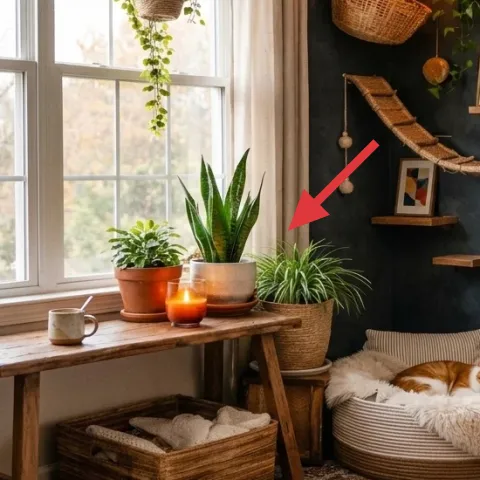
Plants pull color into the corner without adding more big objects, which is exactly what a small-space refresh needs. In the hero, the potted plants on the wooden table create a layered look that mirrors the layering you’re doing with rug + curtains + art. This is why I’m choosing plants over another decor tray: plants give you dimension and movement, especially when trailing leaves spill over the edge. The trade-off is maintenance—potted plants need light and a quick rotation, but that’s still easier than finding room for a new piece of furniture. Keep at least one plant with vertical leaves and one with a softer, rounded shape.
Vary leaf shape, not just plant height
A spiky leaf plus a rounder plant creates “boho structure” even in a tight corner.
Layer 7 — hanging planter basket ($50) Adds greenery overhead where floors stay clear
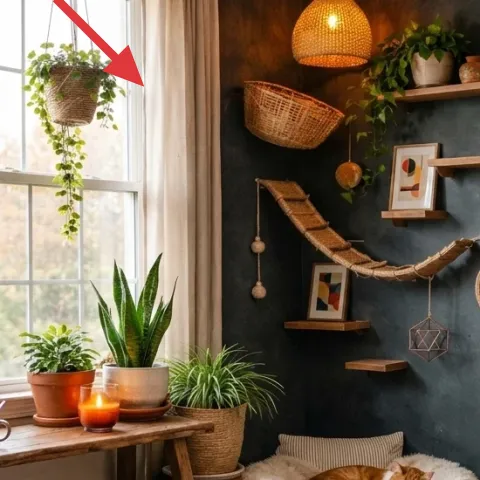
The hanging planter basket gives you a second plant level, which makes the whole corner feel bigger without adding footprint. On a dark blue-gray wall, the lighter planter and the green leaves create an instant focal point near the ceiling line. I’d pick this over stacking more floor baskets because overhead placement reduces clutter and keeps the rug area open for moving through. The trade-off is that hanging planters need to stay at a safe height and avoid tangling cords or art wires. For easy packing, detach the basket and re-tuck trailing stems gently in a box.
Keep the hanging line simple
Use a single, secure suspension point so it comes down fast at move-out.
The cost, layer by layer
| Layer | Item | Cost |
|---|---|---|
| 1 | Large area rug with earthy pattern | $200 |
| 2 | Cream floor-length curtains | $80 |
| 3 | Candle in a small glass holder | $35 |
| 4 | Large framed abstract art print | $80 |
| 5 | Macramé-style wall hanging hammock (DIY ~$72 materials) | $90 |
| 6 | Multiple potted plants on the wooden table | $30 |
| 7 | Hanging planter basket | $50 |
| Total | $565 | |
If you want the same look for less, shrink the framed print to a smaller size and buy one fewer plant pot—keep the rug, curtains, and macramé as the “big visual moves.” Thrift-store frames are often the cheapest way to keep the wall from looking plain.
What worked, what didn't (across the whole room)
Overall, the corner succeeds because it layers soft materials (rug + curtains) before adding personality (art, macramé, plants). The warm candle glow is especially effective against the darker wall. The only parts that can go sideways are the wall textures if they compete with each other.
What worked
- The patterned rug grounds the warm wood without looking dusty fast.
- Cream curtains soften the window area and make the whole corner feel calmer.
- The framed abstract print adds a clear focal point above the softer textures.
- Macramé wall texture brings vertical softness without adding a bulky piece.
- Plants on the table plus a hanging planter create depth in a small footprint.
- Candle light makes the dark blue-gray wall feel cozy at night.
What didn't
- Too many wall items at once can make the corner feel cluttered instead of curated.
- If the curtains are a much heavier fabric, daylight can look dim and flat.
- Plain wall art next to woven cordwork can make the textures feel disconnected.
- Overcrowding the tabletop can tangle around plants and candles.
What we'd skip if we did it again
Skip adding a second large wall frame right away. In a small corner, the wall already has multiple texture sources (macramé + hanging decor + plants), and too much “rectangular” content can crowd the eye.
Skip replacing curtains with a matching set of smaller window treatments. Cream floor-length panels do the best work here because they add height and softness without creating lots of extra pieces to store.
Skip buying a new shelf system or any permanent wall hardware. This look depends on removable layers, so Command-hook-style swaps and packable textiles keep your move-out painless.
Frequently asked
How long does this kind of refresh take?
Plan for about a weekend. Rug and curtains are the “same day” work, and framing and placing plants is quick once the anchor pieces are in. The only part that takes longer is the macramé wall hanging—block out an afternoon to knot and finish, then hang it where you can see the drape clearly.
Is this doable if I’m renting and can’t drill?
Yes—this corner relies on packable textiles (rug and curtains), plus removable wall decor. For the macramé wall hanging, use Command hooks that are rated for the weight you’re adding, and test the hang height before you commit. Everything should come down in under an hour during move-out.
What if my window is smaller or my corner is bigger?
If the window is smaller, scale the curtain panels down slightly and rely on the rug pattern to give the floor interest. If your corner is bigger, you can keep this layout and add one more plant vessel—but avoid doubling up on large wall frames. One strong art moment plus one woven piece keeps the look cohesive.
Where should I shop for these items with the same style?
For a boho-meets-earthy look, check thrift shops and discount home stores for framed abstract prints and curtain panels, then use craft stores for macramé cord and basic dowels. For the rug, look for multitone earthy patterns that won’t show everyday wear. Plants are easiest to source locally so you can pick textures in person.
What’s the biggest mistake people make in small-space corners like this?
Overbuilding the wall before the floor and window are set. If the rug and curtains aren’t chosen first, everything else starts fighting for attention—art, cords, and decor end up feeling random. Set the big, moveable foundation pieces first, then add one clear focal frame and a single woven texture.
More in Small Spaces

7 no-drill upgrades for a window-and-cat corner, $600
A window-and-cat corner can feel intentional without permanent changes. For about $600, this refresh uses 7 no-drill swaps—rug, curtains, f…
5 weekend-ready swaps for a $400 daybed nook refresh
Turn a daybed nook into a vivid, planty hangout with move-friendly swaps. This $400 plan focuses on a bold rug, a simple wooden coffee tabl…
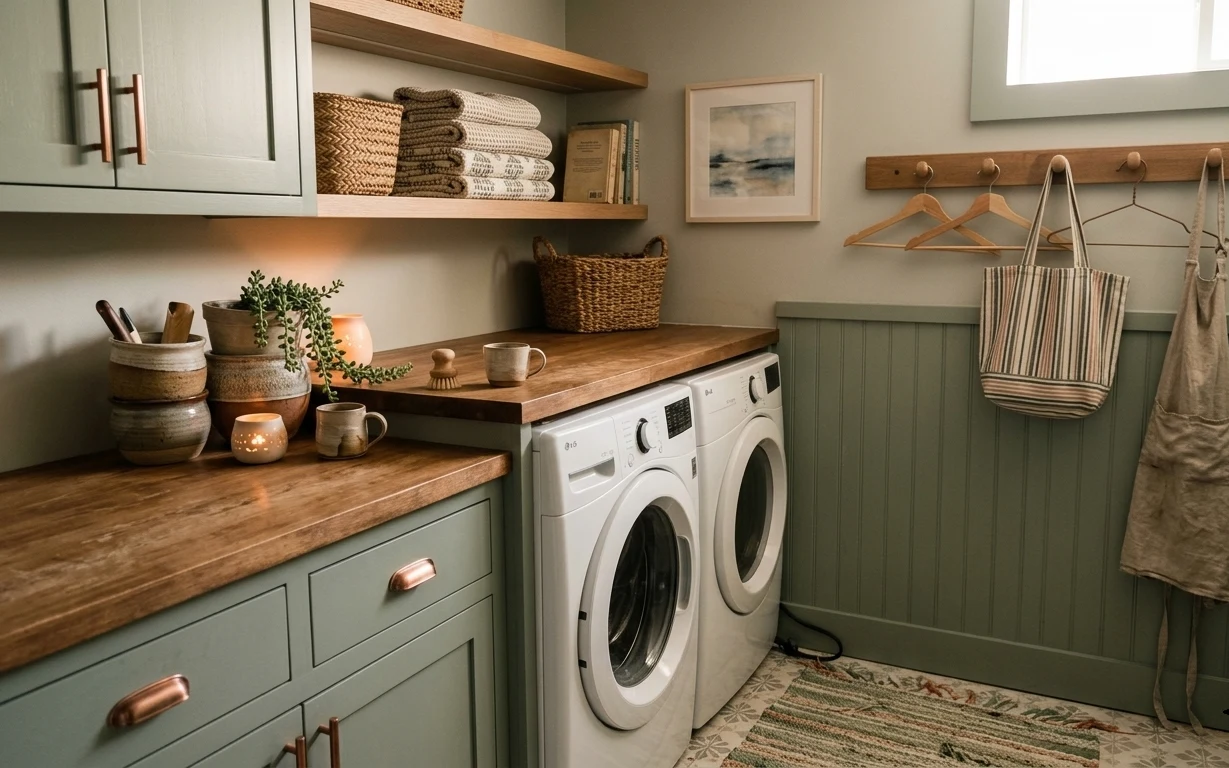
How to refresh a laundry nook for under $400
A weekend laundry nook refresh on a $400 budget: add one patterned rug, warm shelf styling, and a framed print so the machines feel built-i…