- Square footage
- Compact corner / ~60–90 sq ft
- Cost
- $450 total ($500 ceiling)
- Difficulty
- Easy (mostly soft goods + styling)
- Renter-safe
- No-drill, packable pieces
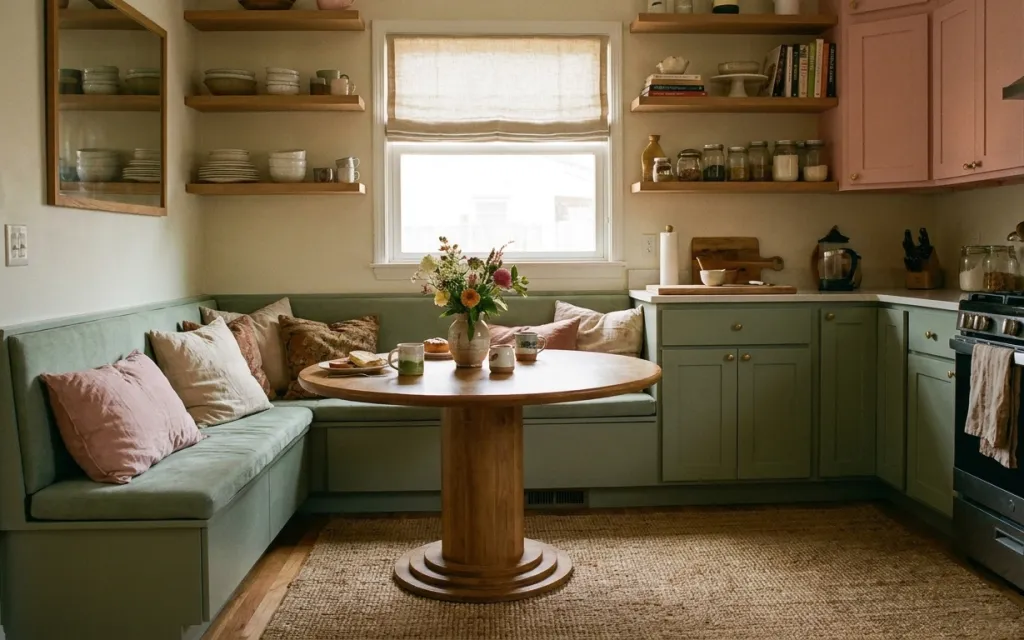
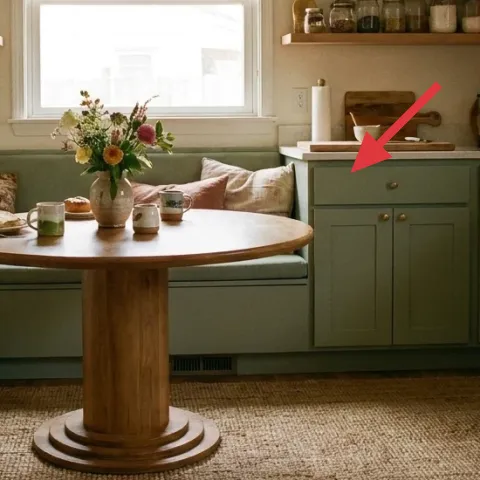
Why sage-and-rose textiles are the breakfast nook of 2026
There’s a specific kind of calm in the way this corner mixes muted sage upholstery with warm wood and that soft blush note from the throw pillows. The jute woven rug anchors everything with texture, while the round wooden table keeps the vibe communal instead of cramped. You can also see the “layering on a small surface” trick at work: a tray, a vase, and a couple of pillar candles turn a simple tabletop into a scene. For shared housing, this look is doable because the upgrades are mostly soft goods and styling objects you can box fast.
The first time I tried to copy a setup like this, I overdid it with matching sets—same ceramic, same height, same everything. It looked tidy for one week and then felt flat. What changed my mind was adding one warm-wood element (a round table) and letting the textures do the talking: woven rug, linen-feel pillow cover, and a little candle glow.
Layer 1 — Jute woven area rug ($200) Texture underfoot for a grounded look
The jute woven area rug is the anchor here: it brings that slightly rough, natural texture that makes the sage banquette feel softer instead of sterile. In a compact breakfast nook, rug pattern and weave matter more than color—because they’re what your eyes hit first when you sit down. The alternative would be something smoother (like a washable low-pile rug), but that reads more “utility.” This choice keeps the floor visually interesting, and it still rolls up well for moving day. Pick a size that extends under the front edge of the banquette and the table legs, so nothing looks like it’s floating.
Match the weave direction to the traffic flow
Run the rug so the weave reads straight through from the doorway to the table area—your eye stays calm, even in a small footprint.
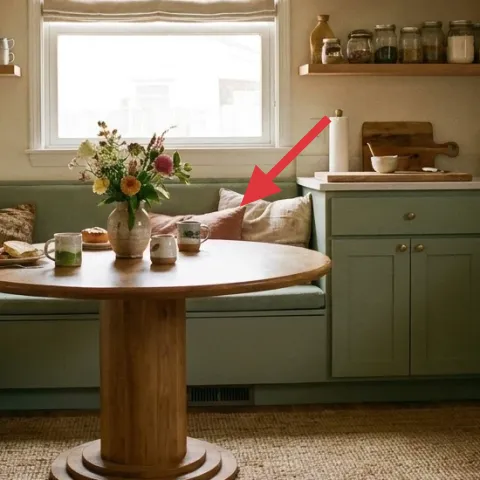
Layer 2 — Throw pillow cover in soft blush ($30) A quick color note that stays moveable
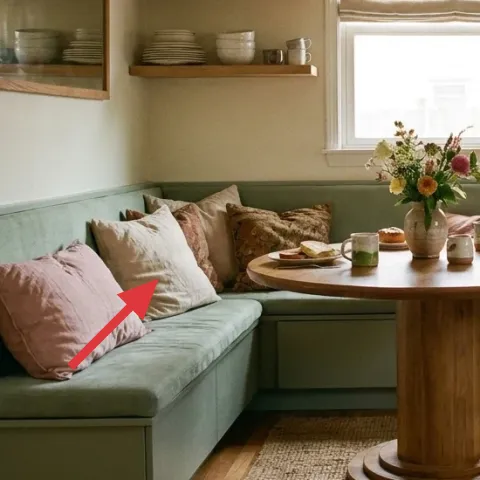
This soft blush pillow cover is doing real work: it adds warmth against the sage upholstery and keeps the whole corner from leaning too green. You’re not adding more furniture—you’re changing the texture and color at the sofa level, which is exactly what shared-housing refreshes can handle. The common mistake is buying a “perfect match” pillow set; then the room looks like a kit. Instead, keep the blush tone slightly dusty so it looks like it belongs with the wood and natural fiber rug. If you dye a cover (below), you can tune the shade to your own thrift finds.
Make it instead of buying it
DIY a soft blush throw pillow cover by dyeing an inexpensive light fabric cover so it lands close to the tone in the photo.
Materials
- Fabric dye (blush/pink) — enough for 1 cover — $12
- Salt — for dye bath — $3
- Gloves — pair — $2
- Plastic drop cloth or garbage bags — 1 set — $3
- Stir stick or wooden spoon — 1 (disposable or old) — $2
Steps
- Pre-wash the pillow cover so sizing doesn’t block the dye.
- Dissolve salt into warm water in a tub (this helps the color take evenly).
- Stir dye into the dye bath until fully mixed.
- Fully submerge the pillow cover and stir gently so no section stays pale.
- Let it dye for the time listed on the dye box, checking color at 10–15 minute intervals.
- Rinse until the water runs mostly clear, then wash separately in cold water.
- Dry flat or on low heat; avoid high heat until you’ve confirmed the shade.
- Insert the pillow form and fluff so the cover’s corners sit nicely on the banquette.
Total DIY cost: $22 — saves about $8 over buying.
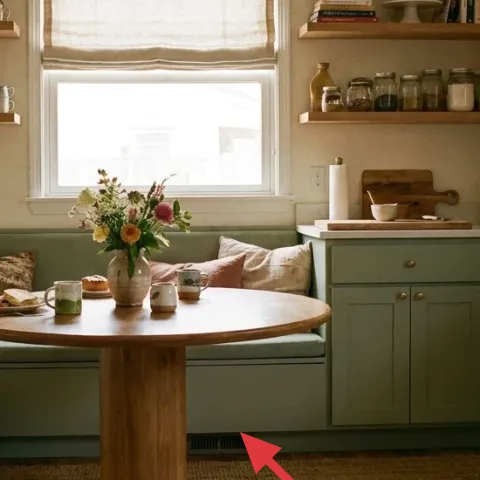
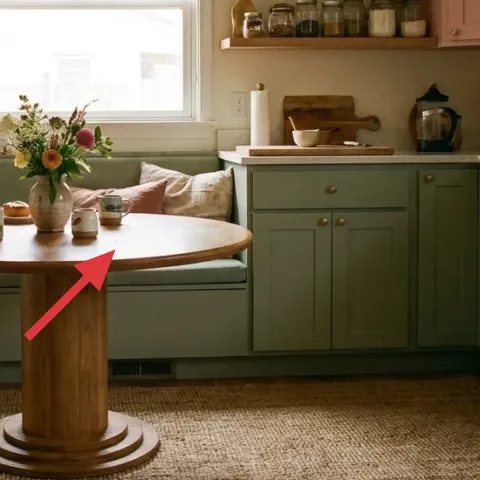
Layer 3 — Round wooden dining table ($120) Central warmth without bulk
The round wooden dining table is the reason this corner feels friendly: it keeps sightlines open between the banquette and the kitchen side, and it gives you a natural “gathering” shape for morning coffee. In a small breakfast nook, a rectangle can feel too rigid and can visually squeeze the room. This round top reads warm even when it’s mostly empty, which matters in shared housing where you might not set up the table every day. The trade-off is size—round tables take up floor space in a different way—so aim for a diameter that still lets you pass behind the banquette. If the table already exists, styling it well is the move.
Keep the centerpiece low
A short vase and a few candles keep the tabletop usable without turning into clutter.
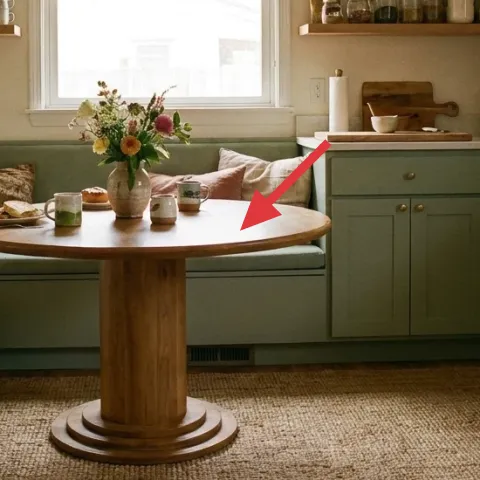
Layer 4 — Ceramic tray on the table ($25) The order that makes styling look effortless
A ceramic tray is what turns “random objects” into a cohesive tabletop. In this photo, the tray area groups small items into one zone—ceramics, cups, and little accessories—so your eye doesn’t scatter across the whole surface. The alternative is leaving each piece loose; it can look charming for five minutes, then it starts to feel accidental. With a tray, you can change the contents quickly for seasons while keeping the same base layout. Choose a tray with a matte or softly textured finish so it doesn’t glare under daylight and so it matches the warm wood and woven rug.
Use a tray with raised edges
Raised sides prevent cups and small candles from sliding during normal use.
Layer 5 — Small pillar candles ($20) Soft glow that reads even in daylight
Those small pillar candles add a quiet lighting cue without changing any fixed fixtures. Even if the room is bright during the day, candles signal “cozy time” because the flame height gives the eye a vertical focal point near the table center. The practical trade-off is safety and maintenance: don’t cram them too close to paper items or anything you might move while carrying a mug. In shared housing, candles are also easy to pack—stack them carefully and they’re ready for the next place. If you want the glow without smoke concern, choose unscented or low-odor candles and keep a stable tray underneath.
Don’t skip the stable base
Use a tray beneath candles so melted wax doesn’t land on ceramics or tabletop finishes.
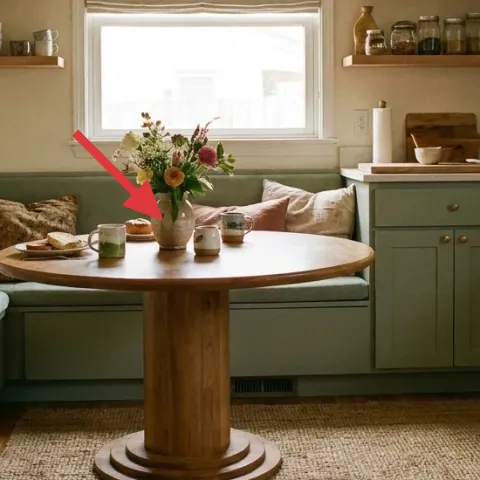
Layer 6 — Flower vase with mixed flowers ($40) Color that looks seasonal without wall art
The flower vase is one of the fastest ways to make this breakfast nook feel “set” because it brings color variation—pinks, greens, and warm accents—right where you’re already looking while sitting. Flowers are also renter-friendly: you’re not committing to a permanent wall change, and you can swap stems as your budget allows. The alternative is buying more décor to hang or stick to the wall, but that runs into lease rules and removal worries. A vase gives you the same uplift with almost zero risk. For the best match to the photo, choose mixed stems with some airy texture and keep the height moderate so the table still feels open.
Repeat one color from the pillows
Pull blush or soft pink from your pillow cover so the vase looks intentional, not random.
Layer 7 — Ceramic mug on table ($15) One lived-in object, not a themed set
That ceramic mug is the “daily life” detail that keeps the corner from looking staged. Styling can tip into showroom territory fast in small spaces, especially when everything is too coordinated. A single mug—plus the other small ceramic cups—does something important: it reassures the eye that this is a working nook. The trade-off is you have to actually use the pieces; otherwise, they start looking like props. If you want the look to last longer, keep one mug dedicated to the table styling so mornings stay low-effort. Mix shapes slightly within the same warm ceramic family for an organic feel.
Keep the mug with a “resting” spot
Let the tray be the home base so you don’t need to rebalance items every time you clear the table.
The cost, layer by layer
| Layer | Item | Cost |
|---|---|---|
| 1 | Jute woven area rug | $200 |
| 2 | Throw pillow cover in soft blush (DIY) | $30 |
| 3 | Round wooden dining table | $120 |
| 4 | Ceramic tray on the table | $25 |
| 5 | Small pillar candles | $20 |
| 6 | Flower vase with mixed flowers | $40 |
| 7 | Ceramic mug on table | $15 |
| Total | $450 | |
A cheaper variant keeps the same layout but swaps in a smaller jute rug size or a cotton-blend throw pillow cover, plus one or two candles instead of a fuller set. Those small cuts usually land you close to $350–$400 while keeping the table-and-textiles layering.
What worked, what didn't (across the whole room)
This corner reads cohesive because the palette stays muted and the textures do most of the styling work. The tabletop and rug layering also make it feel intentional without needing any permanent changes. The only things that can go wrong are overshooting on matching sets and letting candle items crowd the usable surface.
What worked
- The jute woven rug adds texture that softens the sage banquette and makes the floor feel finished.
- The blush pillow cover brings warmth without adding extra furniture or visual weight.
- The round dining table improves flow in a small breakfast nook by keeping sightlines open.
- The ceramic tray groups tabletop items into one zone, preventing scattered-looking clutter.
- Small pillar candles add a vertical focal point and a calm nighttime glow without fixture changes.
- The mixed flower vase adds seasonal color variation while staying easy to pack and swap.
What didn't
- Matching everything too tightly can make the nook feel like a display instead of a lived-in spot.
- Using a taller centerpiece can crowd the tabletop and make daily use annoying.
- Leaving tabletop items loose creates visual noise in a compact layout.
- Skipping a stable base under candles increases the risk of wax mess on the tabletop.
- Choosing a rug with a very smooth finish can make the room feel more like “coverage” than warmth.
What we'd skip if we did it again
Skip any plan to add more permanent wall décor in a shared kitchen nook. In older spaces like this, the wall already has practical structure (shelves and window framing), and too much added art can feel busy before it looks personal.
Skip buying a full themed ceramic set to “complete the look.” One mug, a couple of small cups, and a tray get you the lived-in effect for less money, and those individual pieces pack more easily than a whole matching set.
Skip oversized candles and tall vases on the table. In a small breakfast nook, height steals usable space, and you end up moving objects every time you eat or carry cups through the corner.
Frequently asked
How long does this breakfast nook refresh take?
Most of the work is styling and swapping soft goods, so it’s realistic to do in a single afternoon. Plan about 30–45 minutes for rug placement and quick straightening, 15–25 minutes to arrange the tray and ceramics, and another 10–15 minutes to set the vase and candles. If you DIY the pillow cover with dye, add a few hours for dye time and rinse/wash steps.
Is this renter-friendly if I can’t change the kitchen or banquette?
Yes—the core updates are a rug and textiles plus tabletop styling objects: pillow cover, tray, candles, flowers, and everyday ceramics. Those don’t require drilling or replacing fixed fixtures. The only “hands-on” part is dyeing a cover, which is still removable and reusable in your next place.
What if my breakfast nook is smaller or the table feels tight?
Go smaller with the rug (but still anchor under the front edge of seating) and keep the centerpiece lower. Choose a tray with a footprint that fits your everyday routine—coffee cups plus one small candle should be the limit. In tighter corners, one color note (like the blush pillow) beats adding multiple accents everywhere.
Where should I shop for these move-friendly pieces?
For rugs and pillow covers, budget-friendly options usually show up at discount retailers and large home stores, while thrift and consignment are great for ceramics. For candles and basic trays, look for unscented pillar candles and matte ceramic finishes that won’t glare under daylight. Flowers can be weekly from a grocery or local florist—pick mixed stems that echo your pillow color.
What’s the biggest styling mistake in this kind of small nook?
Over-coordination is the big one—matching every ceramic piece and stacking multiple tall items makes a small table feel cluttered. Instead, keep a simple base (tray + one mug + one candle cluster) and let texture do the rest: woven rug, linen-feel pillow cover, and natural variation from the mixed flowers.
Can I skip the DIY pillow cover and still get the same look?
Absolutely. Buy a blush pillow cover in a light, breathable fabric (linen, cotton, or a linen-blend look) and match the undertone to the vase flowers. The real purpose of that pillow is to warm up sage upholstery, so even a slightly dusty pink works well as long as it doesn’t read neon.
More in Small Spaces

Under $500: a move-friendly breakfast nook refresh
A small breakfast nook makeover with $500 of renter-safe upgrades: a jute rug, a blush pillow cover, and simple candle-and-ceramic styling.…
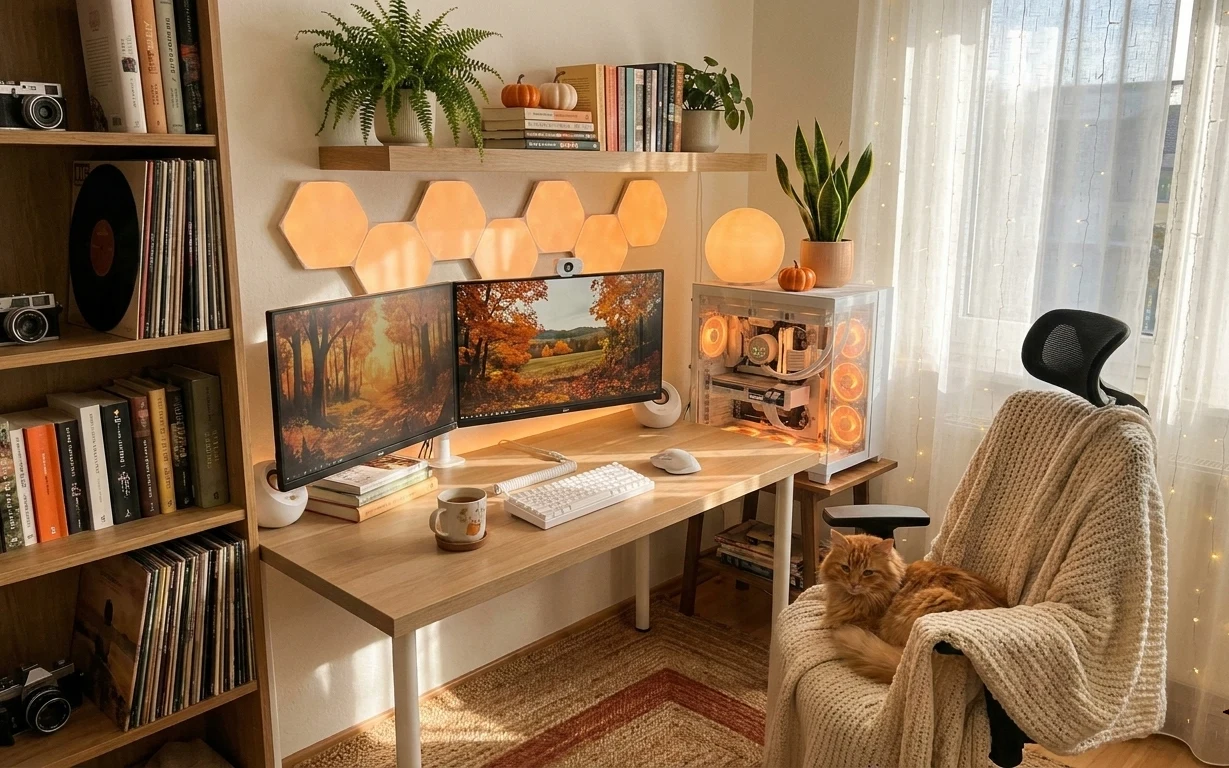
How to refresh a home office corner for under $400
A small home office corner can look warm and put-together without permanent changes. This $400, move-friendly refresh uses a rug, sheer cur…
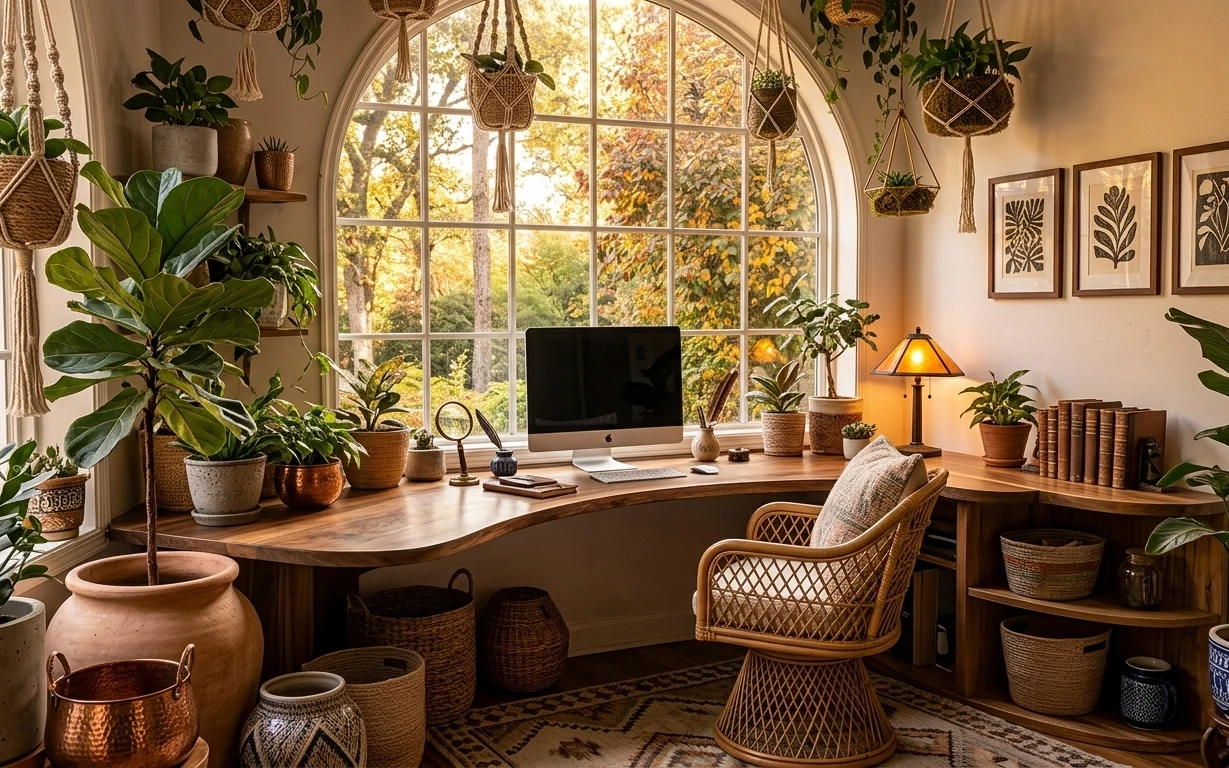
Under $800: sunlit window office nook refresh with 7 swaps
Turn a compact, plant-filled window nook into a brighter workspace using 7 swaps you can do over a weekend. This refresh is built around a …