- Best for
- Adding depth and botanical calm to a kitchen corner
- Time
- One weekend (about 4–6 hours total)
- Difficulty
- Moderate DIY
- Cost
- About $550 planned
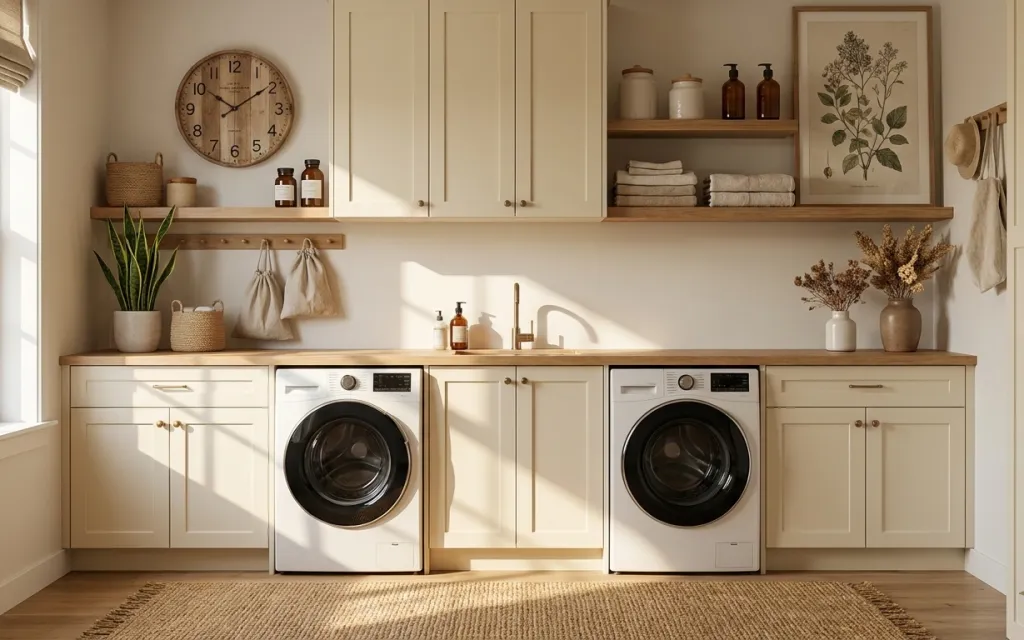
Why sunlit cream-and-walnut styling is the kitchen corner of 2026
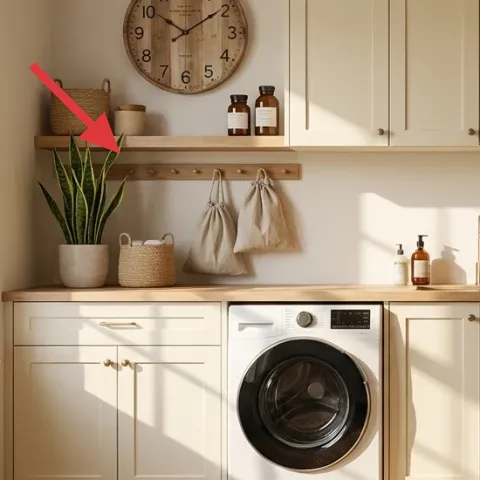
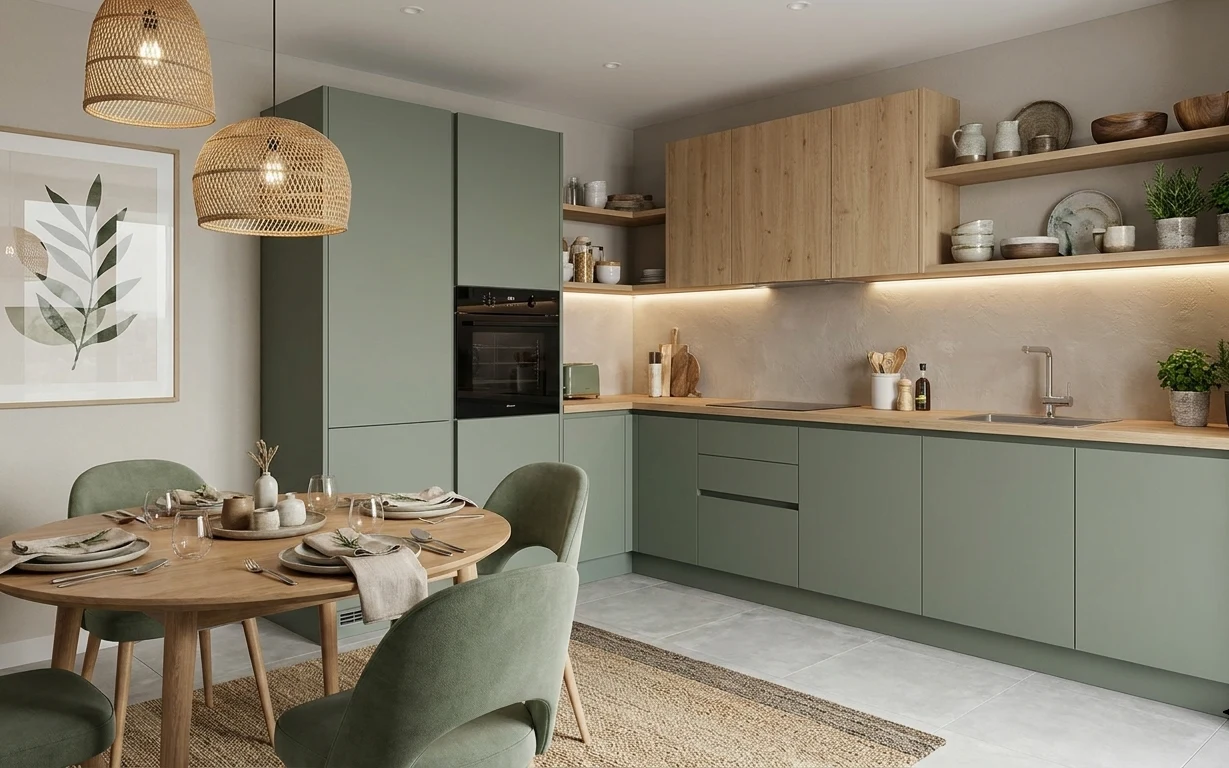
The quickest “whole corner” upgrade usually isn’t a new cabinet—it’s texture plus one clear focal point. In this space, the woven rug anchors the floor, while the framed botanical wall art and the tall potted plant keep the shelves feeling curated instead of cluttered. You can also see how the warm wood floating shelf and light cream cabinets create a consistent base for small accents like the woven baskets and the vase with dried branches. For US homeowners, this is the kind of update you can fully control on a weekend.
I used to over-style kitchen counters with matching containers, then wondered why everything looked busy. What changed for me was keeping the materials limited: woven + wood + a little sage-green. Once I let the wall art and plant do the “botanical” work, the shelves suddenly felt calmer—even with real bottles and towels hanging nearby.
Layer 1 — Woven area rug ($200) Grounds the space in real texture
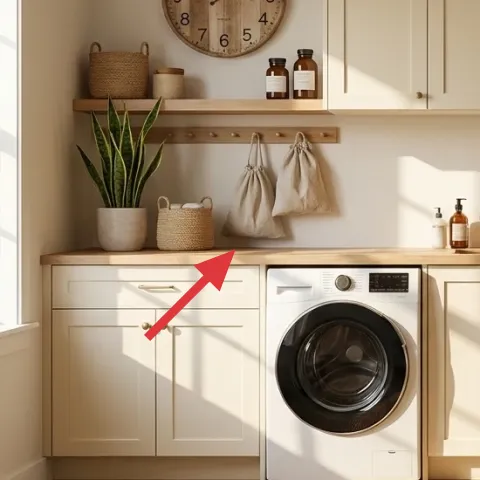
A woven area rug like the one in the foreground is doing more than softening sound—it’s visually tying together the warm wood floor, the cream cabinets, and the natural baskets. This kind of rug also hides everyday wear better than glossy tile or a pale flatweave. The trade-off is that woven rugs aren’t “set-and-forget,” so plan for vacuuming and quicker spot cleaning. If a solid-color rug feels too plain for this corner, choose one with visible flecks or a tight weave so the room stays bright even when things get busy.
Choose a rug with a tight, low-shed weave
That texture reads cozy in daylight and still holds up near a laundry area’s higher foot traffic.
Layer 2 — Framed botanical wall art ($80) Makes the shelves feel styled, not accidental

The framed botanical wall art on the right wall is the easiest focal point to add when you want “natural” without buying a whole new set of cabinets. Because it’s already framed and positioned high, it lifts the eye above the countertop and gives the floating shelf a clear visual partner. The decision to keep it botanical matters: it echoes the tall potted plant’s green and keeps the palette from turning into just cream-and-wood. The trade-off is size—too small and it looks like décor instead of a design element.
Let the frame match the room’s hardware tone
A simple frame keeps the focus on the leaves instead of the frame itself.
Layer 3 — Tall potted plant ($80) Adds height without adding clutter
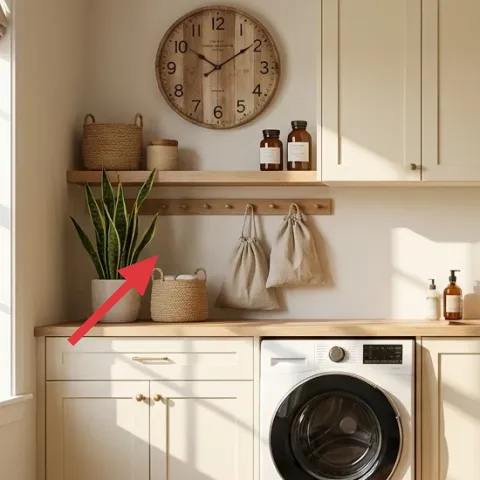
The tall potted plant in a light pot brings vertical life to the corner and balances the horizontal run of cabinets and countertop. It also gives the floating shelf styling somewhere to “land,” because the green reads like an intentional repetition of what’s on the wall art. Compared with adding more containers, a plant is a higher-impact change that still feels lived-in. The trade-off is light: plants don’t forgive dark corners, so placement near the window and bright daylight is the difference between lush and droopy.
Keep the pot color light, not matching-white
It blends with the cream cabinets but still shows up in photos.
Layer 4 — Vase with dried branches ($30) One botanical touch that lasts
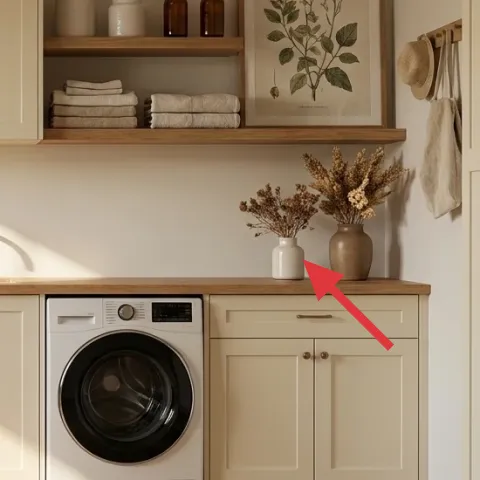
The vase with dried branches is doing that “botanical” work without needing daily watering. Set on the right side near the towels, it adds a sculptural shape that plays nicely with the straight lines of the countertop and the cabinet doors. I like this over fresh-cut flowers here because the room already has real bottles and everyday items—dried stems don’t compete with them. The trade-off is that dried arrangements look best when you dust them occasionally and replace them when the stems start shedding.
Pick branches with multiple twig thicknesses
That variety makes the bouquet read fuller at a glance.
Layer 5 — Large woven basket ($25) Organizes while staying decorative
The large woven basket adds warmth and hides the “kitchen corner mess” that happens with real life—extra towels, small odds-and-ends, and anything that needs a home. Because it’s woven, it visually softens the straight cabinet lines and pairs naturally with the woven rug texture. If you swapped it for a smooth plastic container, the corner would feel colder and more utilitarian. The trade-off is capacity: baskets look best when they aren’t overstuffed, so keep one basket for one category and rotate what lives there.
Use baskets as category bins
One for linens, one for smaller accessories, and the counter stays calm.
Layer 6 — Small woven basket ($15) Fills the shelf without crowding
This small woven basket works like a visual spacer between the tall plant, the wall art, and the countertop items. It helps the shelf styling look intentional because it repeats the same woven texture found in the rug, but it does it at a smaller scale. I’d rather have two woven sizes than one oversized basket, because one large piece can dominate the corner when you’re also styling with a plant and a vase. The trade-off is stability—smaller baskets are lighter, so keep them where they won’t get bumped by hands reaching for towels.
Don’t bury the basket’s weave under too much stuff
When the texture is hidden, the whole point of the woven look disappears.
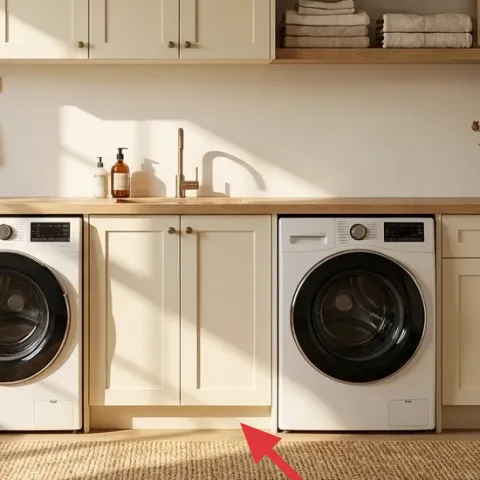
Layer 7 — Peel-and-stick wallpaper behind countertop ($120) Gives the corner depth without a renovation
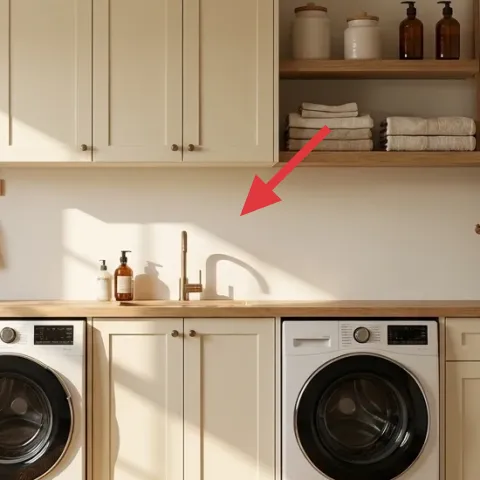
If you want the biggest “this feels new” effect without demolition, the wall area behind the countertop is where peel-and-stick wallpaper can do the heavy lifting. Adding a botanical or soft pattern backdrop makes the framed botanical wall art and the vase with dried branches look more connected, like part of one story instead of separate décor. The trade-off is that wallpaper shows surface flaws—so cleaning and smoothing the wall matters. Compared with painting cabinets or swapping fixtures, this is faster and far easier to correct if you change your mind later.
Make it instead of buying it
Apply peel-and-stick botanical wallpaper to the wall behind the countertop so the plant accents look intentional together.
Materials
- Peel-and-stick wallpaper roll (enough for one wall ~30 sq ft) — 1 roll — home improvement store — $70
- Wallpaper smoothing tool (plastic scraper) — 1 — home improvement store — $12
- Utility knife + extra blades — 1 set — hardware store — $10
- Painter’s tape — 1 roll — hardware store — $8
- Microfiber cloth + mild cleaner — 1 kit — grocery or hardware — $6
Steps
- Clean the wall behind the countertop and let it dry fully.
- Use painter’s tape to mark the wallpaper start line so the pattern stays level.
- Measure wall height and cut the first strip with a sharp utility knife.
- Peel the backing a few inches at a time and align the top edge to your tape line.
- Smooth outward from the center using the smoothing tool to prevent air bubbles.
- Trim edges around outlets/trim lines carefully with fresh blades.
- Cut and apply the next strip, matching the pattern as you go.
- Press seams with gentle, even pressure so they lay flat.
Total DIY cost: $106 — saves about $14 over buying.
The cost, layer by layer
| Layer | Item | Cost |
|---|---|---|
| 1 | Woven area rug | $200 |
| 2 | Framed botanical wall art | $80 |
| 3 | Tall potted plant | $80 |
| 4 | Vase with dried branches | $30 |
| 5 | Large woven basket | $25 |
| 6 | Small woven basket | $15 |
| 7 | Peel-and-stick wallpaper behind countertop | $120 |
| Total | $550 | |
If you want a cheaper variant, swap the tall potted plant for a smaller tabletop plant and choose a simpler wallpaper pattern with fewer color tones. Keep the framed botanical print and the woven rug—those two do the most work per dollar.
What worked, what didn't (across the whole room)
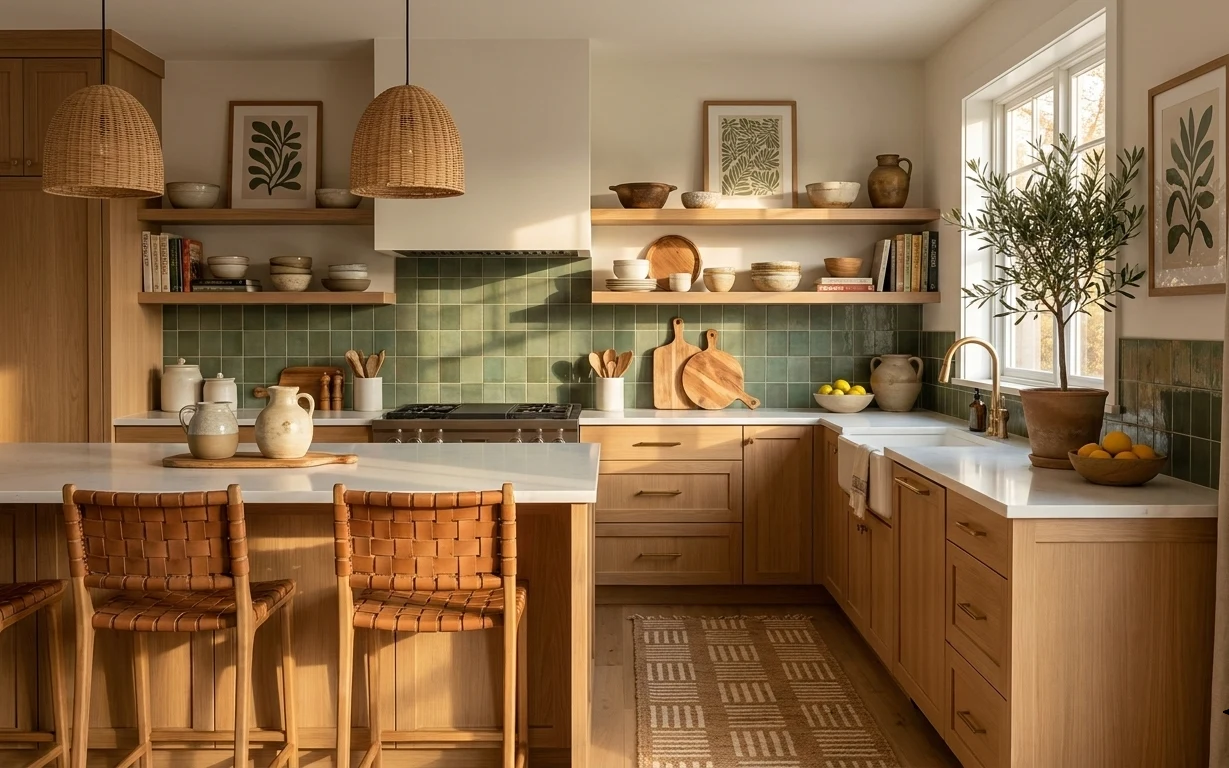
The biggest win is how the room uses natural textures in multiple scales: rug underfoot, baskets for organization, and a plant for height. The framed botanical wall art and the vase with dried branches make the corner feel curated instead of purely functional. The one place where things can get off track is when the wallpaper pattern competes with the leaf shapes on the wall art.
What worked
- The woven area rug ties together the warm floor and the cream cabinet color.
- The framed botanical wall art creates a clear focal point above the countertop clutter zone.
- The tall potted plant adds vertical balance and echoes the botanical theme.
- Baskets keep everyday items contained while repeating the rug’s woven texture.
- The vase with dried branches adds shape without daily maintenance.
- Wallpaper behind the countertop adds depth so the shelves look styled, not random.
What didn't
- A too-busy wallpaper pattern makes the framed botanical art feel smaller.
- Overfilling baskets hides the weave and turns them into generic storage bins.
- If the tall plant pot is too dark, it can overpower the cream cabinetry.
- Skipping rug padding (if needed) can make the woven rug shift underfoot.
What we'd skip if we did it again
Skip a high-gloss runner or vinyl-looking “easy-clean” alternative. In this corner, the look depends on warmth—woven fibers and matte textures keep the bright daylight from making the kitchen feel stark.
Skip matching every shelf object in the same color family. You want repetition of materials (woven, wood, and light pots), but variation in scale so the corner feels collected instead of coordinated.
Skip choosing wallpaper before testing it against the framed botanical print. If the pattern has bold contrast, it competes with leaves and branches—pick a softer botanical or tone-on-tone print so everything reads as one story.
Frequently asked
How long does this kind of kitchen corner refresh take?
Plan for a weekend if the goal is mostly décor plus one wall update. Swapping in the woven rug and reorganizing baskets is quick, usually 60–90 minutes. The framed botanical art placement is a short, low-stress step. Peel-and-stick wallpaper is the time driver—budget about 2–3 hours depending on how many cuts you need around edges.
Can you do this if you rent?
A similar look is absolutely doable in a rental because the core pieces are removable: the framed botanical wall art, baskets, and plant styling. For the wall, choose peel-and-stick wallpaper over paint and remove it carefully when you move. The key is keeping the wall clean and smooth, because rentals often have texture that affects how wallpaper seams lay.
What if my kitchen corner is smaller than in the photo?
Go smaller on the rug and keep the botanical focal point tighter. A narrower rug footprint still benefits from the woven texture, but choose a size that leaves a clear walkway. For wall art, keep it centered at eye level and avoid multiple prints. You can also use only one basket size, letting the plant and framed art carry the rest of the visual weight.
What if my kitchen corner is larger?
In a bigger corner, the same ingredients scale up by adding negative space. Choose a slightly larger rug footprint and consider wider spacing between baskets and the tall plant so the counter doesn’t look packed. For wallpaper, extend coverage consistently across the wall for a clean backdrop line, then keep the décor count steady—too many items will compete with the botanical theme.
Where should I shop for the woven rug, baskets, and botanical wall art?
For woven rugs and baskets, look for home goods stores and online retailers that focus on natural textures and neutral fibers. Botanical wall art is widely available from print shops and home décor brands; choose a framed piece with muted greens and cream tones. For peel-and-stick wallpaper, prioritize brands with a track record for easy alignment and removable performance.
What’s the biggest mistake people make in a kitchen corner like this?
The most common mistake is picking too many competing patterns at once—like a bold wallpaper print plus a busy wall art plus high-contrast décor. The photo’s look works because it repeats a small set of materials: woven texture, light wood, and botanicals in soft tones. If one pattern feels too loud, scale it back and let texture do the heavy lifting.
More in Kitchen & Dining

Under $600: botanical kitchen corner refresh with 7 weekend wins
Turn a bright kitchen corner into a calm, botanical moment with 7 budget-friendly upgrades. This weekend refresh keeps the look cohesive—ju…
Under $1000: a homeowner's warm-modern kitchen refresh with seven sun-soaked layers
A complete seven-layer homeowner refresh for a warm-modern kitchen — sage tile backsplash, oak cabinets, three hand-woven saddle-leather ba…
Under $250: sage-and-wood kitchen dining refresh
A move-friendly kitchen dining zone refresh for roommates and shared housing, built around a jute-look rug, framed botanical print, and eas…