- Best for
- Weekend bathroom refresh
- Cost
- $710 total
- Time
- 1–2 weekends
- Renter-safe
- Mostly (mirror + styling); hardware depends
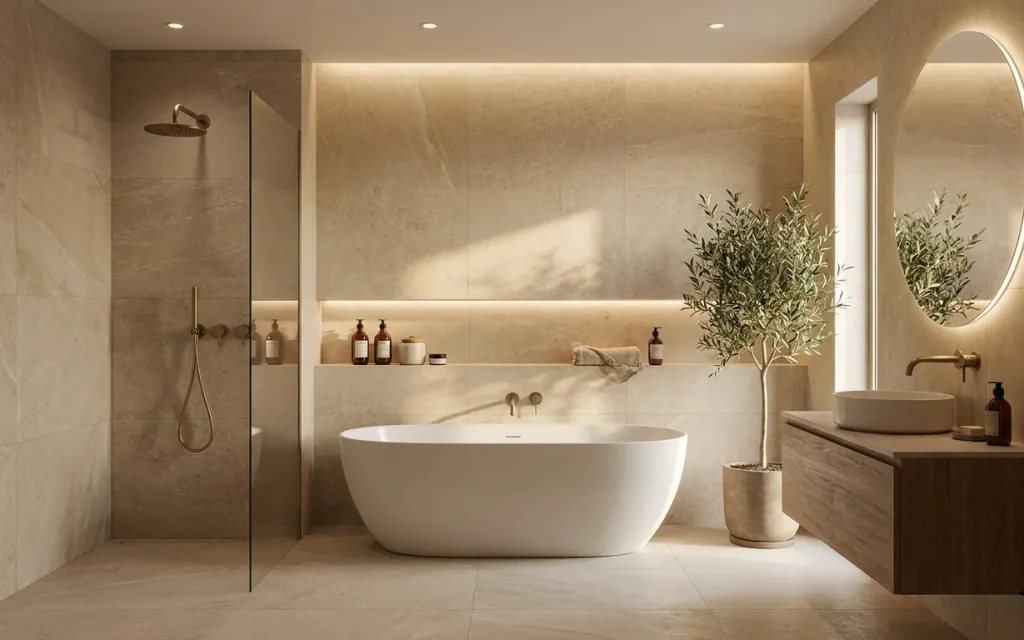
Why warm brass-and-beige spa styling is the spa-style bathroom of 2026
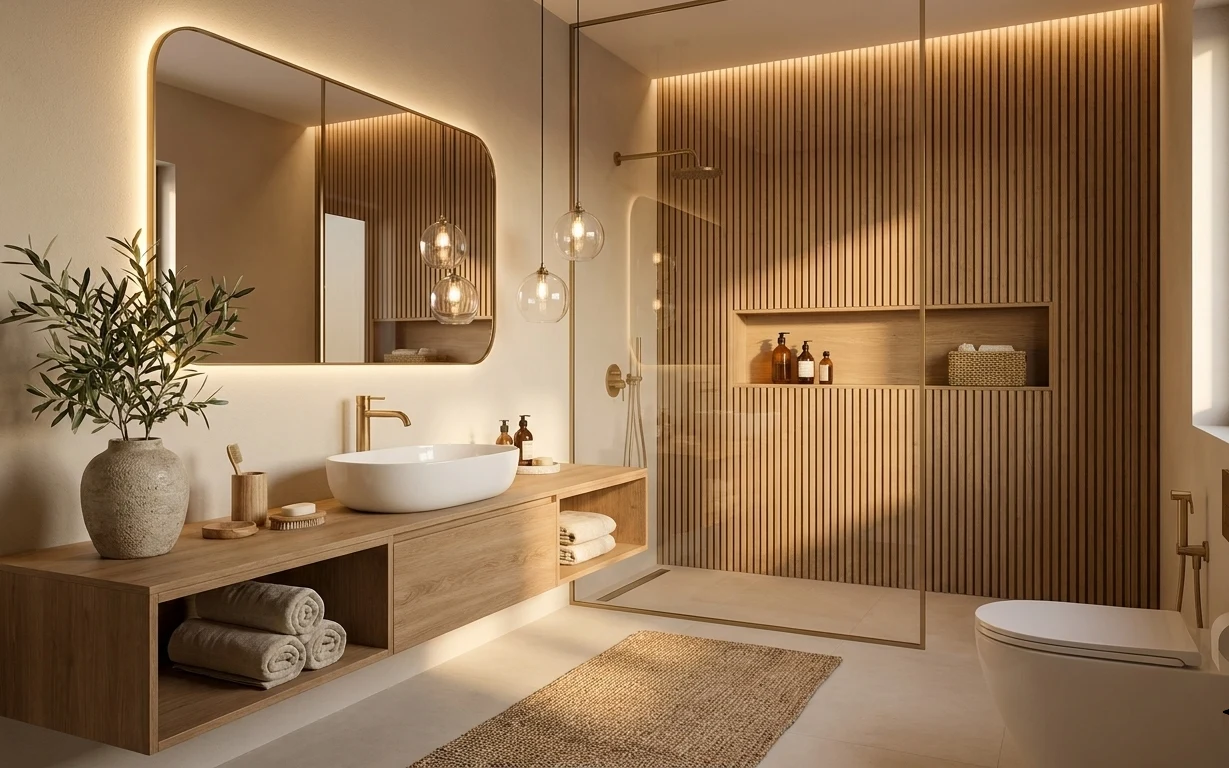
The fastest way to make a bathroom feel calmer is to pull the visual weight toward warm metals, clean shapes, and a single “botanical moment.” In this photo, the beige stone tile floor and walls set a neutral baseline, then the brass tones and soft lighting do the heavy lifting. The rolled hand towel, clustered soap dispenser bottles, and the potted olive tree make the space feel lived-in without looking cluttered. For US homeowners, these are weekend-friendly swaps because the structure is already there—you’re styling what you already own.
I used to over-style bathrooms with tiny decor everywhere (which always turns into dust cleanup). The mistake I finally corrected was keeping the countertop and niche styling to one height band: towels here, bottles there, plant off to the side. That’s what makes this look feel intentional—especially when the recessed lights and backlit mirror soften the edges. The result is a spa-style bathroom that still feels like your home, not a showroom.
Layer 1 — oval mirror ($120) a warm-lit focal point above the sink
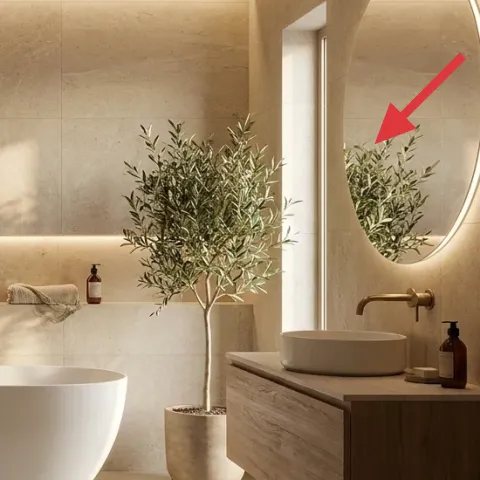
An oval mirror is one of the highest-ROI upgrades here because it adds a softer shape right where your eyes land—above the sink and vanity cabinet. The warm glow from the mirror lighting helps the beige tile feel richer instead of flat, and the oval silhouette plays nicely against the straight lines of the wall and shower glass panel. The obvious alternative would be another round mirror, but the oval is slightly more elongated, which makes the whole vanity area feel a touch taller. Trade-off: you’ll want to measure height and clearance so it doesn’t crowd the counter.
Match the mirror’s warmth to the rest of the brass
If your faucet hardware is brass-toned, pick a mirror light with a warm white temperature so the metal tones don’t look yellow-green.
Layer 2 — wood bathroom vanity cabinet ($300) the cleanest place to start when you want “spa”
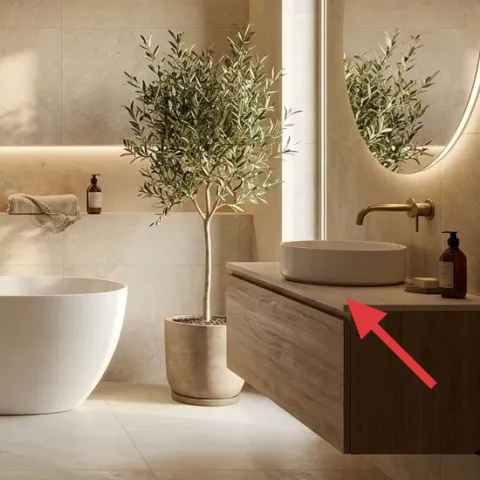
The vanity cabinet is basically the bathroom’s visual anchor, and updating it changes the whole mood even if the tile stays exactly the same. In the photo, the warm wood tone balances the beige stone tile and makes the brass faucet and mirror lighting feel intentional—not accidental. The reason a cabinet refresh works better than repainting tile is that it instantly changes color temperature and contrast without wrestling with grout, sealers, or messy prep. Trade-off: painting a vanity takes a little patience for drying and curing, but it’s still a true weekend project for a homeowner willing to do careful sanding.
Make it instead of buying it
This DIY refresh paints the wood bathroom vanity cabinet so it matches the warm brass-and-beige palette without replacing it.
Materials
- Bonding primer (1 quart) — home center — $65
- Cabinet/trim paint (1 quart) — satin or semi-gloss — $40
- High-quality angled brush — 2 in. — hardware store — $30
- Foam mini roller + tray — set — $45
- Water-based topcoat (protective finish) — quart — $25
Steps
- Clean the vanity cabinet thoroughly with a degreaser so paint has real adhesion.
- Sand the surfaces lightly with fine-grit sandpaper to scuff the finish.
- Wipe off dust and let the wood dry fully before priming.
- Apply a thin coat of bonding primer and keep edges crisp with a brush.
- Let the primer dry until it’s no longer tacky, then sand very lightly again.
- Roll and brush on 2 thin coats of cabinet paint, letting each coat dry fully.
- Apply a protective topcoat in a thin, even layer.
- Allow full curing before heavy water exposure—then reinstall and style.
Total DIY cost: $205 — saves about $95 over buying.
Keep the finish practical
Bathrooms get splashes and steam—so a satin or semi-gloss finish reads cleaner and wipes better than flat paint.
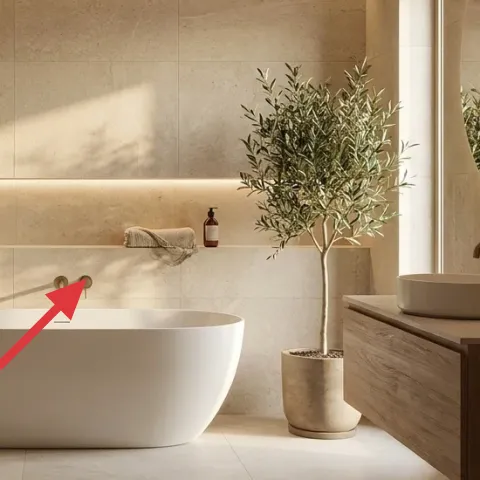
Layer 3 — brass bathroom faucet ($80) one piece of shine that ties the counter together
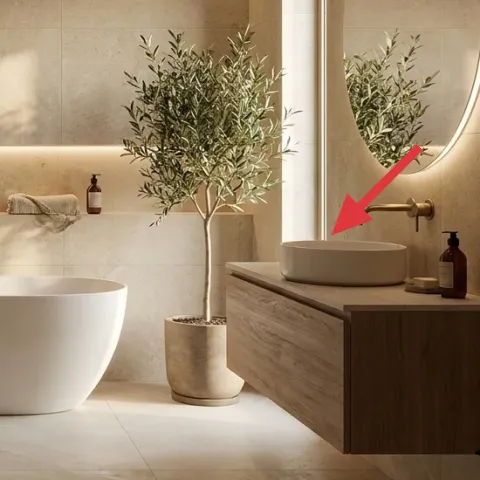
The brass bathroom faucet is a small object, but it’s a huge color cue because it sits right next to the mirror and the vanity cabinet. When the faucet finish matches the mirror lighting and any other brass details, the whole space looks more cohesive without adding extra decor. The obvious swap would be doing only styling (soap bottles and towel), but changing the faucet is what gives the bathroom that “spa” polish. Trade-off: you may need extra care if you’re swapping hardware—shut off water and plan for fit and supply lines (calling an electrician isn’t relevant here, but calling a plumber can save time if connections are tricky).
Don’t mix metal finishes by accident
If the faucet is brushed brass but your mirror lighting hardware is a warmer gold, the mismatch will read like “unfinished,” especially under recessed lights.
Layer 4 — rain showerhead ($120) make the shower read intentional, not temporary
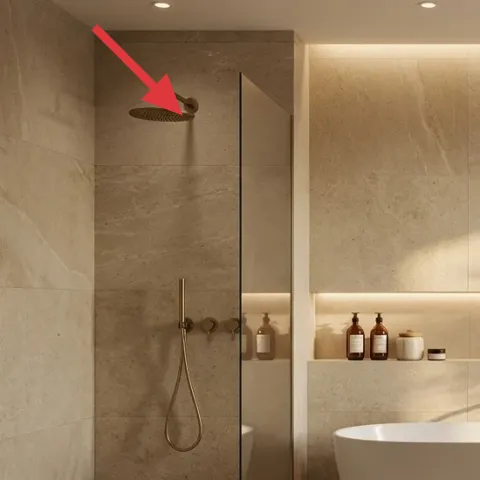
A rain showerhead updates how the shower “frame” looks—visible from the doorway and mirrored in the glass panel. Because it’s overhead and centered, a well-chosen fixture makes the whole bathing area feel designed, even if the tile and glass stay put. The brass finish also echoes the faucet and mirror lighting, which keeps the palette consistent. The alternative would be buying a decorative shower caddy or adding new towels, but those don’t change the main focal point. Trade-off: choose a showerhead with the right spray pattern so the update is more than cosmetic.
Pick a finish that matches the faucet hardware
Using the same brass tone makes the bathroom feel curated instead of pieced together.
Layer 5 — rolled hand towel ($15) one folded texture breaks up the tile
A rolled hand towel is the easiest way to add “spa” texture without clutter. In the photo, it sits horizontally in the niche area, which creates a calmer rhythm than stacking towels vertically. This matters because the beige stone tile and shower glass panel can otherwise make everything feel flat and architectural. The obvious alternative is hanging a towel on a hook, but a roll reads more styled and hides the ends, so it looks cleaner at a glance. Trade-off: you’ll need to swap or re-roll often so the towel stays looking crisp, not wrinkled.
Keep it in the same height band
Placing towel and bottles on one approximate horizontal line makes the niche feel curated instead of crowded.
Layer 6 — soap dispenser bottles ($35) replace scatter with a matched “counter set”
Clustered soap dispenser bottles turn a busy bathroom moment into a tidy, intentional vignette. Here, the bottles are grouped in the niche area near the towel, which makes the counter-less look feel complete even with the open shelving. If you try to do this with random single bottles, the heights and shapes start competing under the warm mirror lighting, and the niche reads cluttered. Trade-off: a matched set costs a bit more than grabbing whatever is on sale, but it saves you from constantly rearranging. This also makes refill days less annoying because everything stays uniform.
Use one pump height and repeat the visual shape
When bottles share the same silhouette and spacing, the niche looks designed rather than accidental.
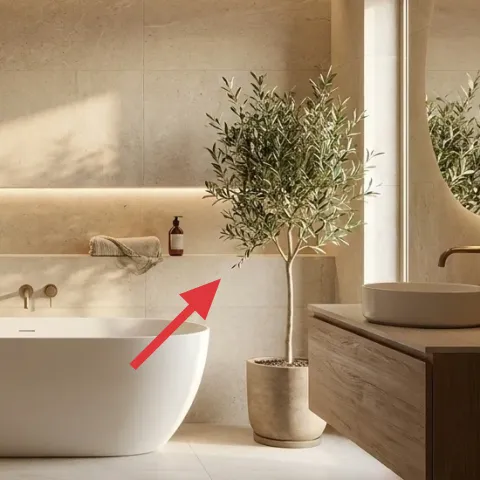
Layer 7 — potted olive tree in round planter ($40) the living detail that softens tile
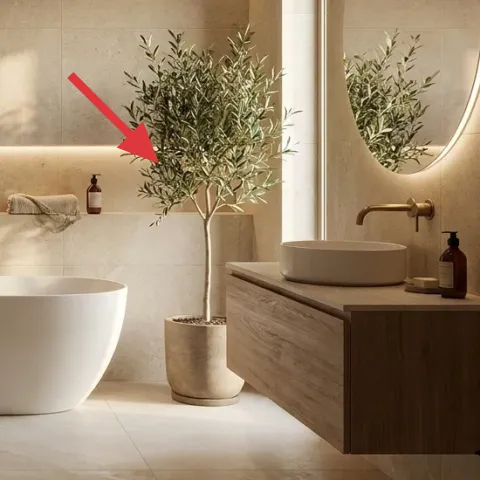
A potted olive tree in a round planter adds softness where the bathroom is otherwise all hard edges—beige stone tile, glass panel, and straight cabinetry lines. The leaves read fresh in a way that’s hard to copy with decor, and the planter shape echoes the rounded oval mirror. The obvious alternative would be faux greenery, but real texture usually looks better against warm brass lighting and reads less “staged.” Trade-off: live plants need basic care, so set a watering reminder and wipe leaves occasionally so dust doesn’t dull the green.
Position it to frame the mirror
Placing the plant near the mirror’s side keeps the warmth of the lighting focused on the whole vanity zone.
The cost, layer by layer
| Layer | Item | Cost |
|---|---|---|
| 1 | oval mirror | $120 |
| 2 | wood bathroom vanity cabinet | $300 |
| 3 | brass bathroom faucet | $80 |
| 4 | rain showerhead | $120 |
| 5 | rolled hand towel | $15 |
| 6 | soap dispenser bottles | $35 |
| 7 | potted olive tree in round planter | $40 |
| Total | $710 | |
If you want a cheaper version of this bathroom look, prioritize the oval mirror, the towel styling, and one small live-plant moment, then skip the rain showerhead and faucet swap until later.
What worked, what didn't (across the whole room)
The overall result feels calmer because the big visual elements—mirror shape, vanity warmth, brass hardware—stay in one coordinated family. The smaller items (rolled towel, matched soap dispenser bottles, and the olive tree) make the space feel finished without adding clutter. The only friction point is that the “spa” look depends on keeping a consistent height band in the niche and on the counter.
What worked
- The oval mirror’s warm backlight makes beige stone tile look richer instead of flat.
- Refreshing the wood bathroom vanity cabinet changes color temperature faster than tiling tweaks.
- Brass faucet hardware keeps the whole vanity area visually connected to the mirror lighting.
- A rain showerhead upgrades the shower’s focal point without touching the tile layout.
- Rolled hand towel styling adds soft texture against hard surfaces.
- Matched soap dispenser bottles in the niche make a clean, repeatable countertop routine.
- The potted olive tree softens the glass panel and rounds the whole scene.
What didn't
- Too many different bottle shapes in the niche made everything look cluttered under warm lighting.
- Leaving the towel un-rolled reduced the “spa” look and made the niche feel unfinished.
- Switching only one metal finish (brass to a cool chrome) created a noticeable mismatch.
- A plant placed too low near the floor didn’t frame the mirror and lost impact.
- Skipping the protective finish on a painted vanity cabinet made wipes look streaky.
What we'd skip if we did it again
Skip buying multiple small decor pieces for the vanity at once. A spa-style bathroom reads best when the countertop and niche have a clear height band, so fewer objects with matched shapes look more intentional.
Skip a metal-finish mismatch. If the faucet hardware and mirror lighting both feel brass-toned in your photo, keep new purchases in the same family so the bathroom doesn’t look like it’s in progress.
Skip replacing the rain showerhead last if the goal is a weekend refresh. Even if you don’t change anything else, updating the shower fixture makes the whole bathing area feel designed from the start.
Frequently asked
How long does a refresh like this usually take?
Plan for about 6–10 hours for the non-DIY swaps (mirror, showerhead, styling) plus drying/curing time for the vanity cabinet DIY. If the vanity needs multiple coats and cure time, it’s usually closer to 1–2 weekends. The project is front-loaded with measurements and prep, then becomes surprisingly quick once the supplies are on hand.
Is this doable if I rent?
You can still steal the look without changing plumbing or permanent fixtures. Focus on the oval mirror if your landlord allows it, plus the rolled hand towel, matched soap dispenser bottles, and the potted olive tree. For anything that involves swapping hardware like a showerhead or faucet, treat it as optional and choose renter-safe options if you need to restore the original pieces later.
What if my bathroom is smaller than this photo?
Go for fewer, larger-looking items instead of more accessories. An oval mirror with warm backlighting can help a small bathroom feel brighter, while one framed plant moment near the vanity side keeps the composition balanced. Keep the niche styling minimal: one towel and a matched bottle set beats multiple individual bottles.
What if my bathroom has cooler lighting or less warm tile?
Warm lighting cues are the easiest fix. Choose warm-toned mirror lighting or a warmer bulb temperature where possible, and keep hardware finishes consistent. Even without changing the tile, warm brass and a wood-toned vanity cabinet (or painted wood to match) bring the room into the same color story.
Where should I shop for these pieces on a budget?
Start with the oval mirror and vanity cabinet at big-box home retailers or online marketplaces that list dimensions clearly. For the soap dispenser bottles and hand towel styling, kitchen-and-bath retailers often have sets that match. A potted olive tree is easiest to find at local nurseries and garden centers, and you can downsize for tight bathrooms.
Biggest mistake to avoid in a spa-style bathroom refresh?
The biggest mistake is letting the niche and vanity styling become mismatched. If the bottles vary in height and the towel looks rumpled, the whole space reads busy. Keep one height band, choose repeatable silhouettes for bottles, and make sure any brass-toned finishes match across the faucet and lighting.
More in Bathroom

Under $800: 7 spa-style bathroom upgrades that fit a weekend
A spa-style bathroom refresh under $800: swap in an oval mirror, tune up the vanity area, and add warm brass and greenery. This weekend pro…
Under $500: a bathroom spa corner refresh with 7 renter swaps
A renter-friendly bathroom spa corner refresh with 7 swaps that keep the same warm, natural feeling. Everything in this look is move-ready …
Under $600: spa bathroom corner refresh with renter swaps
A renter-friendly bathroom refresh built around a spa bathroom corner—warm wood, green tile, and plants—using move-safe swaps. This plan ke…