- Best for
- Tidy laundry-room shelf organization
- Cost
- Under $400
- Time
- 3–5 hours + glue cure
- Difficulty
- Moderate (confident DIY)
Why towel-and-shelf styling is the laundry room of 2026
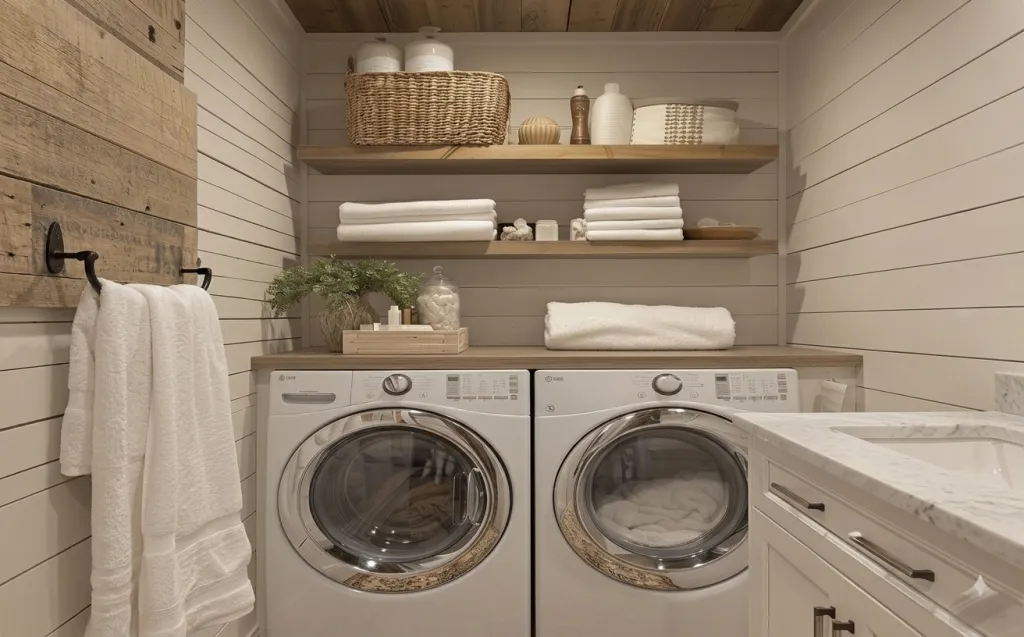
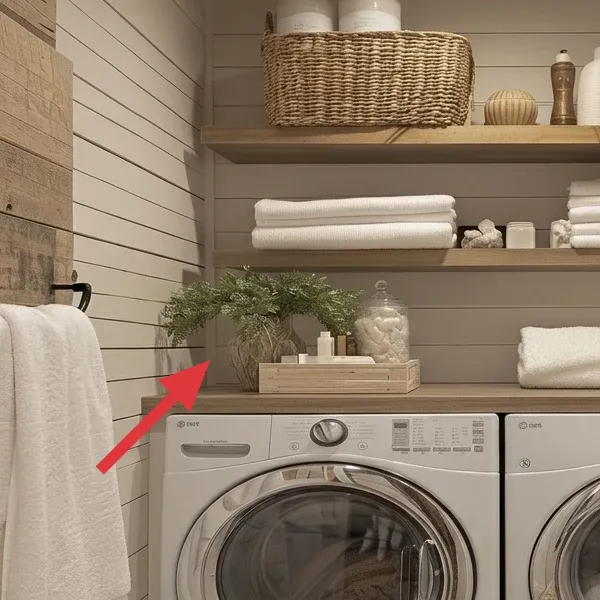
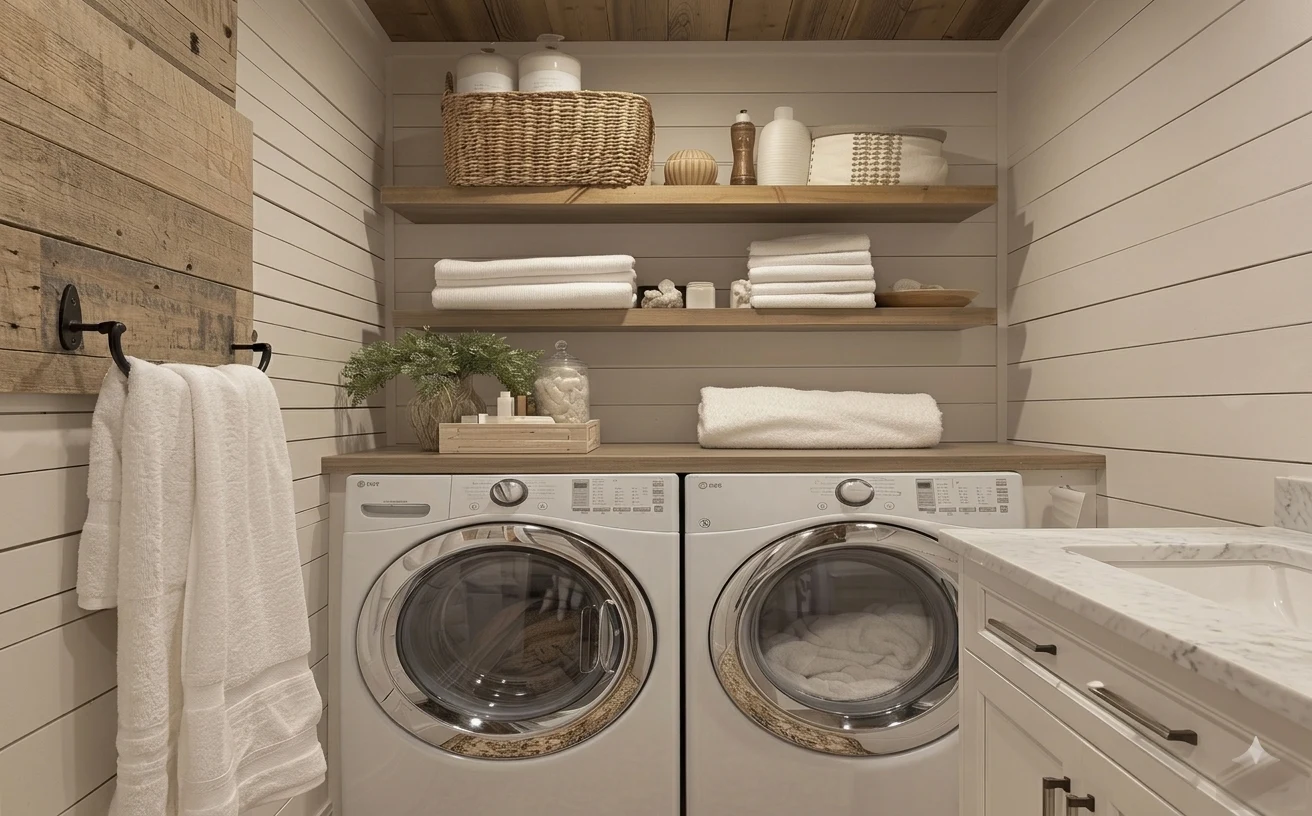
Start with what you already have: in the photo, the existing white wall paneling, the built-in open shelves, and the hardworking washer-and-dryer layout create the baseline. The upgrade is in the “small daily system” details—folds that match, storage that visually calms the counters, and a warm, natural texture note from woven and wood. This is the same principle I saw make its way from Japandi styling into real-life homes: fewer categories, repeated shapes, and soft textiles where you touch them. You can get that effect quickly because the room’s palette is already friendly—white towels, natural wood tones, and greenery—so you’re not fighting color. And with one weekend’s worth of shopping and a simple DIY tray, you can make the room look designed instead of just functional.
I tried to skip the “towel choreography” once, and the whole shelf read messy even when everything was clean. The fix wasn’t buying more—it was committing to consistent towel sizes and roll direction so the shelves become a visual grid. I also caught myself over-styling the counter: too many bottles at once creates visual noise near appliances with lots of buttons. In this setup, everything has a job: the woven basket holds the in-between linens, the plant adds life without clutter, and the trays keep small items corralled. That’s why it works for homeowners on a budget—your money goes into organization you’ll actually use, not just decoration you’ll ignore.
Layer 1 — Woven hamper basket ($60) Natural seagrass weave, open-top storage
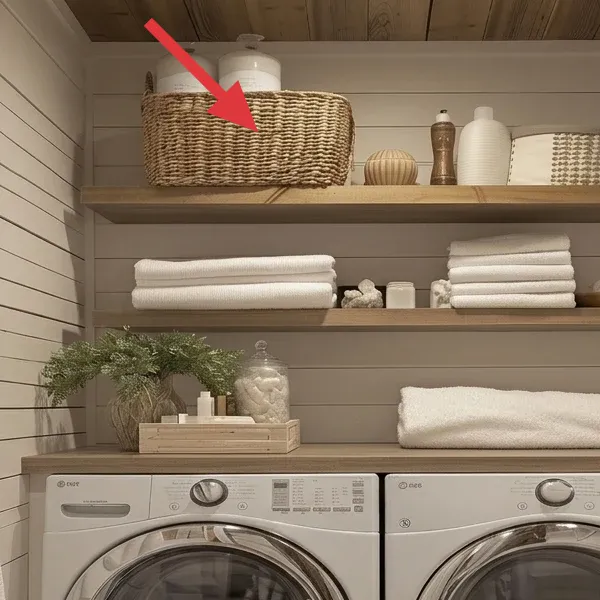
This natural woven basket sits on the top shelf, above the washer area, and it’s doing double duty: it visually softens the hard lines of the built-ins and it gives you an obvious place to stash folded or “next-load” linens. The weave is a light, warm tone that reads like seagrass or straw rather than plastic. Because it’s open-top, it also looks airy instead of bulky.
Why it works here: laundry rooms need storage, but most baskets look either too dark (they disappear) or too tall (they crowd shelves). This one keeps the palette light and repeats the room’s natural-wood warmth without adding color chaos. The trade-off is that open-top storage shows what you drop in—so you’ll want to keep a simple “stacking rule” in your household: linens in the basket, everything else on the tray.
Use the basket as your “between loads” holding zone
When baskets become a dumping ground, they look messy. Keep it for folded towels only, and the shelf stays styled.
Layer 2 — White storage canisters ($50) Three lidded jars that hide small clutter
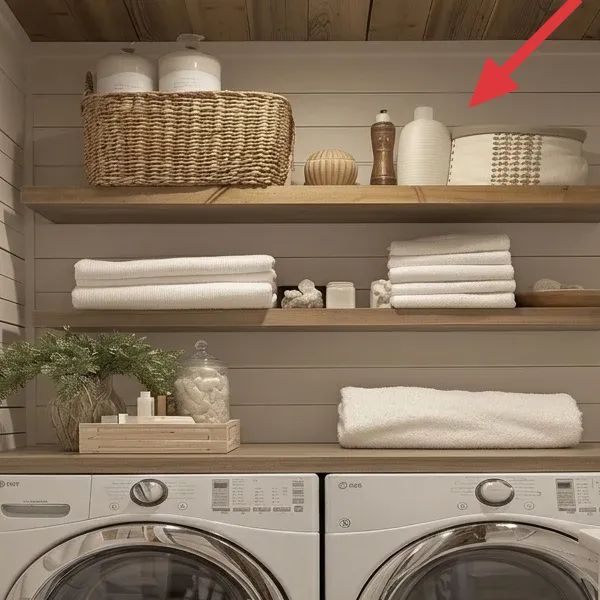
On the top shelf, there are white canisters with matching lids, arranged behind the woven basket. They read as ceramic or heavy ceramic-like storage—matte, bright, and clean-lined. Their size is small enough to feel intentional on a shelf, but big enough to hold the everyday stuff that otherwise migrates onto the counter.
This works because it “absorbs” visual noise: instead of seeing loose packets or random bottles, you see a consistent set. The canisters also echo the room’s main color—white towels—so the shelves stay cohesive even when your laundry routine changes. I’d skip a mixed set of clear containers here; clear storage near appliances can look busy fast, especially on shelves where you’re already stacking towels.
Pick matching lids to keep the shelf from feeling busy
Lids are the difference between “organized” and “decor,” because they create a consistent line at the top.
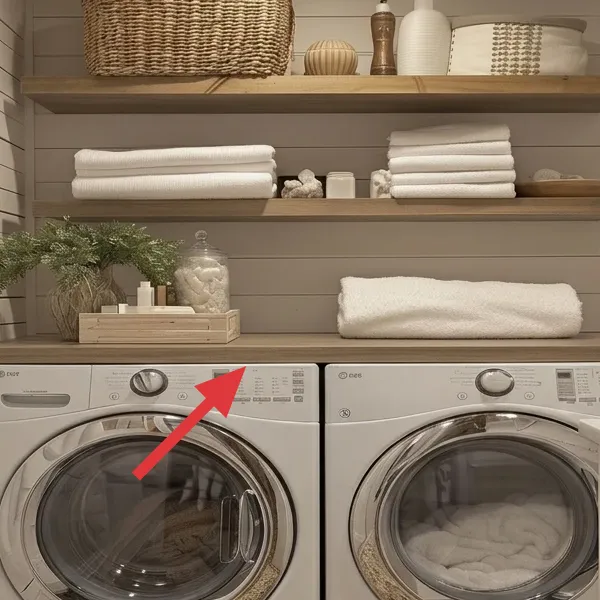
Layer 3 — Folded & rolled white towels ($100) Crisp stacks in multiple towel sizes
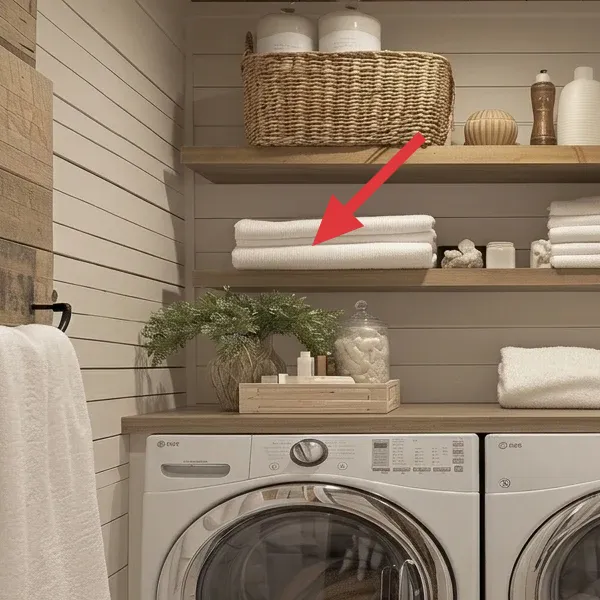
The shelves are dressed with neatly folded and rolled white towels, creating repeating shapes across the built-ins. You can see a few different fold styles—some stacked like linens in a hotel, others rolled to show thickness—so the shelf looks curated rather than uniform. The towels are thick-looking and bright, which matters in a laundry room because it’s the easiest place for grime and dull colors to show up.
Why I’d choose this over buying more storage: towels are already part of the job, so they’re a “free” design element. You’re not hiding anything hard-to-reach—you’re making the room’s core routine look intentional. The compromise is that towels need a little upkeep: if you fold sloppily every time, the visual grid breaks. Stick to one rule—always roll the same direction or fold the same way—and the look holds even with real life happening.
Commit to one folding “language” per shelf
Pick either rolls or folds for each shelf level, then repeat the same method to keep it calm.
Layer 4 — Small potted plant ($40) Green leaves in a simple dark pot
There’s a small leafy plant on the mid shelf, placed near the center of the storage run. It’s lush enough to add contrast against the white towels, but not so large that it blocks the view of the washer area. The pot is dark and understated, which keeps attention on the leaves instead of the container.
This layer works because laundry rooms often feel sterile—hard surfaces, appliances, and repetitive white. A plant brings “soft edges” and adds a living texture that reads cozy without demanding extra storage. The trade-off: shelves can be dry and drafty around mechanical areas, so you’ll want to water on a simple schedule and rotate the plant weekly so one side doesn’t lean toward the light.
Don’t place it where it’ll dry out fast
Keep it away from direct heat vents and wipe leaves weekly so dust doesn’t build up on the shelf.
Layer 5 — Wooden organizer tray (DIY) ($20) Corral small bottles with a low pine base
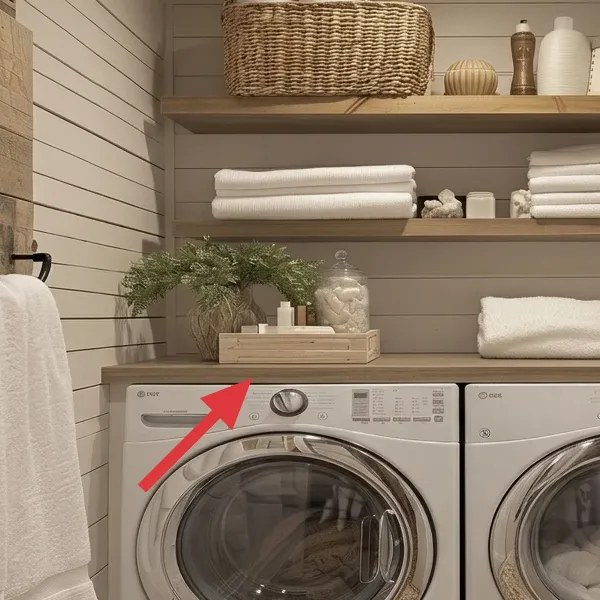
This light wooden tray sits on the mid shelf and acts like a styling “landing pad” for small items. In the photo, you can see it holding bottles and small accessories close together, which prevents the counter and shelf from looking scattered. The tray’s shape is low and wide, so it reads stable and doesn’t visually compete with the towels above and next to it.
Why I’d DIY it: you can match the look with raw pine and clean joinery, and the job is mostly measuring and assembly—not finishing-heavy work. Buying an identical tray gets expensive fast once you factor in shipping, but a $20 DIY lets you get the same practical benefit: one container creates one visual block. The trade-off is that you’ll need to keep the tray tidy—when small items spill outside the tray edges, the whole shelf system looks less intentional.
Make it instead of buying it
Build a shallow pine organizer tray to corral the same bottles and little jars you’re seeing on the shelf.
Materials
- Pine board, 1x6, 4 ft — Home Depot — $10
- Wood glue — Elmer’s or Gorilla brand (8 oz) — $4
- Sandpaper pack (120- and 220-grit) — Lowe’s — $4
- Painter’s tape (1 roll) — Target — $2
Steps
- Measure a finished tray size that fits your shelf space—aim for about 12 in. long by 6 in. wide so bottles have room to sit.
- Cut a base panel from the pine board to your tray length and width.
- Cut two shorter side pieces and two longer end pieces so they form a shallow frame around the base.
- Sand the cut edges and faces smooth, especially where bottles will touch the tray.
- Dry-fit the frame to confirm the sides sit straight, then apply painter’s tape along the inside corners to hold alignment.
- Glue the frame joints, press the corners tight, and re-check squareness before the glue grabs.
- Wait 4 hours for the wood glue to cure fully so the tray stays rigid when you move it.
- Remove tape, lightly sand any squeeze-out, and wipe the tray clean before loading bottles.
Total DIY cost: $20 — saves about $25 over buying a similar shallow wooden tray.
Layer 6 — Clear apothecary jars & soap bottles ($65) Matching glass containers for everyday products
On the shelf and countertop zone, you can see clear glass jars and bottles clustered together, including a tall bottle and smaller containers. The glass adds sparkle without adding color—light hits the curved surfaces and keeps the room from feeling flat. This layer also makes your laundry routine look “contained,” because products live in a predictable place.
Why it works here: a laundry room gets messy fast because detergent, stain removers, and wipes are always in use. Instead of letting those items spill into random corners, this glass-and-bottle setup creates a single visual cluster. The trade-off is that you need to keep the labels and bottle tops looking clean—cloudy residue or sticky caps will show in clear glass more than you’d expect.
Keep bottle caps the same finish
If you mix finishes, the cluster looks cluttered; consistent caps read intentional even when products change.
Layer 7 — Black towel bar & hanging hand towels ($60) Matte black bar with two hanging white towels
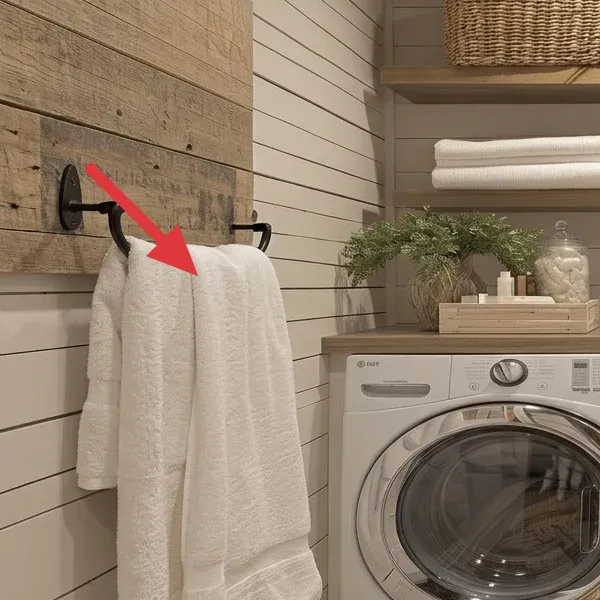
On the left wall, there’s a matte black towel bar with two white towels hanging from it. The bar’s dark tone adds contrast against the bright wall paneling, so it’s easy to find the towels without digging through shelves. The hanging towels are folded and draped in a way that looks tidy, not slumped.
This works because it solves the “laundry room needs grab-and-go” problem. Shelves are great for storage, but the towel you use most often should be at arm height and visible. I’d skip going fully matchy with all-black accessories if you’re working with warm wood and white—this bar is the accent, while the rest stays light and soft. That balance is what keeps the room from turning industrial.
Hang towels with the same fold height
Even small differences in drape length make the wall look chaotic—try lining up the bottom edge.
The cost, layer by layer
| Layer | Item | Cost |
|---|---|---|
| 1 | Woven hamper basket (open top) | $60 |
| 2 | White lidded storage canisters set | $50 |
| 3a | Bath towels (2) | $60 |
| 3b | Hand towels (2) | $28 |
| 3c | Washcloths (2) | $12 |
| 4 | Small potted plant (4–6 in pot) | $40 |
| 5a | Pine board, 1x6, 4 ft | $10 |
| 5b | Wood glue (8 oz) | $4 |
| 5c | Sandpaper pack (120/220 grit) | $4 |
| 5d | Painter’s tape (1 roll) | $2 |
| 6a | Clear glass apothecary jars (2) | $30 |
| 6b | Soap dispenser bottles | $35 |
| 7a | Matte black towel bar | $30 |
| 7b | Hand towels (2) | $30 |
| Total | $395 | |
If you want a cheaper variant, keep the same shelf plan but thrift the towels and use one larger basket instead of a full canister set. You can also swap the clear apothecary jars for opaque matching bottles—less expensive, and they hide residue better.
What worked, what didn’t (across the whole room)
Overall, the win was turning “laundry storage” into a repeatable visual pattern: white textiles, natural wood, and a small hit of green. The biggest misses were places where I let products spill outside their zones.
What worked
- The woven hamper on the top shelf makes linen storage feel intentional instead of hidden, because the texture softens the built-ins.
- Matching white canisters reduce visual clutter near the washer area, so the counter looks calm even when you’re actively doing laundry.
- Rolled-and-folded towels create a repeatable “grid” on the shelves, which reads styled rather than merely stocked.
- The plant adds a living texture that keeps the room from feeling sterile, without taking over shelf space.
- The DIY wooden tray is a real system upgrade—small bottles stay corralled and your shelf styling survives real-life use.
- Clear jars work best here because the bottles are grouped; without grouping, glass can look busy fast.
- The black towel bar gives you an always-visible grab point, which makes the room function better and look tidier.
What didn’t
- If the towels aren’t rolled/folded in the same direction, the shelf reads patchy—consistency matters more than variety.
- Clear glass catches residue and fingerprints; if you don’t wipe caps weekly, the cluster starts to look slightly dingy.
- Too many small items on the middle shelf overwhelms the calm palette; the tray needs to be the “limit.”
- A plant with dry soil looks dull quickly in shelf lighting, so it needs a simple watering routine to stay fresh.
- Switching to random jar sizes without lids makes the top shelf feel accidental instead of curated.
What we’d skip if we did it again
Skip buying a bunch of decorative containers at once. When you have clear jars, multiple lids, and assorted bottle shapes, the laundry room can start looking like a retail display instead of a usable system. Build the shelf cluster around one repeat pattern first (white lids + clear glass group, or all-opaque matching bottles), then stop. This is the easiest way to keep your under-$400 budget from turning into visual noise.
Skip “mystery storage” that’s cute but doesn’t corral. I learned this the hard way: baskets without a clear purpose end up holding whatever lands there, and that’s how shelves get messy even when they’re cleaned. In this photo, the tray and hamper both have jobs—small bottles stay on the tray, linens stay in the hamper. Choose containers that match the daily flow of laundry, not just the vibe.
Skip adding extra shelf items once you’ve hit the towel-and-tray rhythm. The shelves already carry the room—white textiles are doing most of the aesthetic work. If you add more decor, you’re competing with towels, which are already bright and textured. Keep the plant and the core storage group, then let the negative space do its job. Your future self will thank you when you’re folding towels at 8 p.m.
Frequently asked
How long does this laundry-room refresh take?
Plan for about 3–5 hours total the first weekend. The buying and staging part (sorting towels, setting the basket, grouping bottles into jars, and placing the plant) is usually 1–2 hours. The DIY wooden tray is the time wildcard, but it’s still manageable: you’ll cut pieces, sand edges, assemble with wood glue, and then wait for curing before you move it. If you’re doing the tray on Saturday morning, you can place it on the shelf the same day after the cure window, then fine-tune the towel folds and final spacing in the evening.
Can I do this if I rent?
This specific setup is homeowner-friendly because one layer relies on a towel bar decision and the shelf styling assumes you can change what hangs and sits on the built-ins. If you’re renting, you’d need to avoid anything that requires permanent mounting and instead focus on the non-permanent layers: the towels, the hamper, the plant (in a movable spot), and the grouping of bottles in jars and a tray. The DIY tray is also renter-friendly because it’s a standalone item that doesn’t require attaching to walls. The main idea to copy is the “zones” concept: one home for towels, one home for bottles, one shelf cluster that stays consistent.
What if my laundry room is smaller?
Go smaller on volume, not on organizing. Keep one visual anchor (either a woven hamper or a shelf canister set), and limit the number of towels you display at once—think “enough to look intentional,” not “everything you own.” If the plant feels too tight for your shelf depth, use a smaller pot and place it on the counter inside your tray zone instead of on the main shelf. The clearest small-space trick is to measure the width of your shelves and pick container sizes that don’t force you to shove towels into awkward angles.
What if I have a bigger laundry room?
If the room has extra shelf depth or more wall space, you can add one additional repeat of the same pattern rather than a different style. For example: keep the towel choreography, and add a second canister set in the same white-lidded family. You can also go one size up on the hamper so it holds a full “next week” batch of linens. The risk with bigger spaces is adding too many types of containers—stick to one glass group plus one woven storage piece, and your look will stay cohesive.
Where would you shop differently in 2026?
I’d still start with the basics—Target and Walmart for towels and jars, and Home Depot or Lowe’s for pine and sandpaper—because the palette is easy to match. In 2026, the places that surprise me are craft and home organizers sections for matching canisters and tray-style wood pieces, even when you’re building something DIY. For the plant, I’d pick a local nursery option over an online impulse order, since shelf lighting and pot size matter. The goal is to match finishes (white lids, warm wood, dark pot) more than to chase brand names.
What’s the single biggest mistake people make with laundry-room styling?
The biggest mistake is treating it like a living room, where everything can be decorative. In a laundry room, items move constantly—bottles get grabbed mid-task, towels get redistributed, and the shelf becomes a “temporary staging area.” If you don’t pre-plan zones (tray for bottles, hamper for linens, towel bar for grab-and-go), the styling will collapse even if everything is clean. Build storage and styling around the daily workflow, and the room stays attractive without extra effort.
Is the DIY pine tray durable enough?
It’s durable for light daily use—especially when it’s holding small bottles rather than soaking with water. Because it’s pine and not a sealed hardwood, wipe it dry if anything drips onto it and avoid leaving it in standing moisture. If your laundry routine is splashy, consider adding a clear topcoat in the future once you’ve tested the routine. The core benefit still matters regardless of finish: the tray creates boundaries that stop small clutter from spreading across your shelves.
More in Bathroom
Weekend laundry-room refresh: 7 styling upgrades for under $400
This weekend laundry-room refresh uses seven simple upgrades—stacked white towels, a tidy shelf hamper, a small plant, and one DIY pine org…

Under $400: 7 moving-friendly bathroom layers for shared renters
This moving-friendly bathroom refresh gives you the spa-like, layered look without swapping landlord fixtures—just seven renter-safe layers…
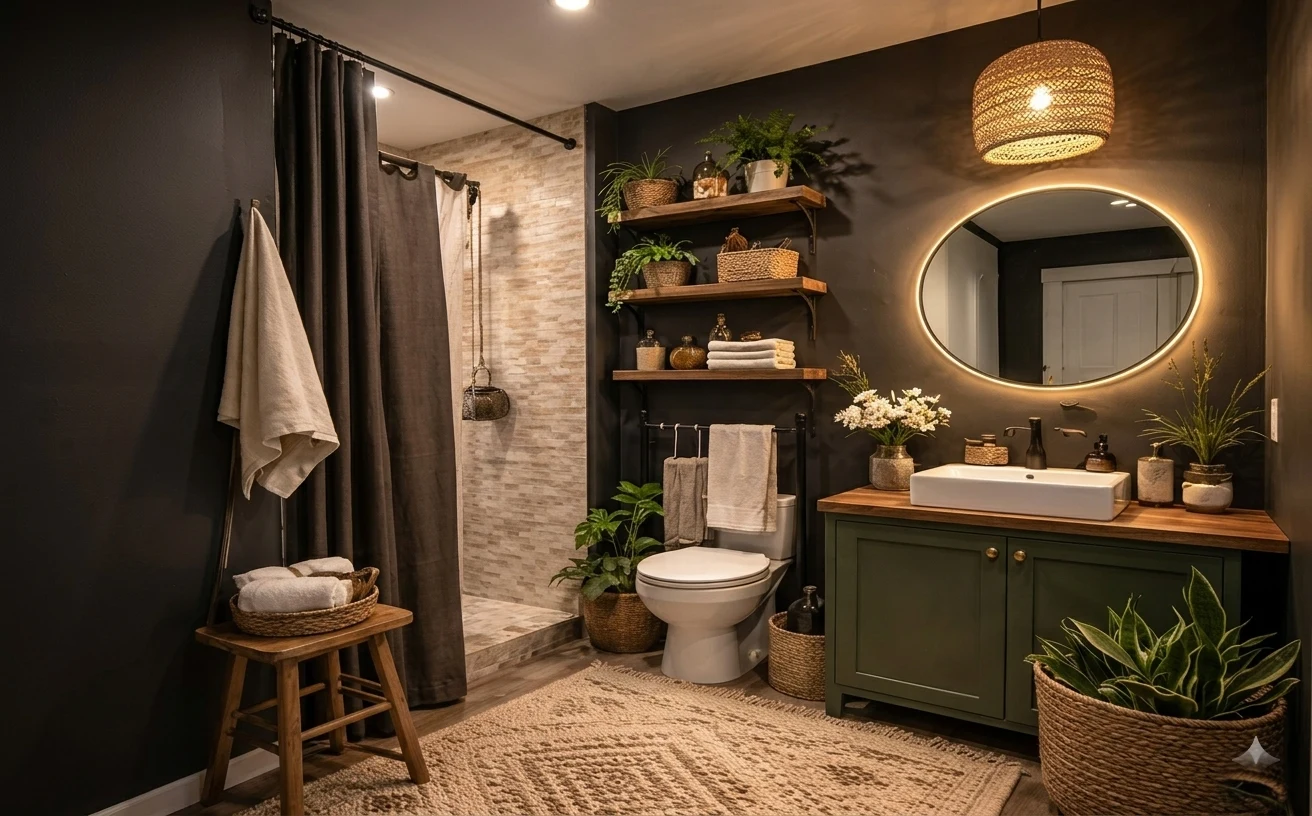
Under $600 weekend spa bathroom refresh: dark walls, rug, warm shelves
This spa bathroom refresh delivers a hotel-like glow on a real homeowner weekend budget of Under $600. By layering a patterned area rug, wa…